- This topic has 0 replies, 1 voice, and was last updated 6 months ago by
 Powerbits.
Viewing 0 reply threads
- You must be logged in to reply to this topic.
December 2, 2025
Hello everyone,
Welcome to Update 19, launching tomorrow on Wednesday 3 December.
This update brings major new additions, including our brand new Eastern Front map, Smolensk, along with significant changes to artillery. You will find a new Artillery Squad and the introduction of Self Propelled Artillery vehicles that bring an entirely new layer of strategy to the battlefield. We cannot wait for you to jump in and experience everything first-hand.
We also want to say a sincere thank you to everyone who has continued to support us over the past few months. Seeing so many of you test new builds on the Experimental Branch on Steam has been incredible. Your patience and feedback after Update 18 meant a great deal to the team, and it played a major role in helping us shape this update.
As a small thank you to the community, you will find some new items in your inventory when you return to Hell Let Loose. This includes a selection of new helmets and armor cosmetics for you to try out in game (see the DLC section below for details).
Now let us take a look at what is new in Update 19.
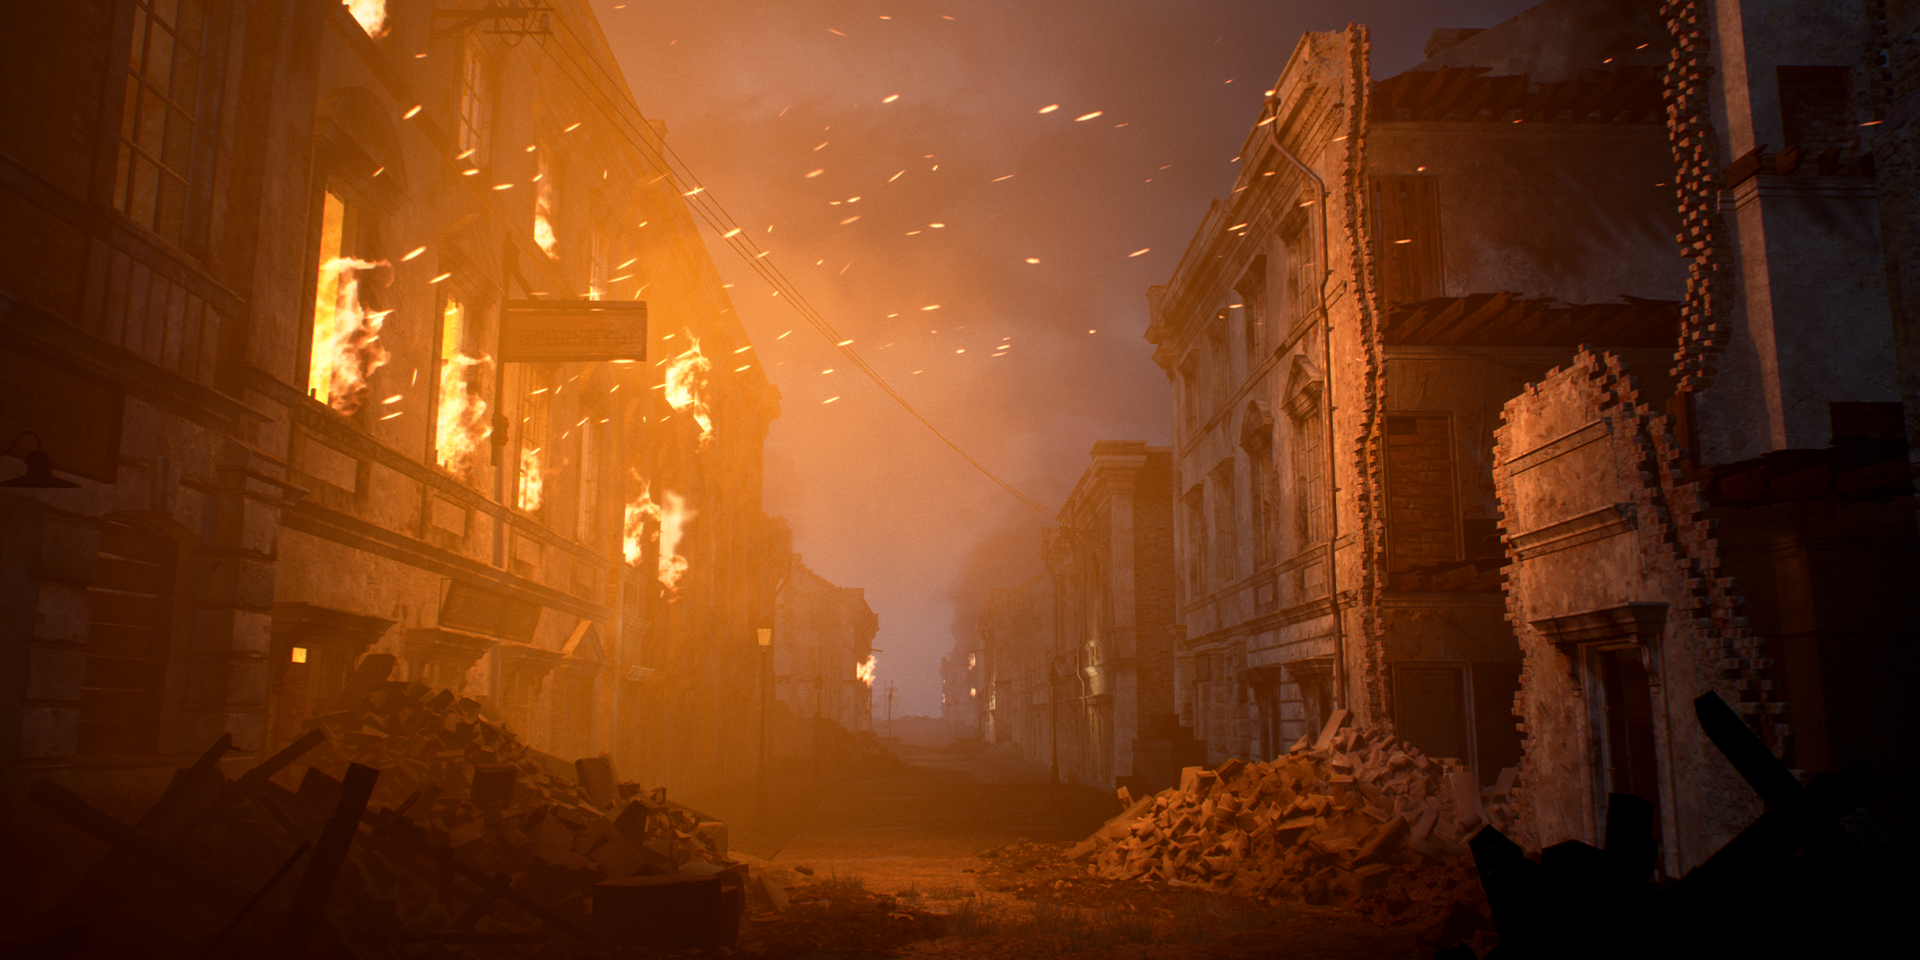
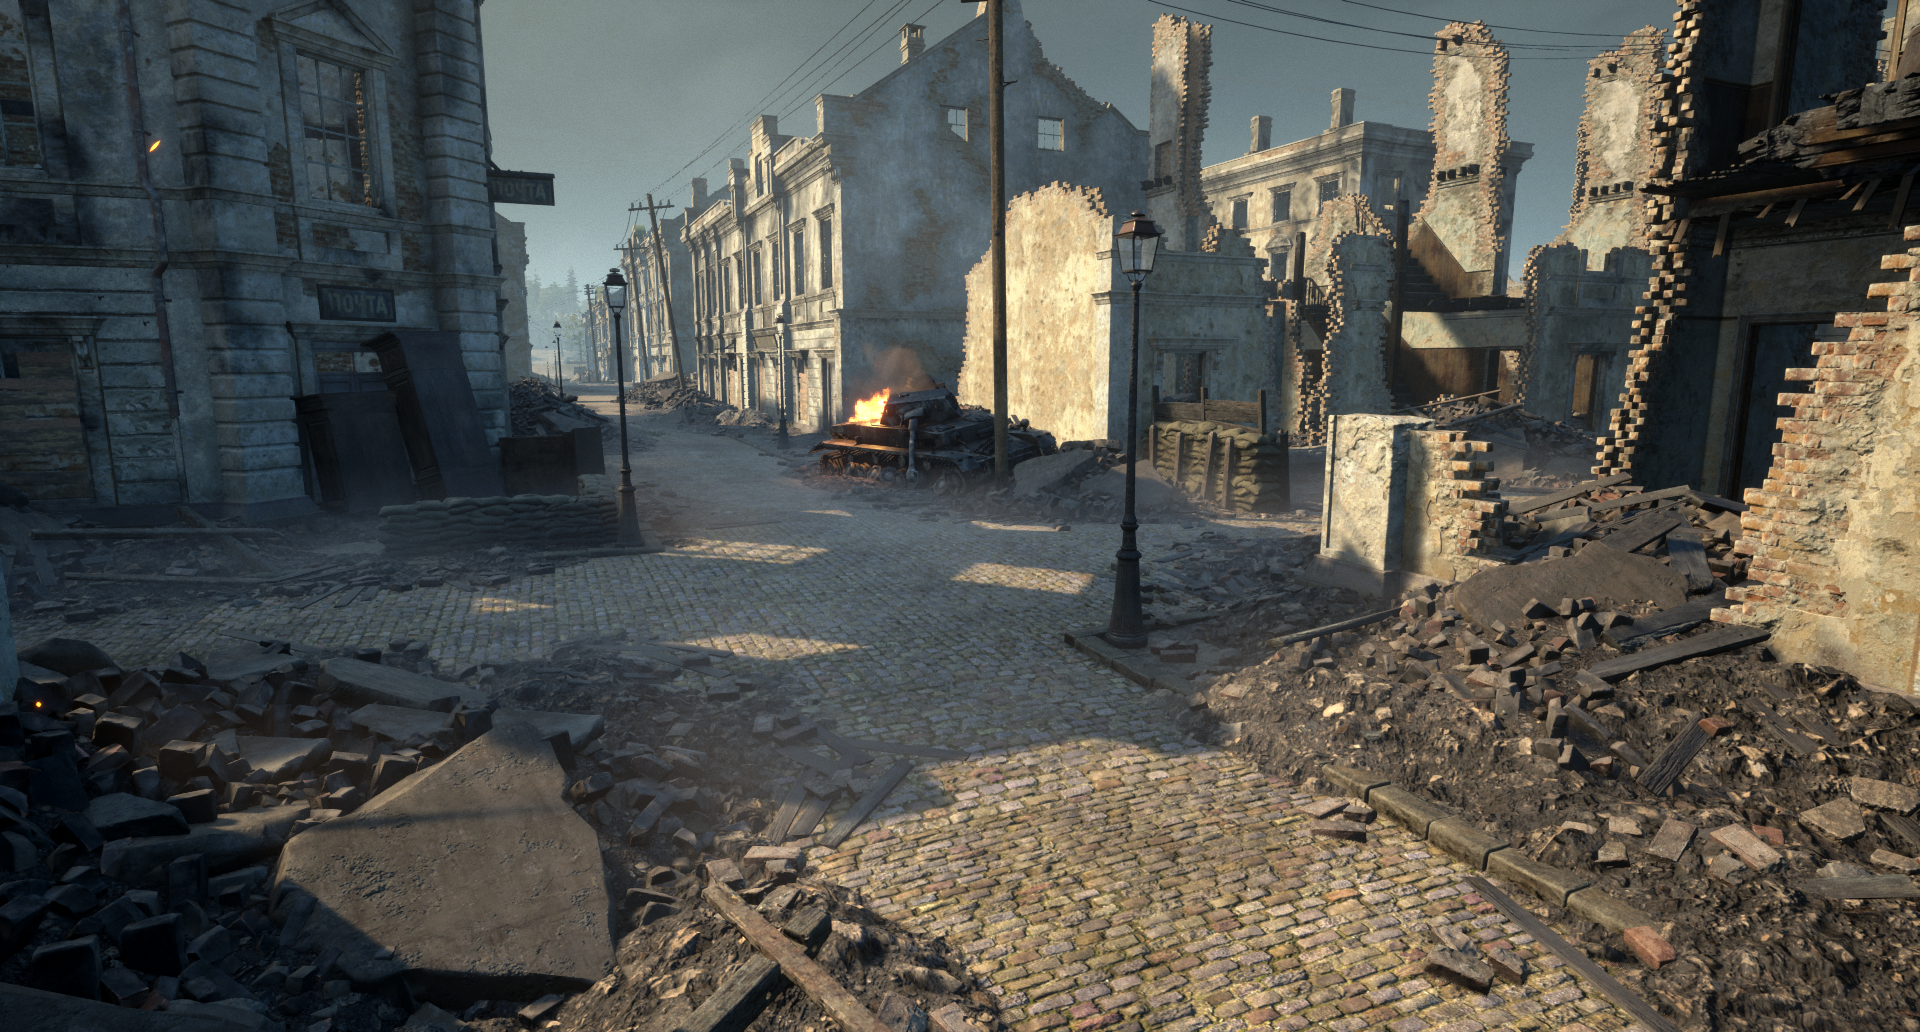
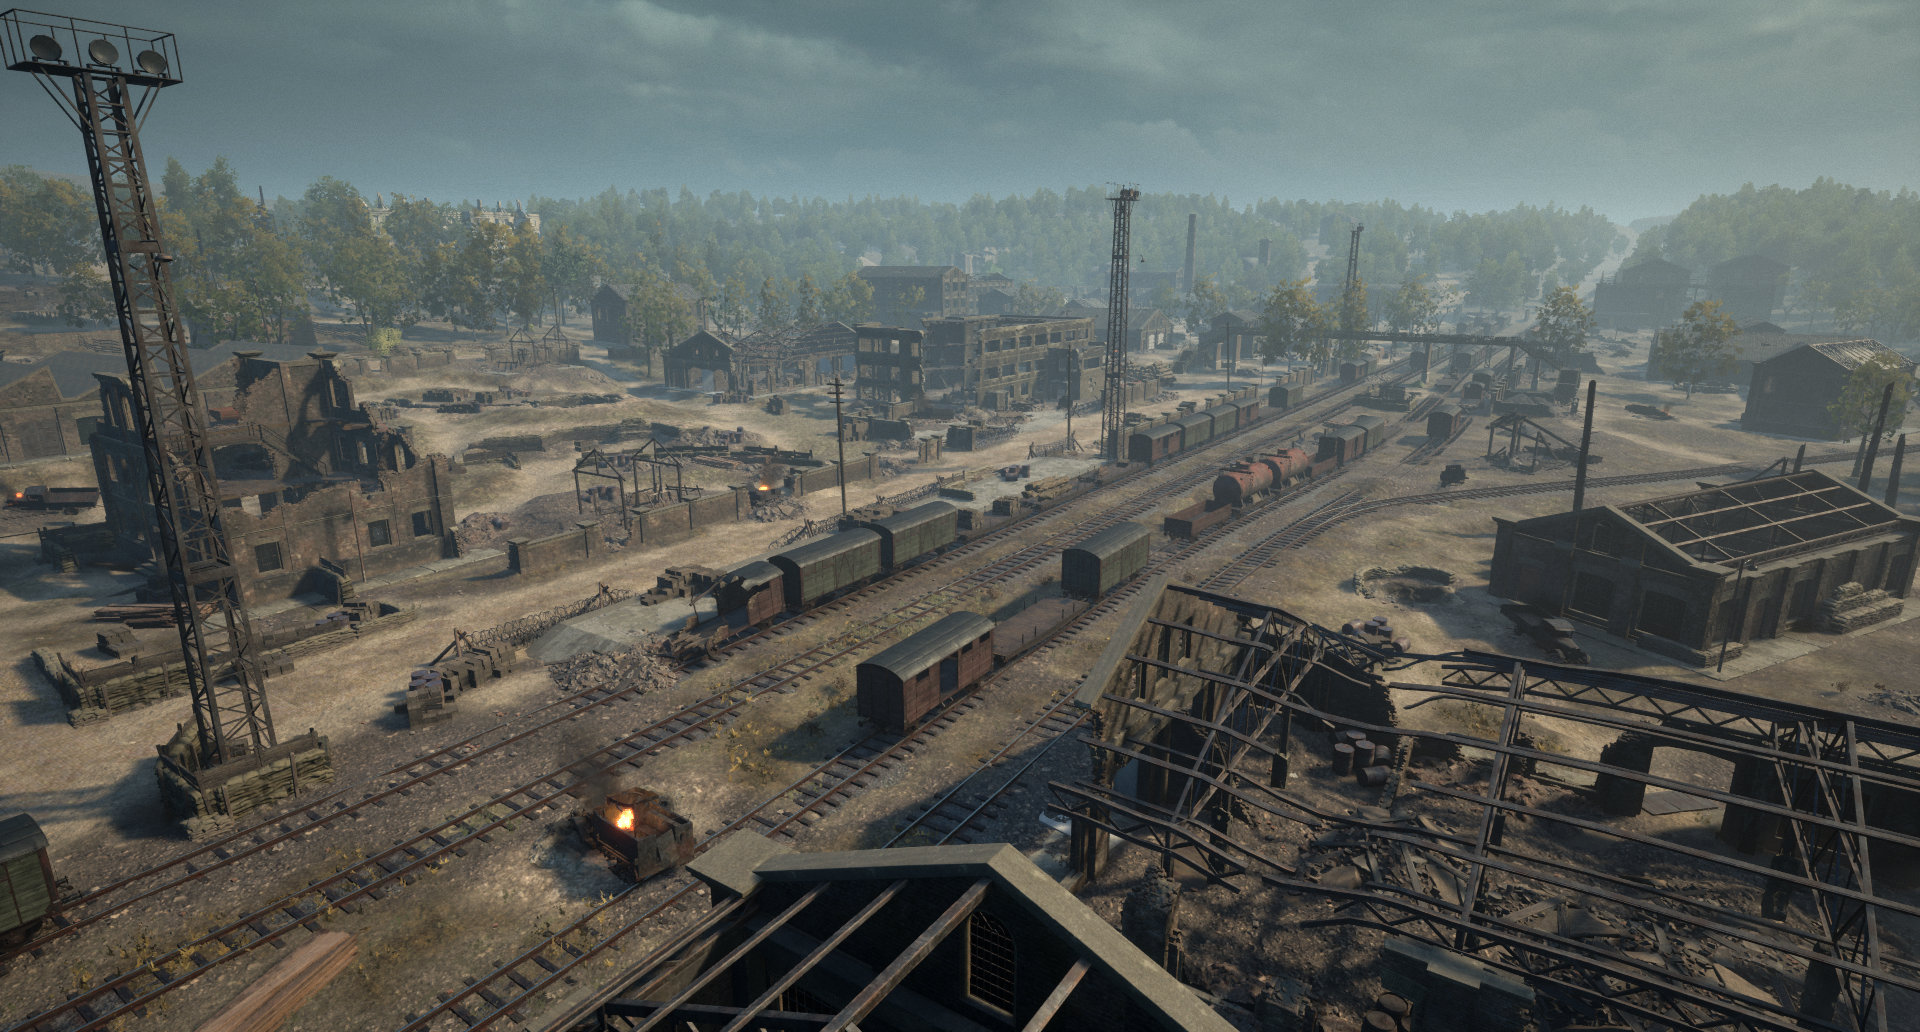
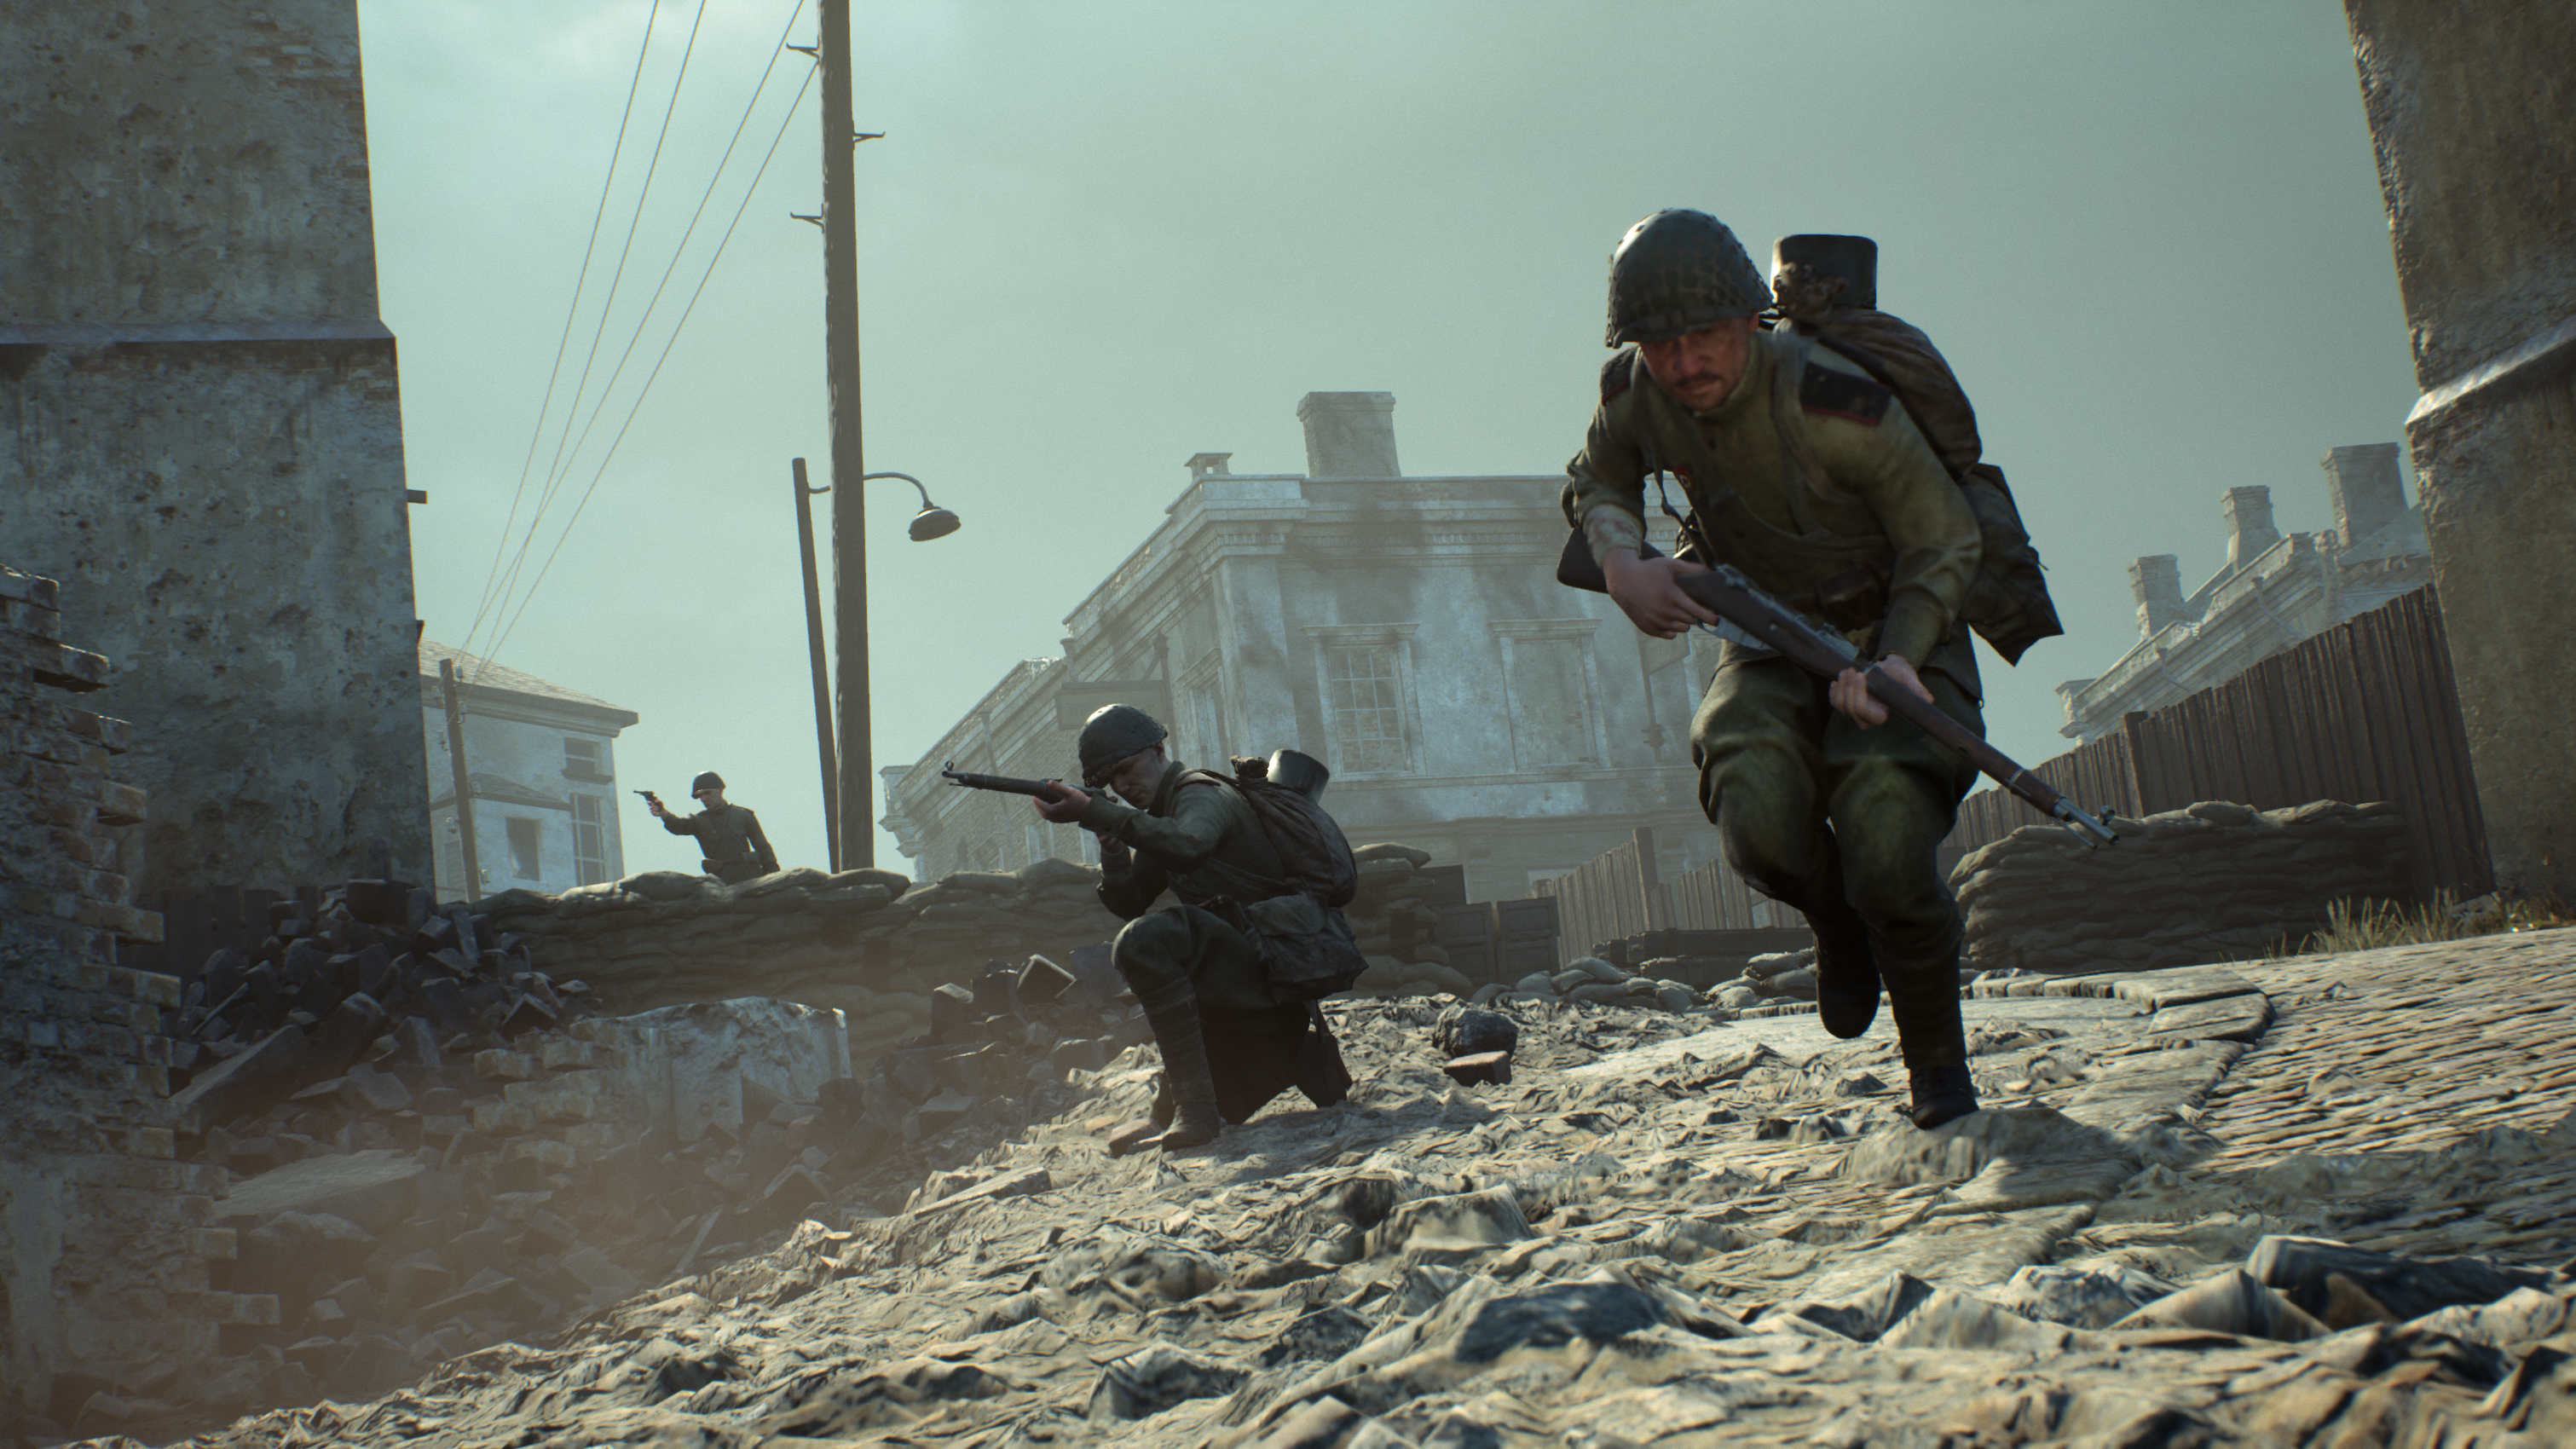
Our newest map brings the fight to the Eastern Front along the Dnieper River.
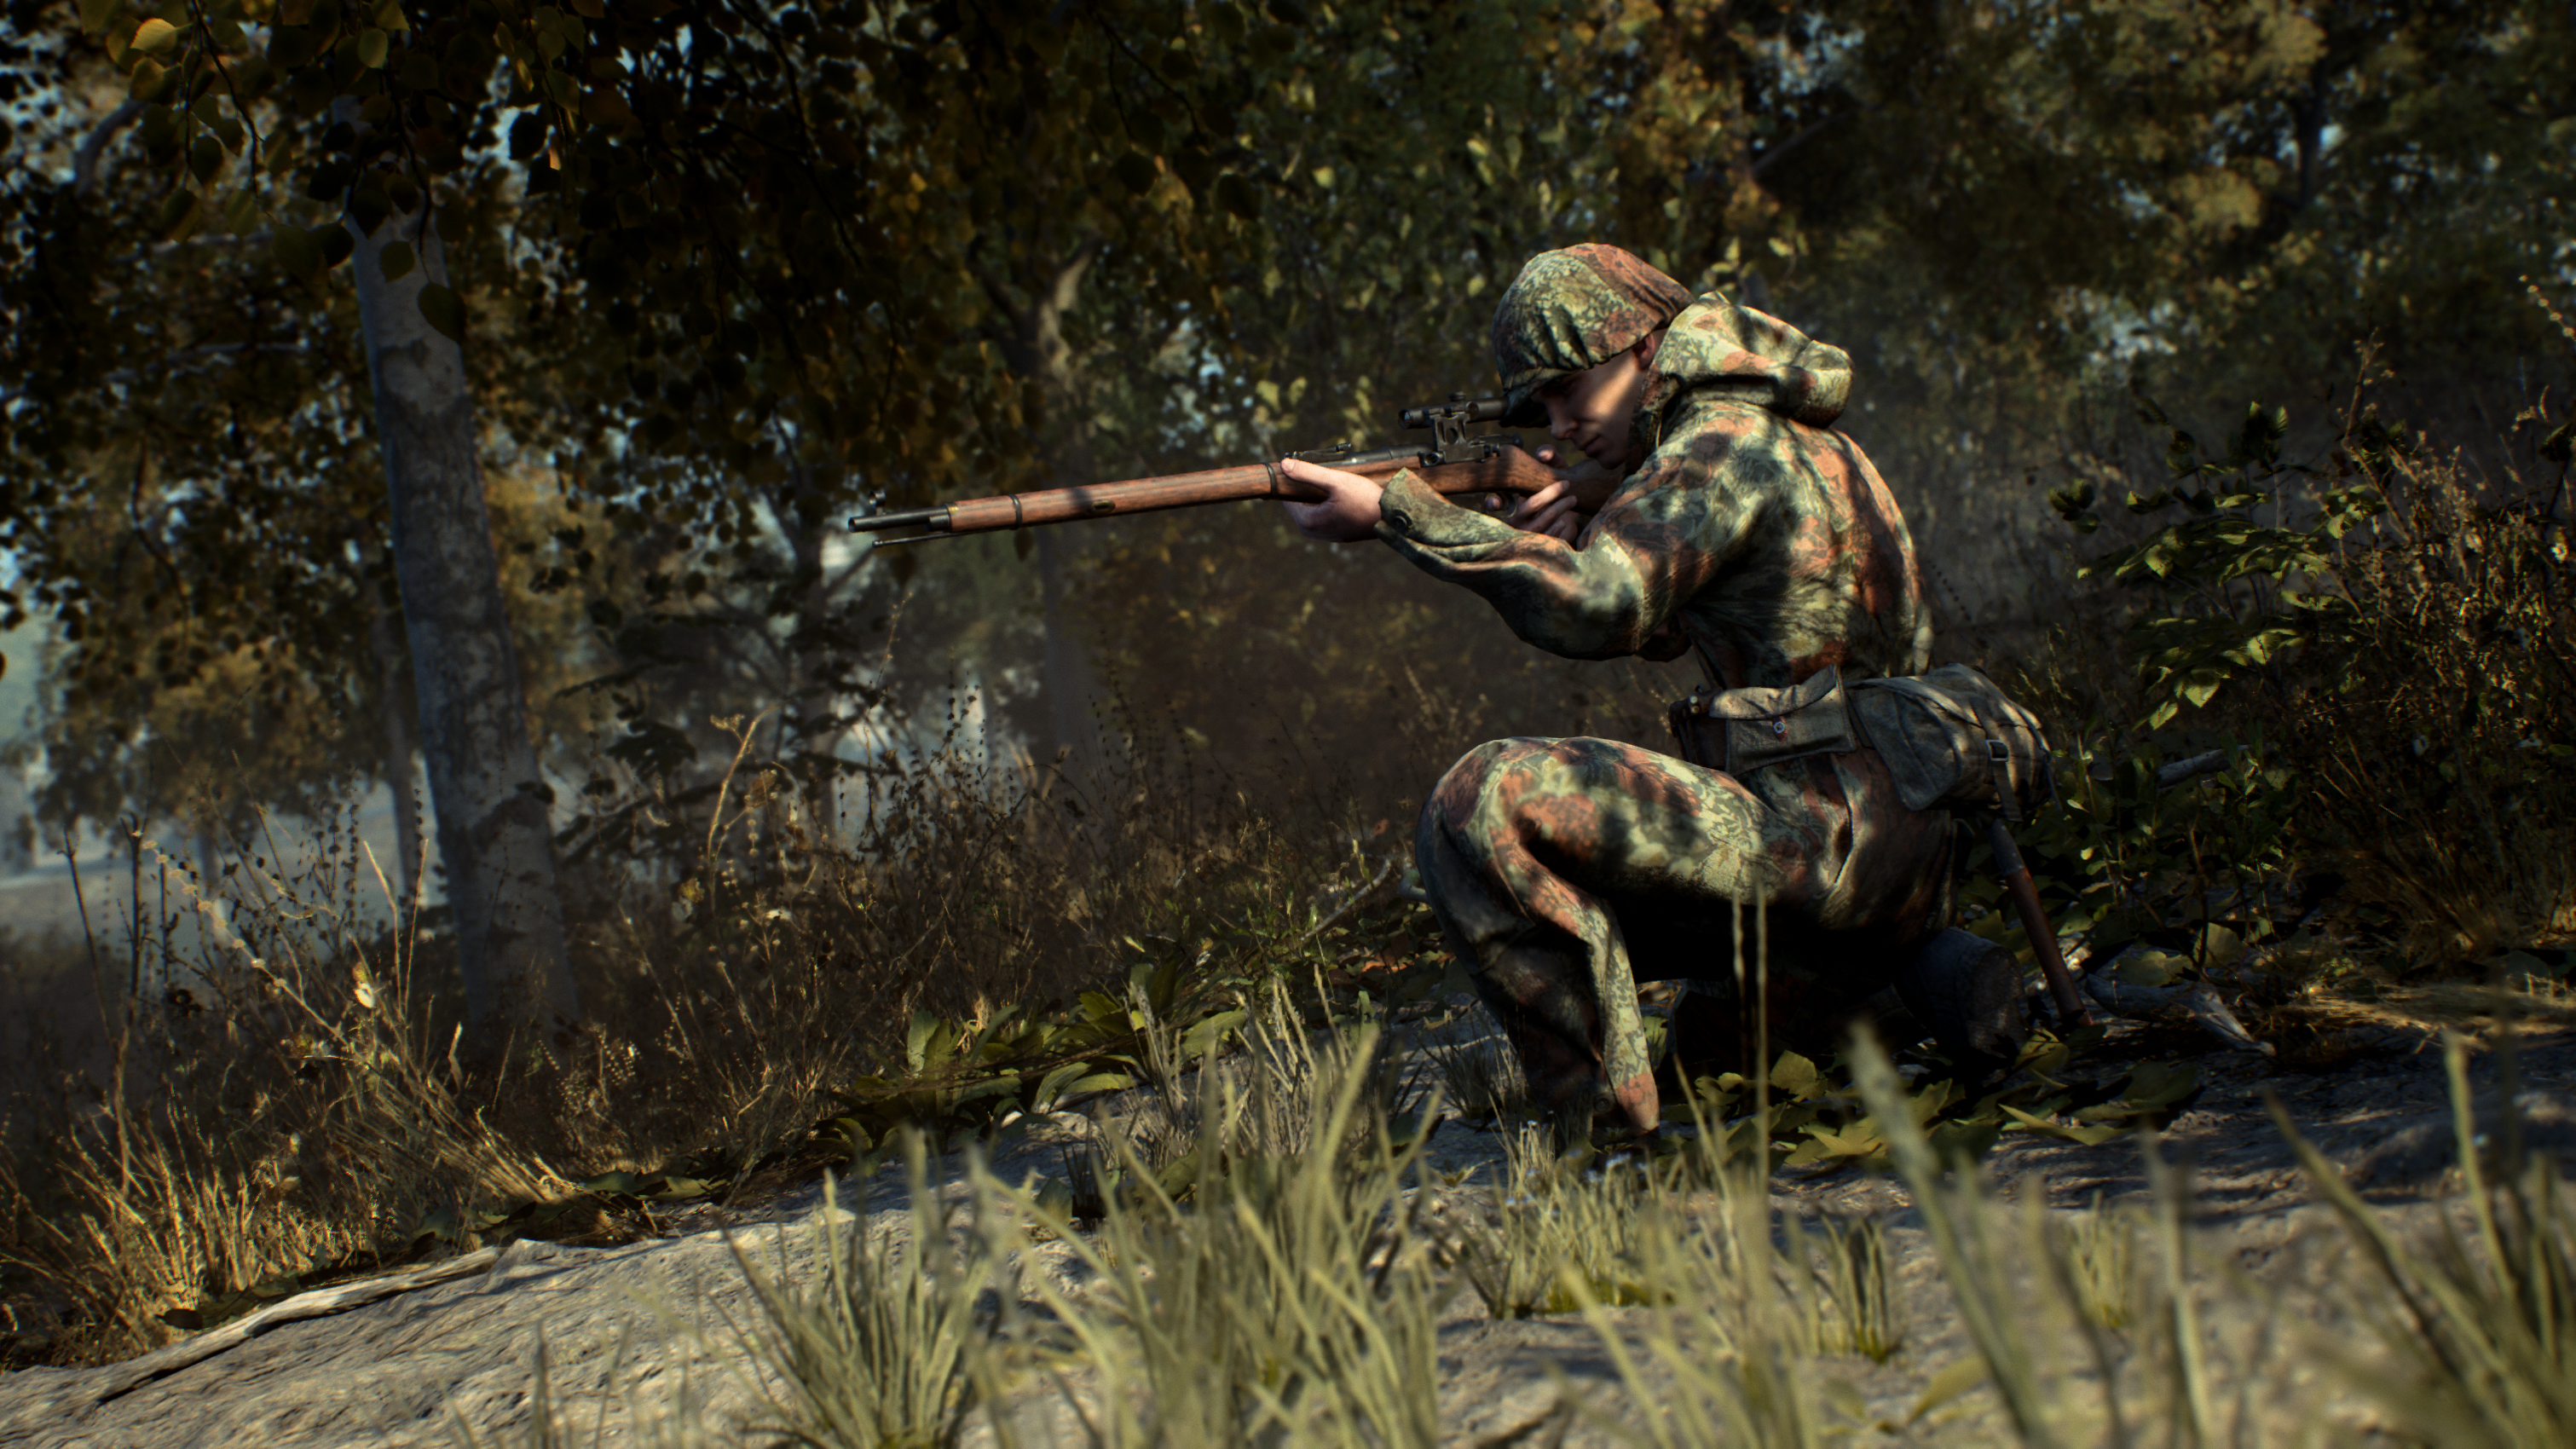
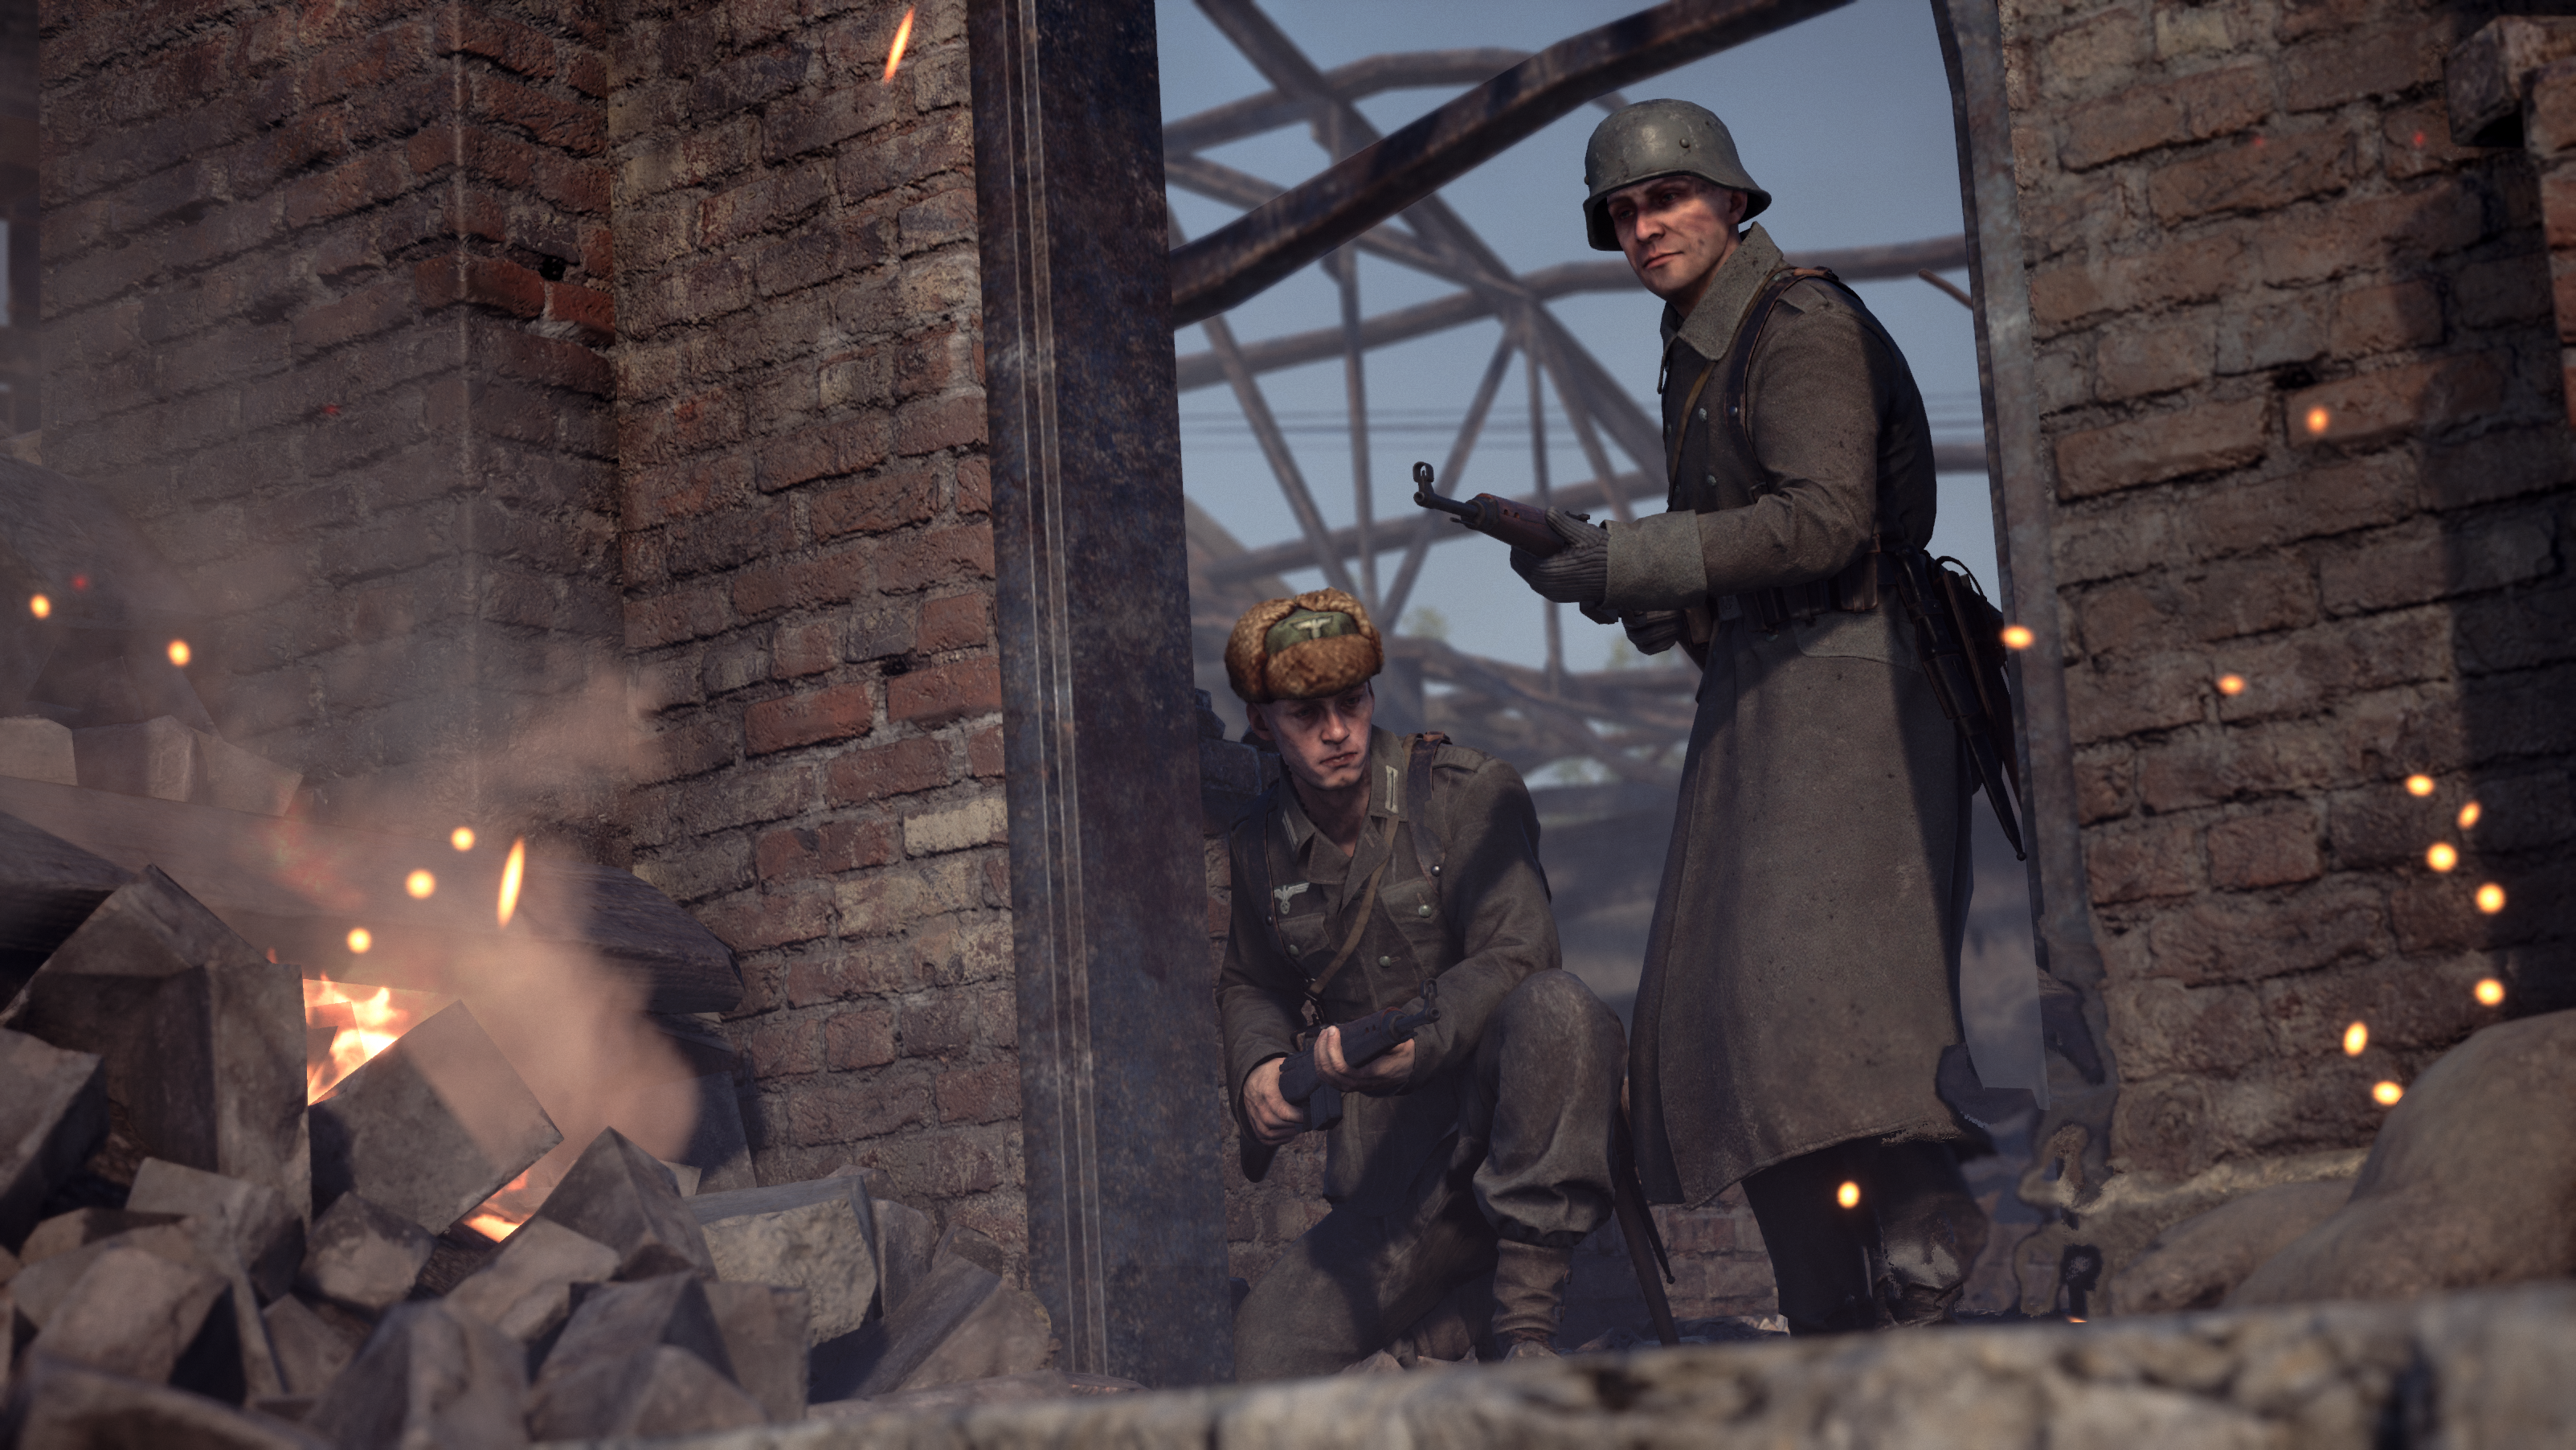
Smolensk is the result of extensive research and development by our team, with the goal of creating a dense urban battlefield that feels authentic and intense. The map features a wide range of distinct areas, including industrial zones, tight urban streets, and key riverside positions. We cannot wait to see players push through these locations and fight for control of the city.
We have also put a great deal of work into building a dramatic night time scenario. Fires rage across the skyline and illuminated buildings can be seen from almost anywhere in the city, creating a striking atmosphere as battles unfold. We hope you enjoy the experience.
After listening to the community, the brief was for Eastern Front and urban combat. Research into key battles led to the selection of Smolensk, resulting in one of the largest and most ambitious maps created for Hell Let Loose, featuring:
The dense urban layout enables memorable gameplay moments throughout the city, from room-to-room assaults through shattered buildings to flanking armored vehicles using a maze of alleys and doorways.
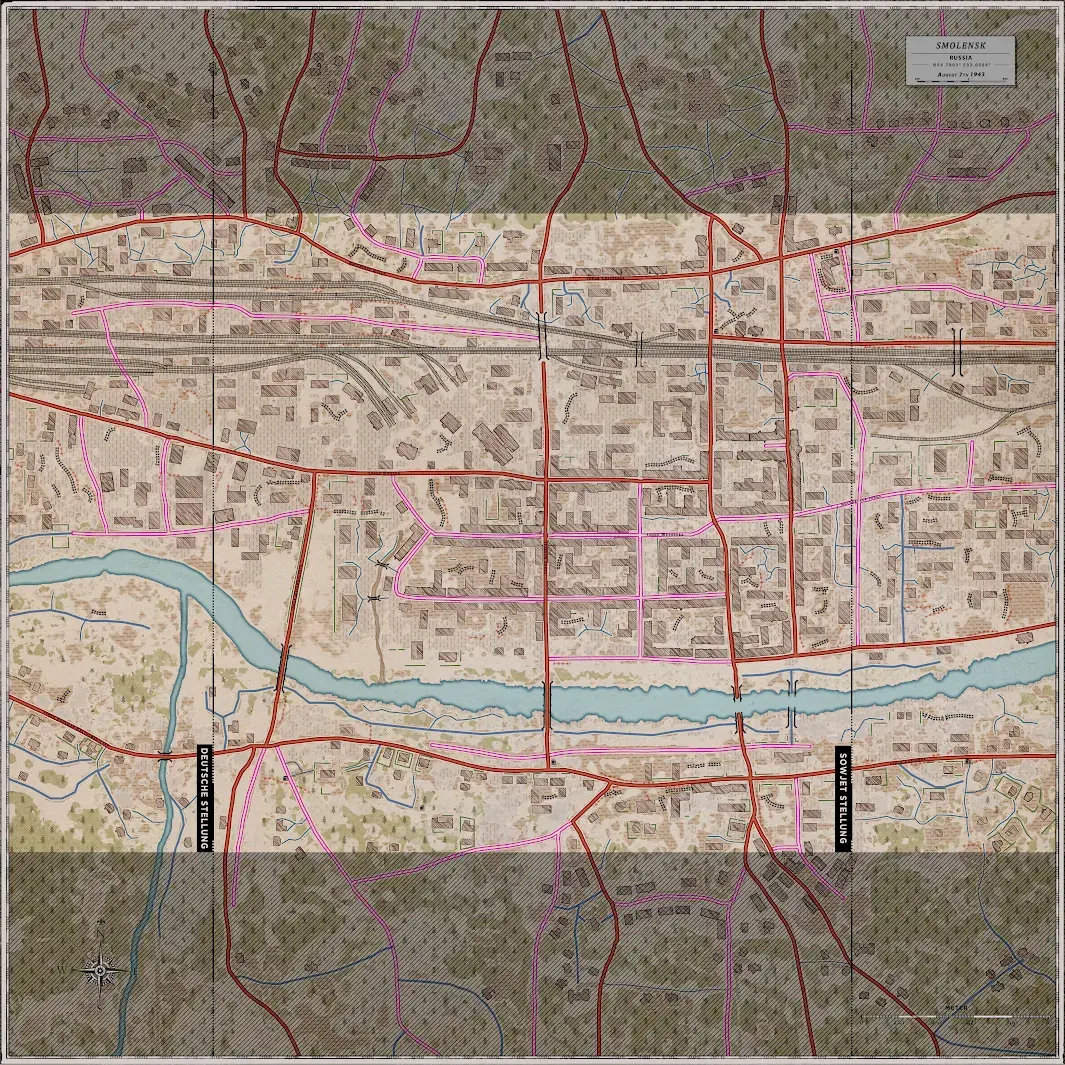 Smolensk – High Resolution Tactical Map
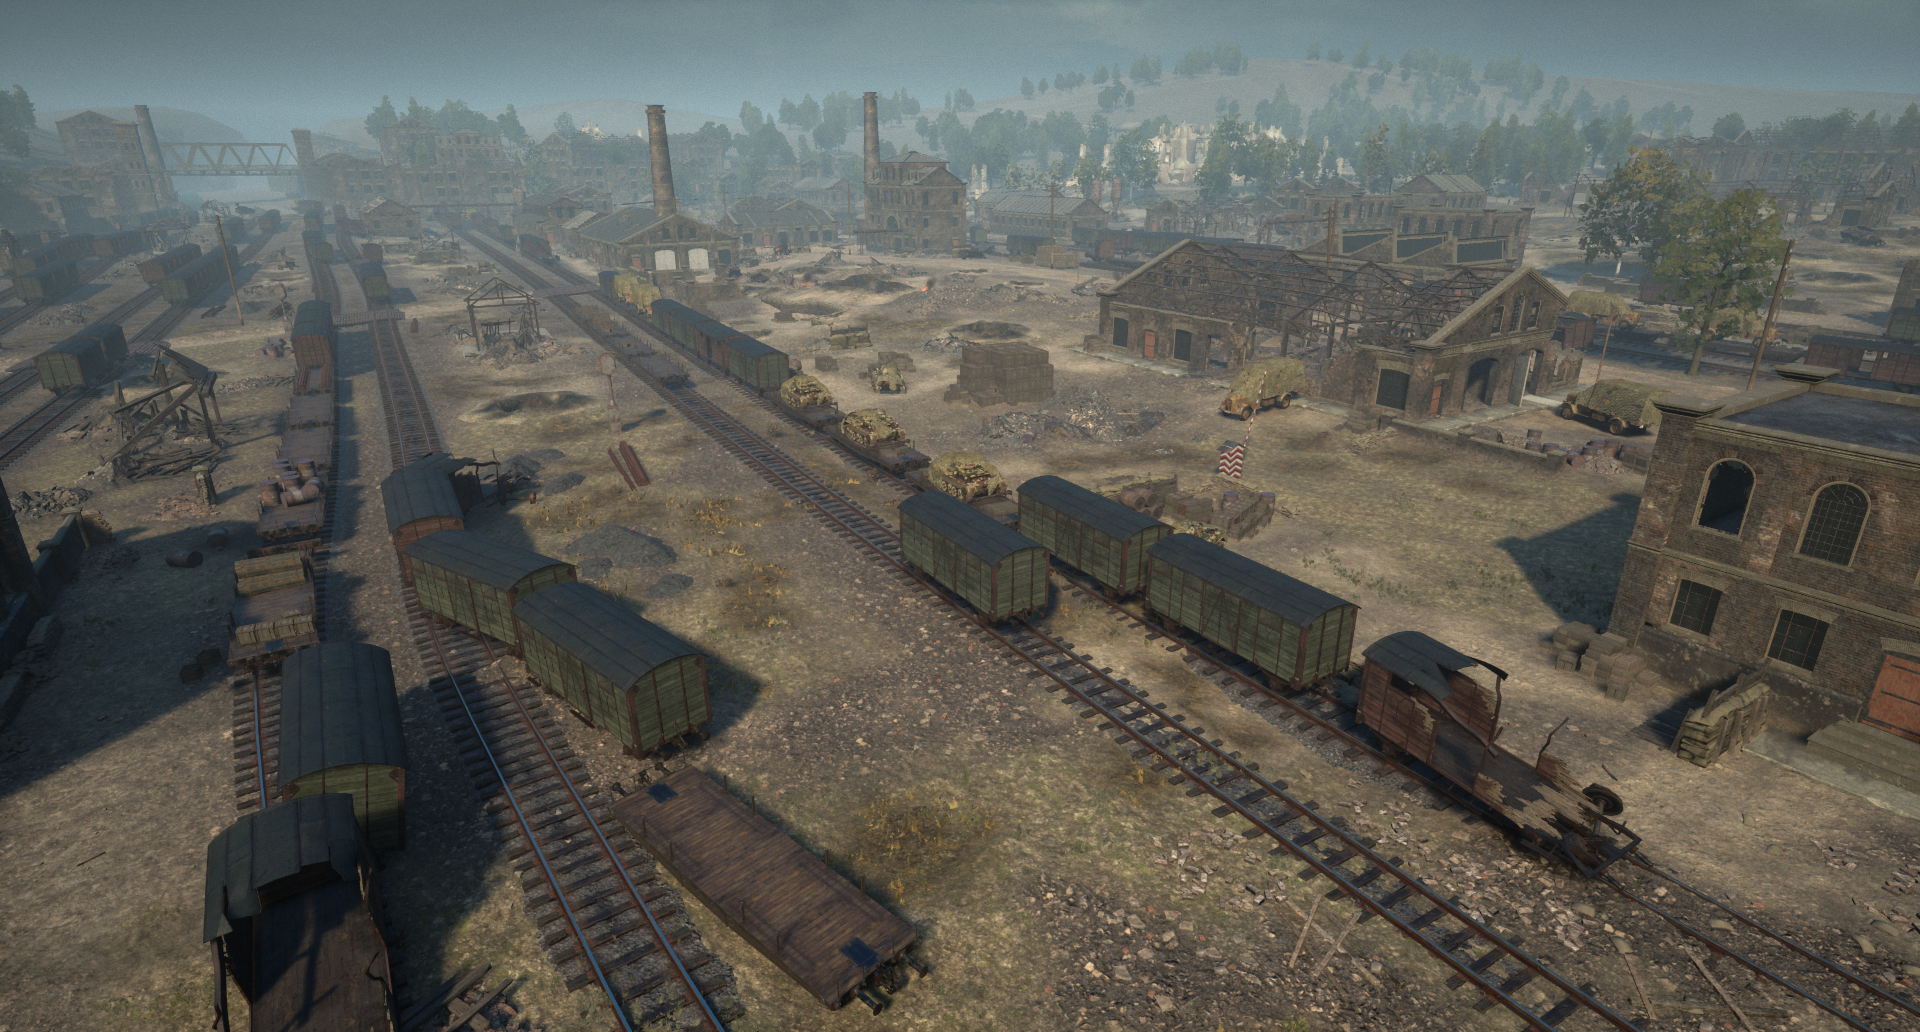
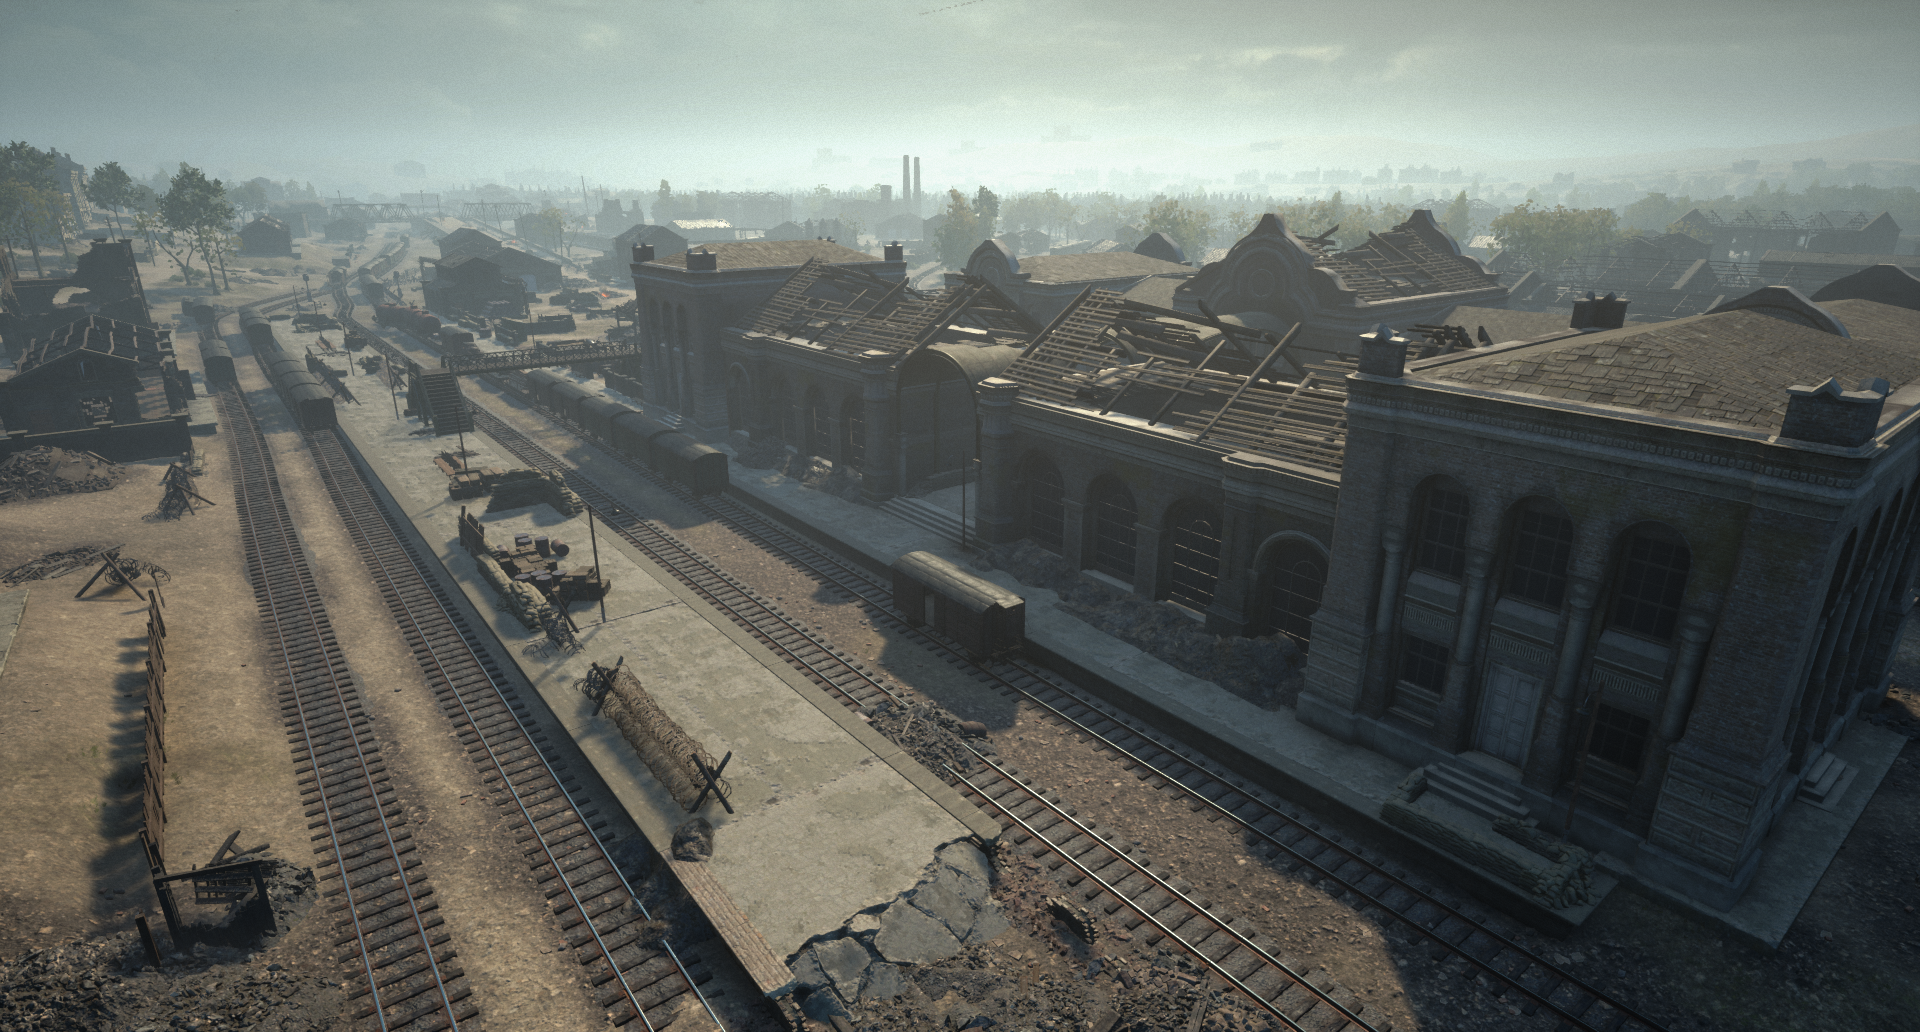
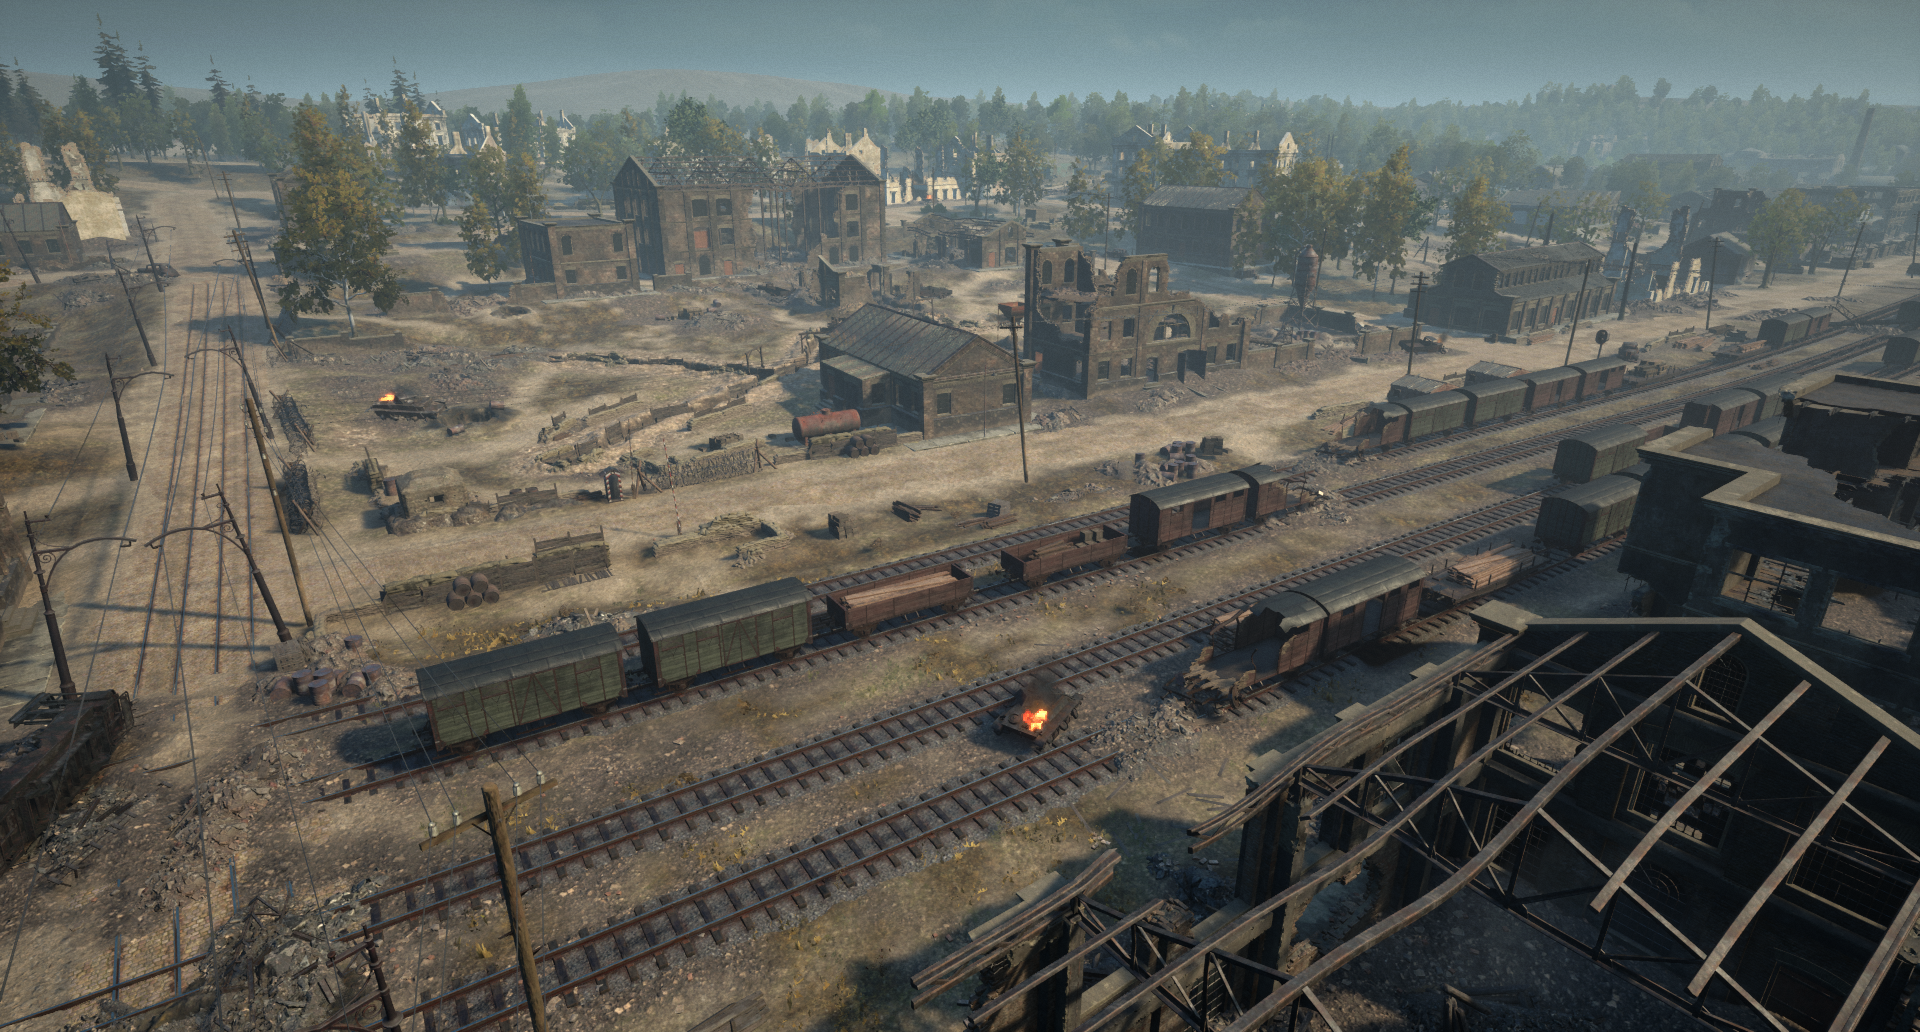
One of the closest Capture Points to the German Forces Headquarters. The narrative behind this Capture Point was that the German Forces were using trains to transport tanks, trucks and supplies to the front line, and this area served as a loading and unloading station for that.
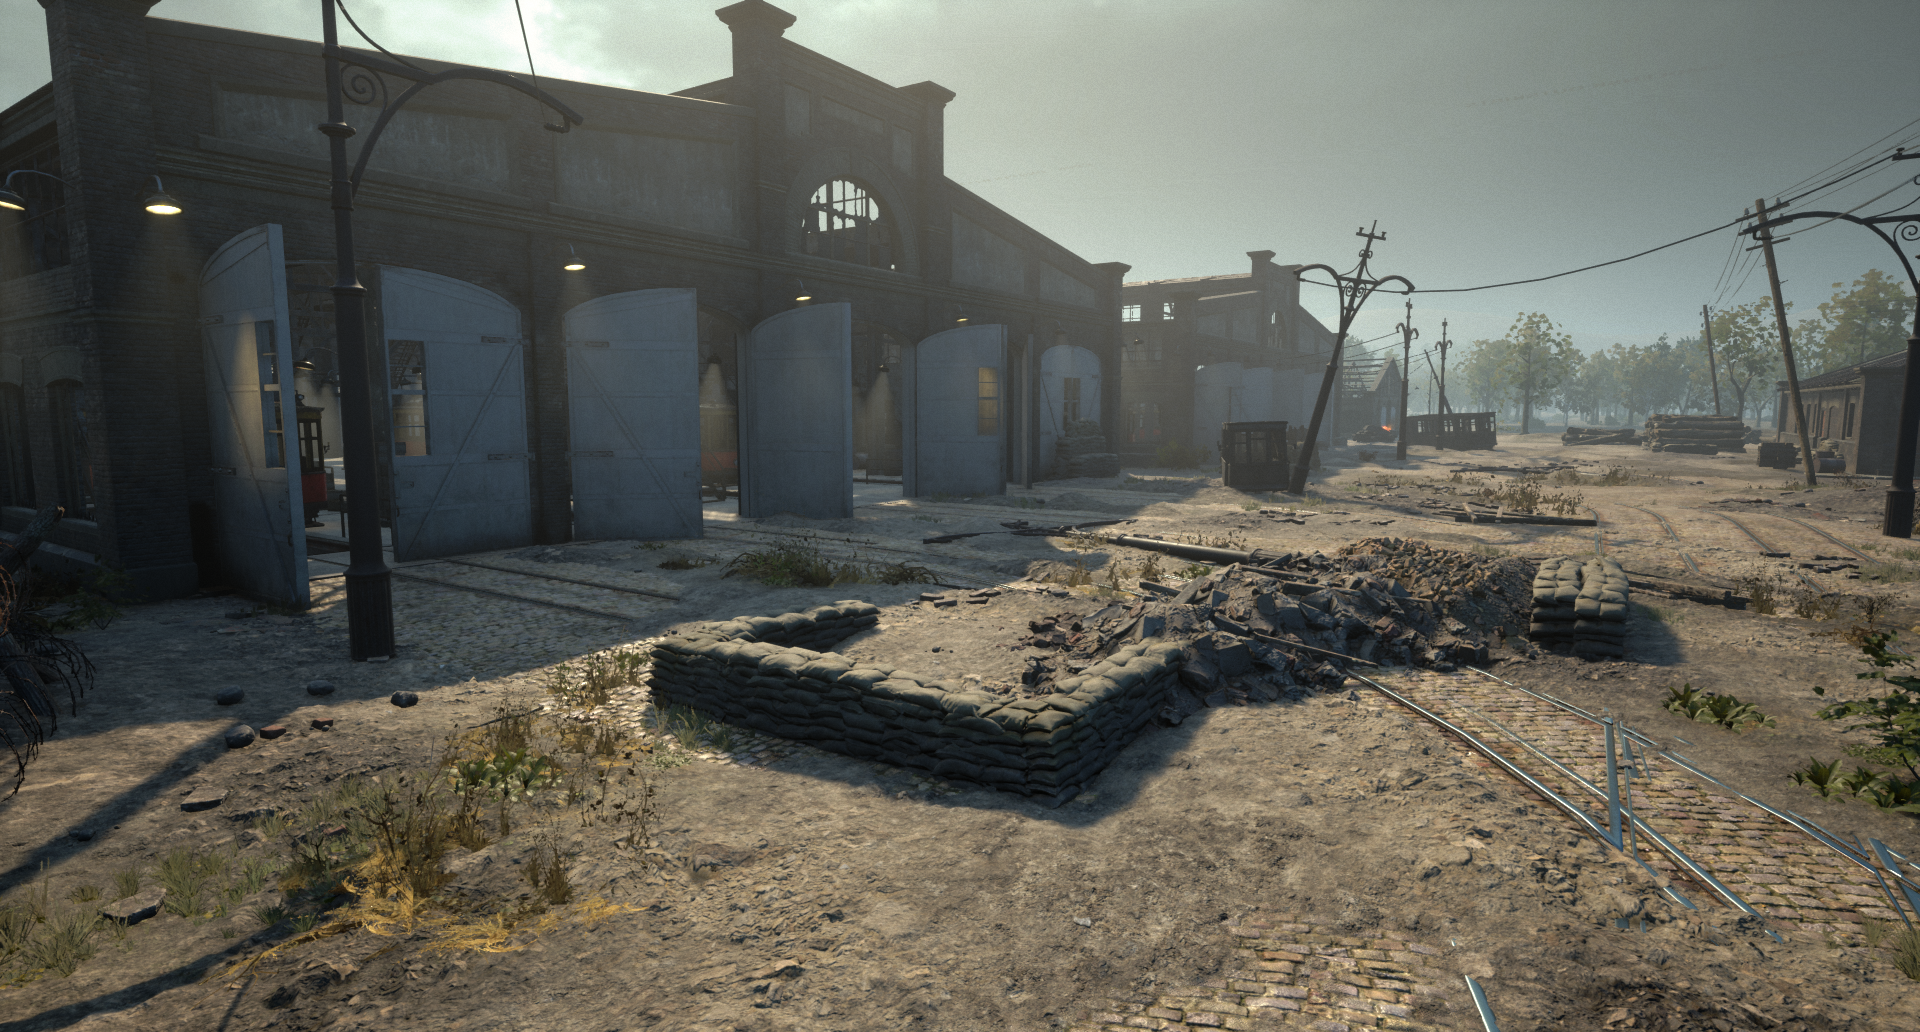
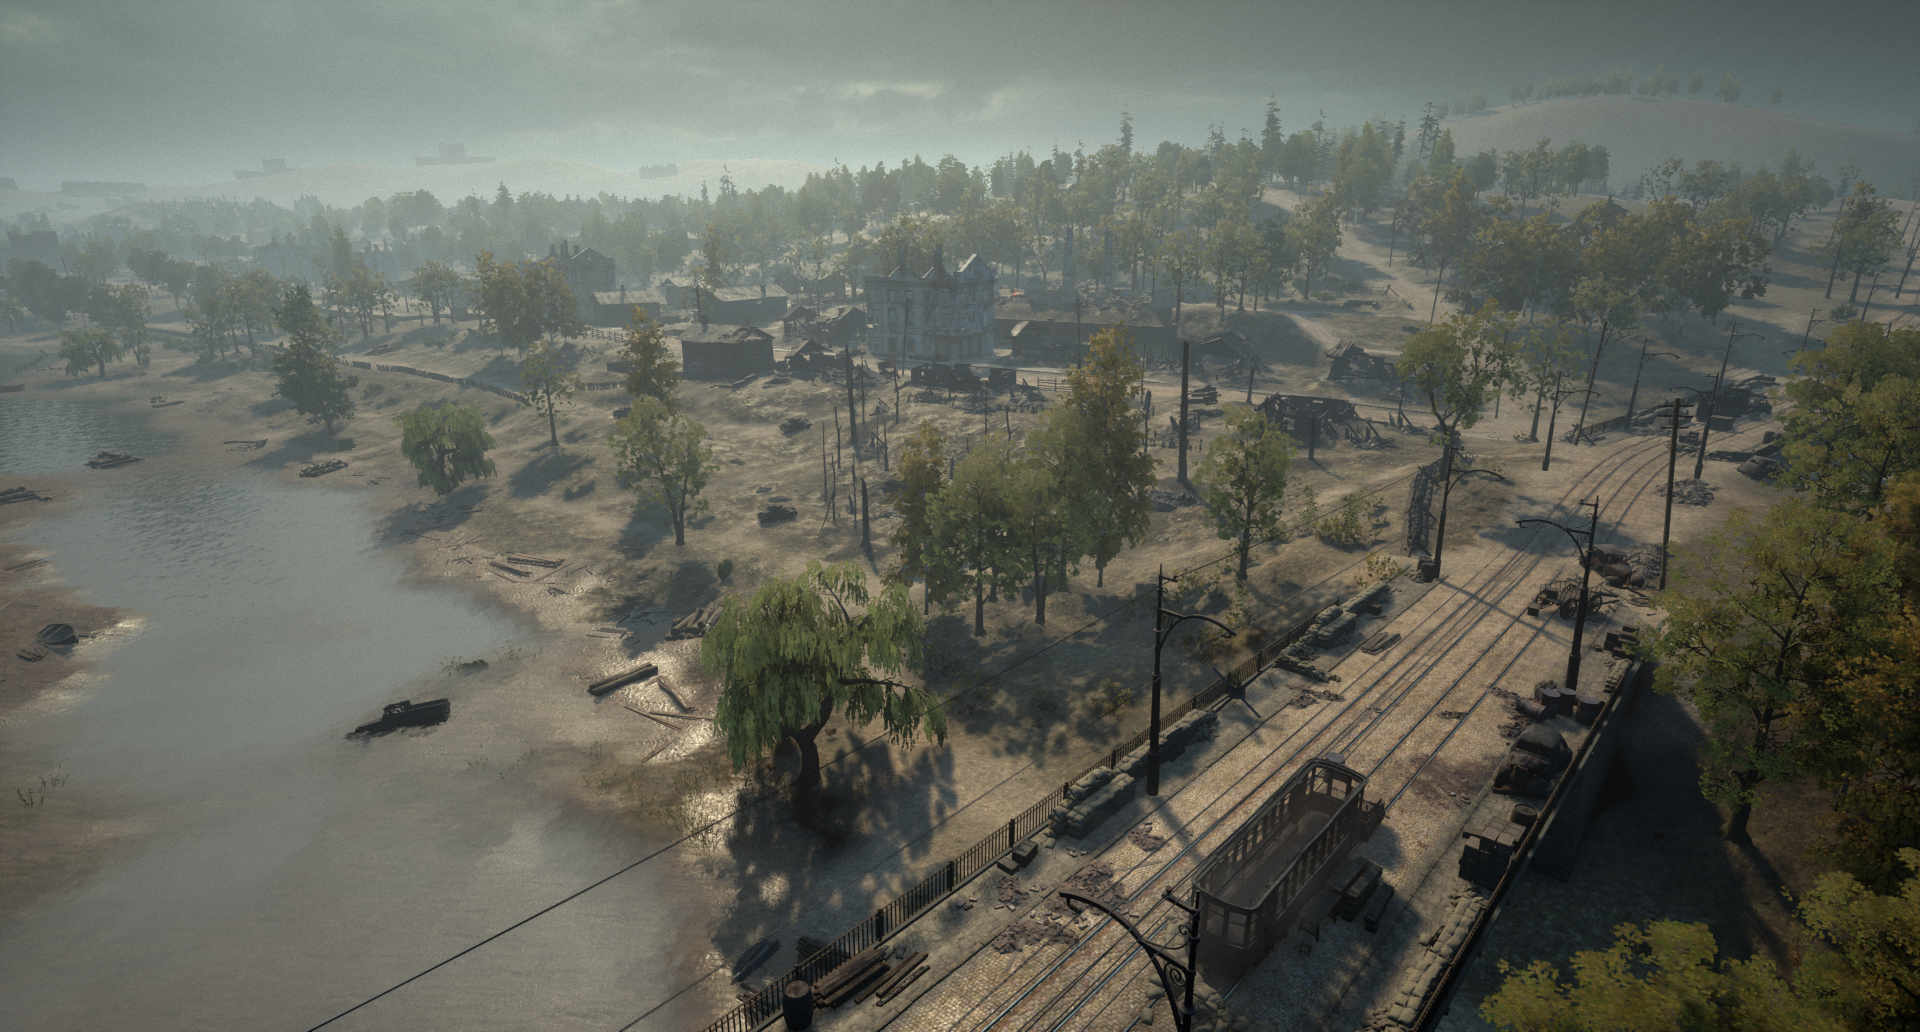
The city of Smolensk had a tram network that weaved through the city. This Capture Point features the depots where trams were stored and repaired. Walkways positioned both above and below the trams create exciting firefights within this Capture Point. A large multi-storey building sits opposite the Tram Depot, giving both sides strong cover when pushing into this area.
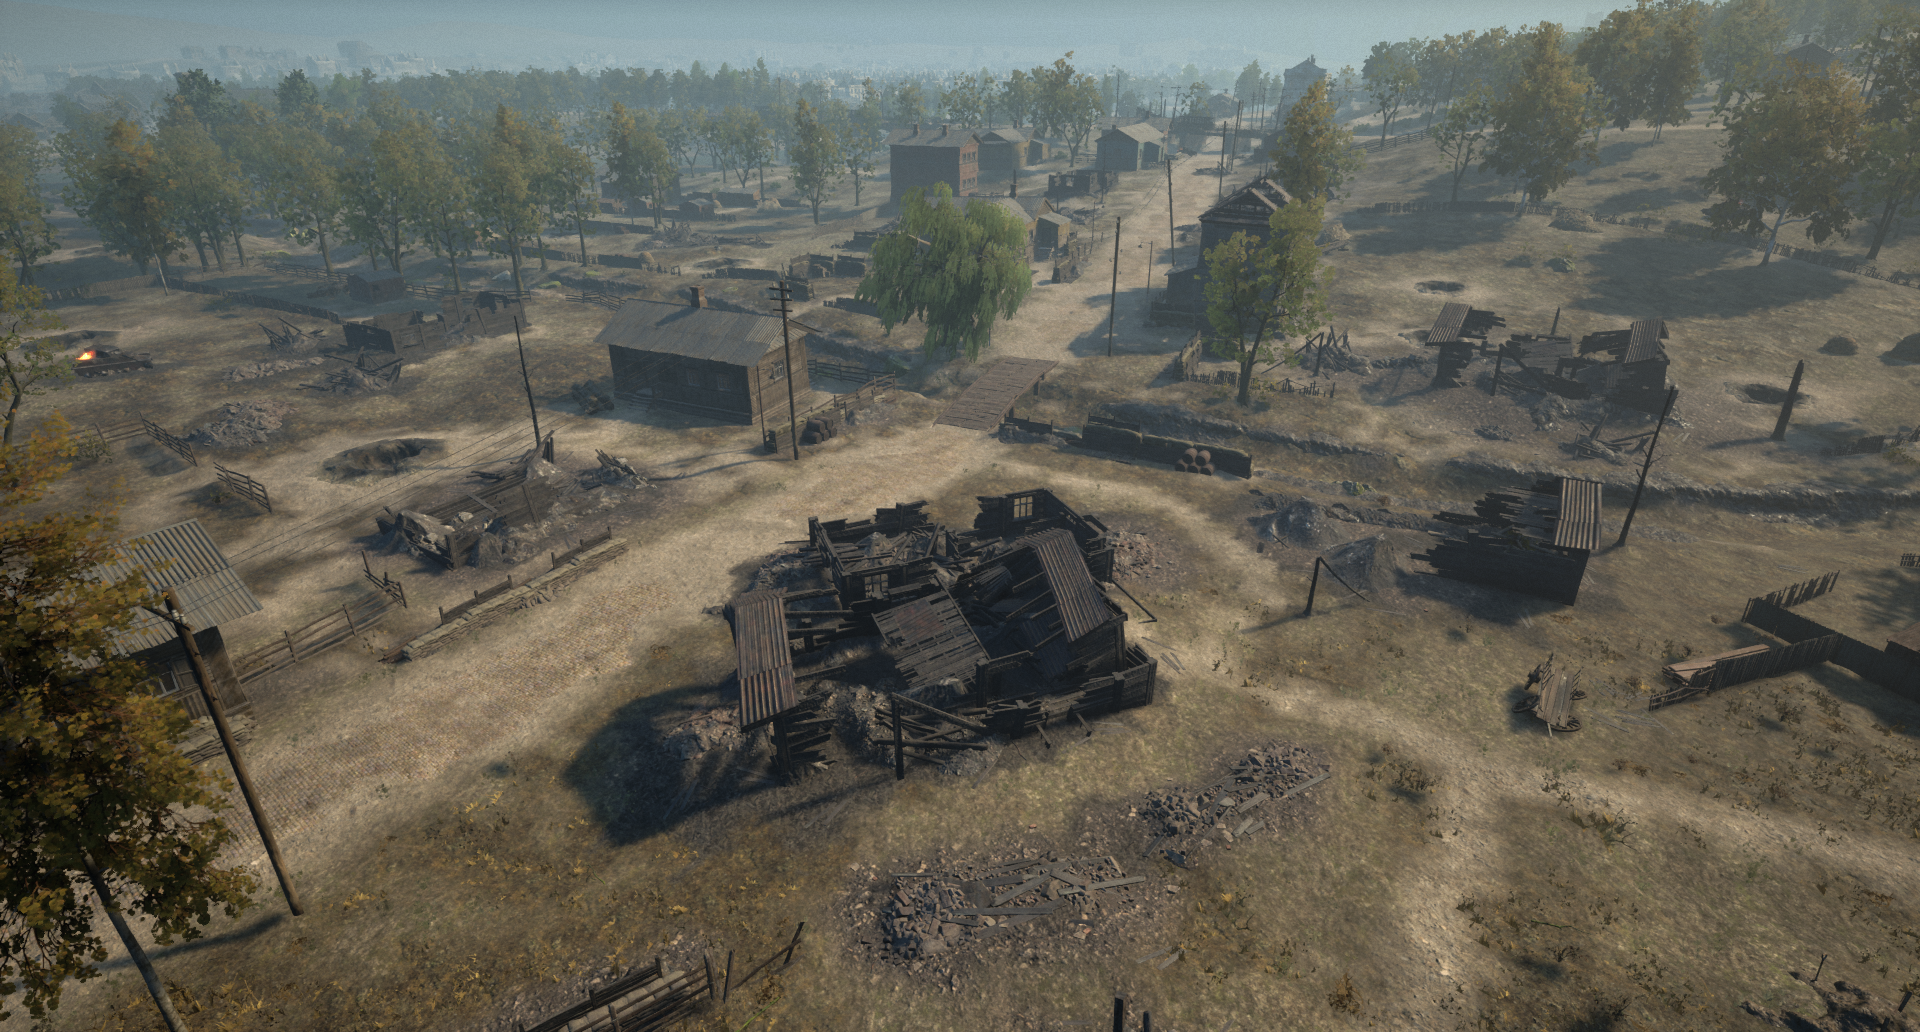
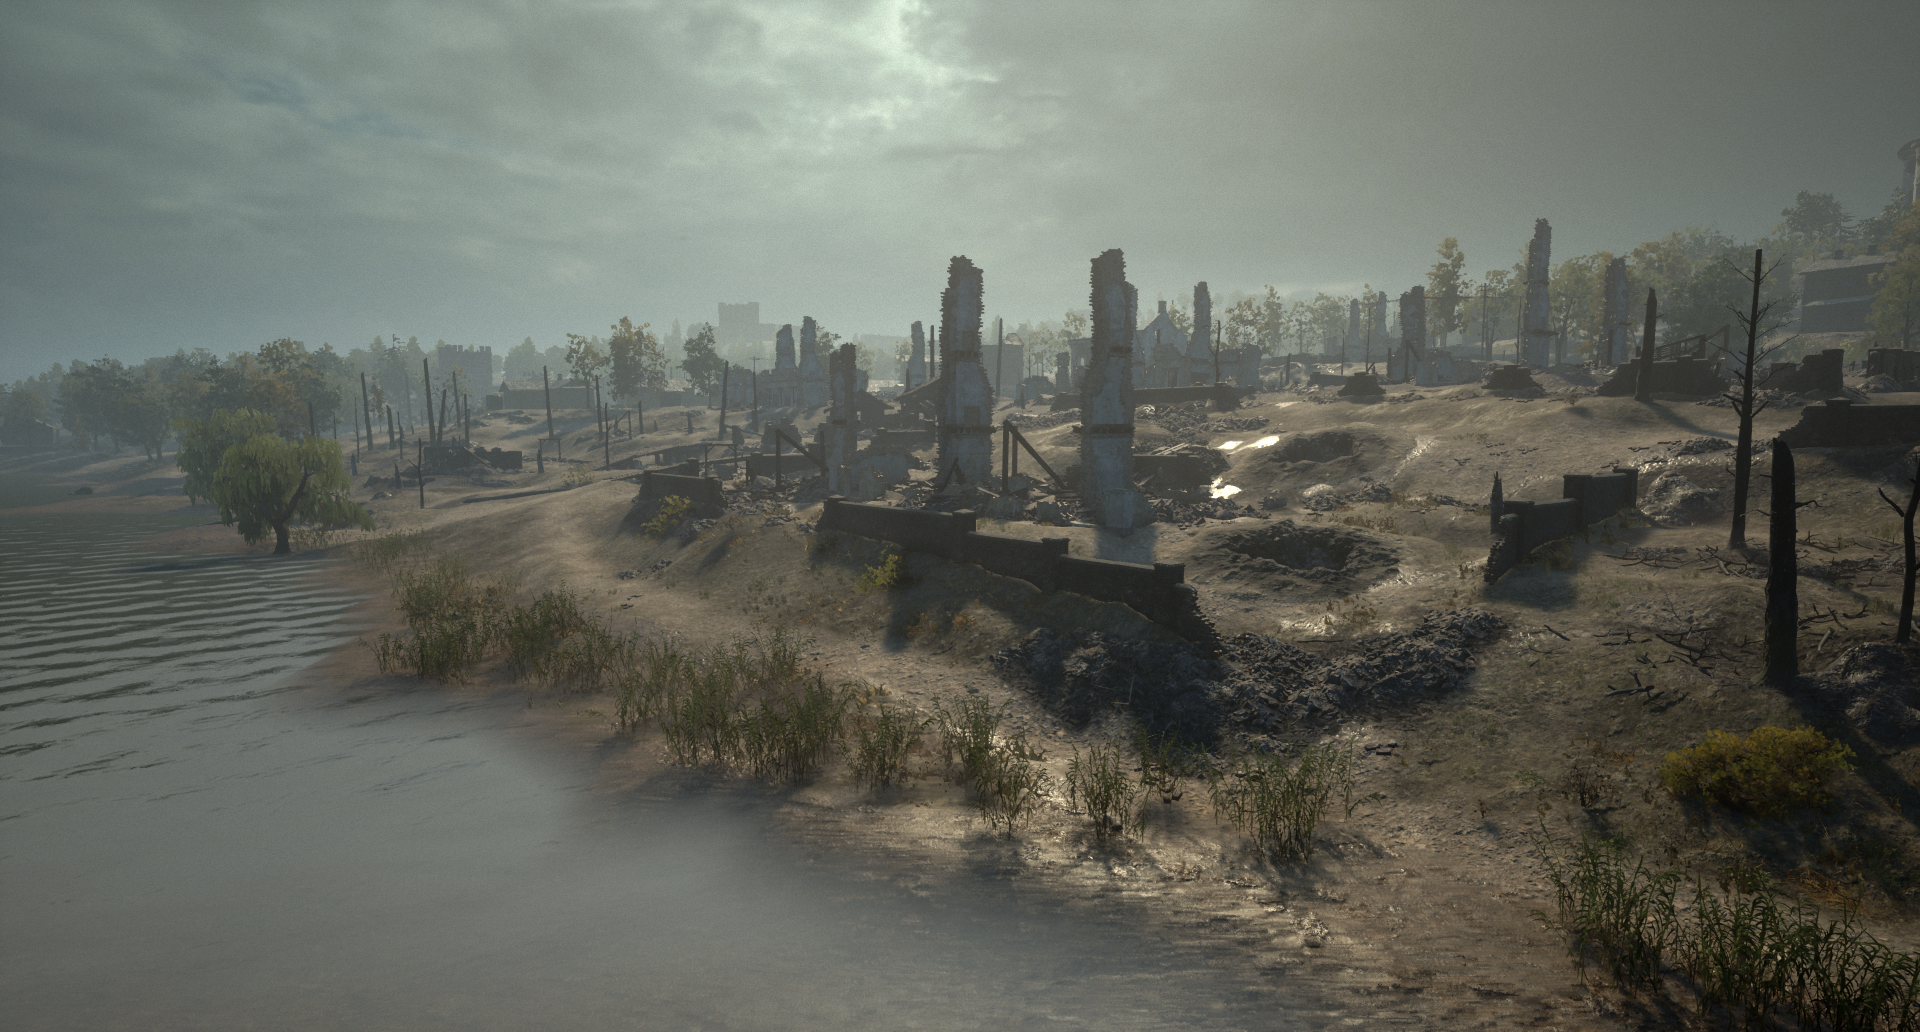
In the south-west of the map lie the remains of Smolensk’s outskirts. This area shows traces of rural Russia, with natural landscapes and traditional izba-style buildings. The terrain around this Capture Point offers strong attacking opportunities, whether approaching from the hills to the south or the river to the north.
One of the most visually striking Capture Points on the map, this area centres on the war-torn Railway Station, currently named Smolensk Hauptbahnhof under German Forces occupation. Multiple assault routes allow for varied tactics, and vehicles can move freely, even across the railway lines.
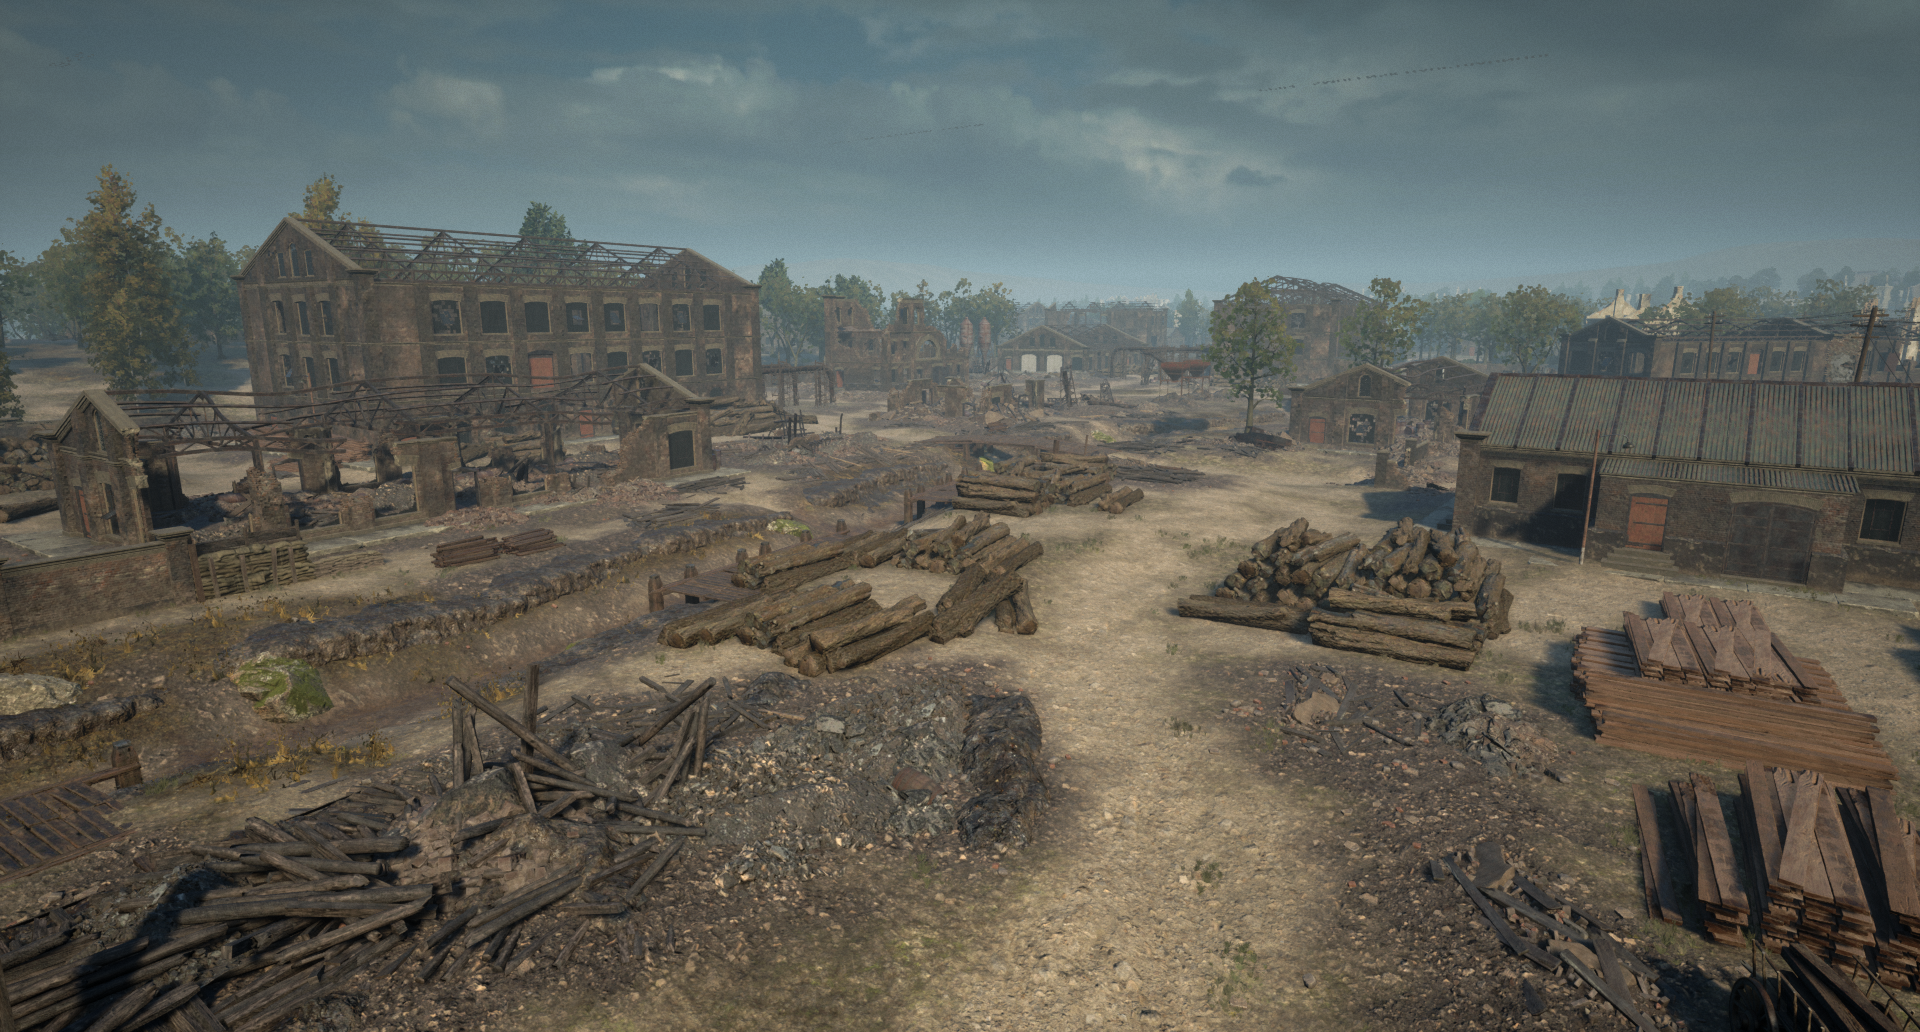
Historical references show that this area of Smolensk housed a massive lumber yard. Players defending this Capture Point must navigate stacks of timber, ruined warehouses, and a dried-up creek. The lumber yard proved pivotal in the defence of Smolensk as it allowed the German Forces to use the stored wood to build bridges and defences across the city.
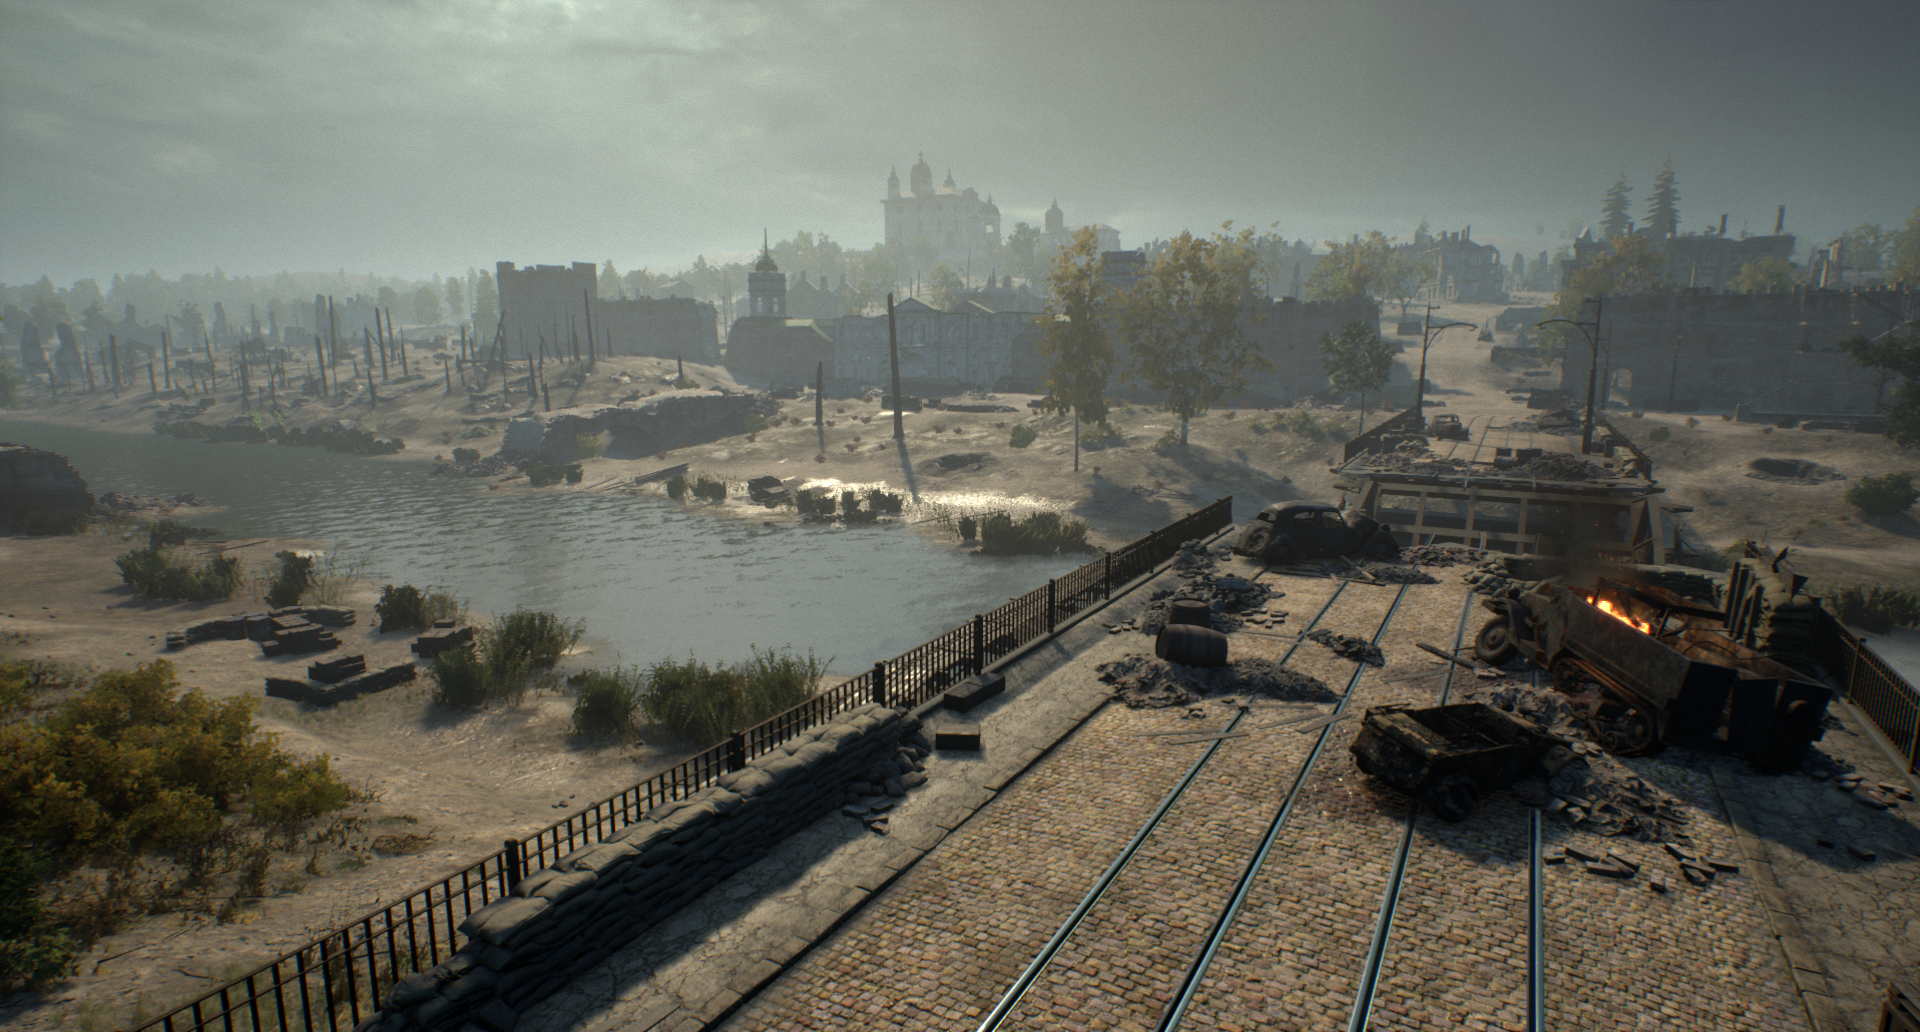
This Capture Point marks the transition from the rural south-western outskirts into the more urban city to the north and east. Although attacking from the north may seem difficult due to the river, the entire river is fully crossable on foot and with vehicles. Crossing the water slows movement, adding an element of risk compared to using the bridges, but players are free to choose their crossing points.
This Capture Point serves as the civilian entrance to the Train Station. Its unique layout creates exciting gameplay, with enemy players able to take positions directly underneath while attempting to capture the top of the overpass. Destroyed trams provide excellent cover, and multiple routes up and down from the overpass allow players to approach and defend from a variety of angles.
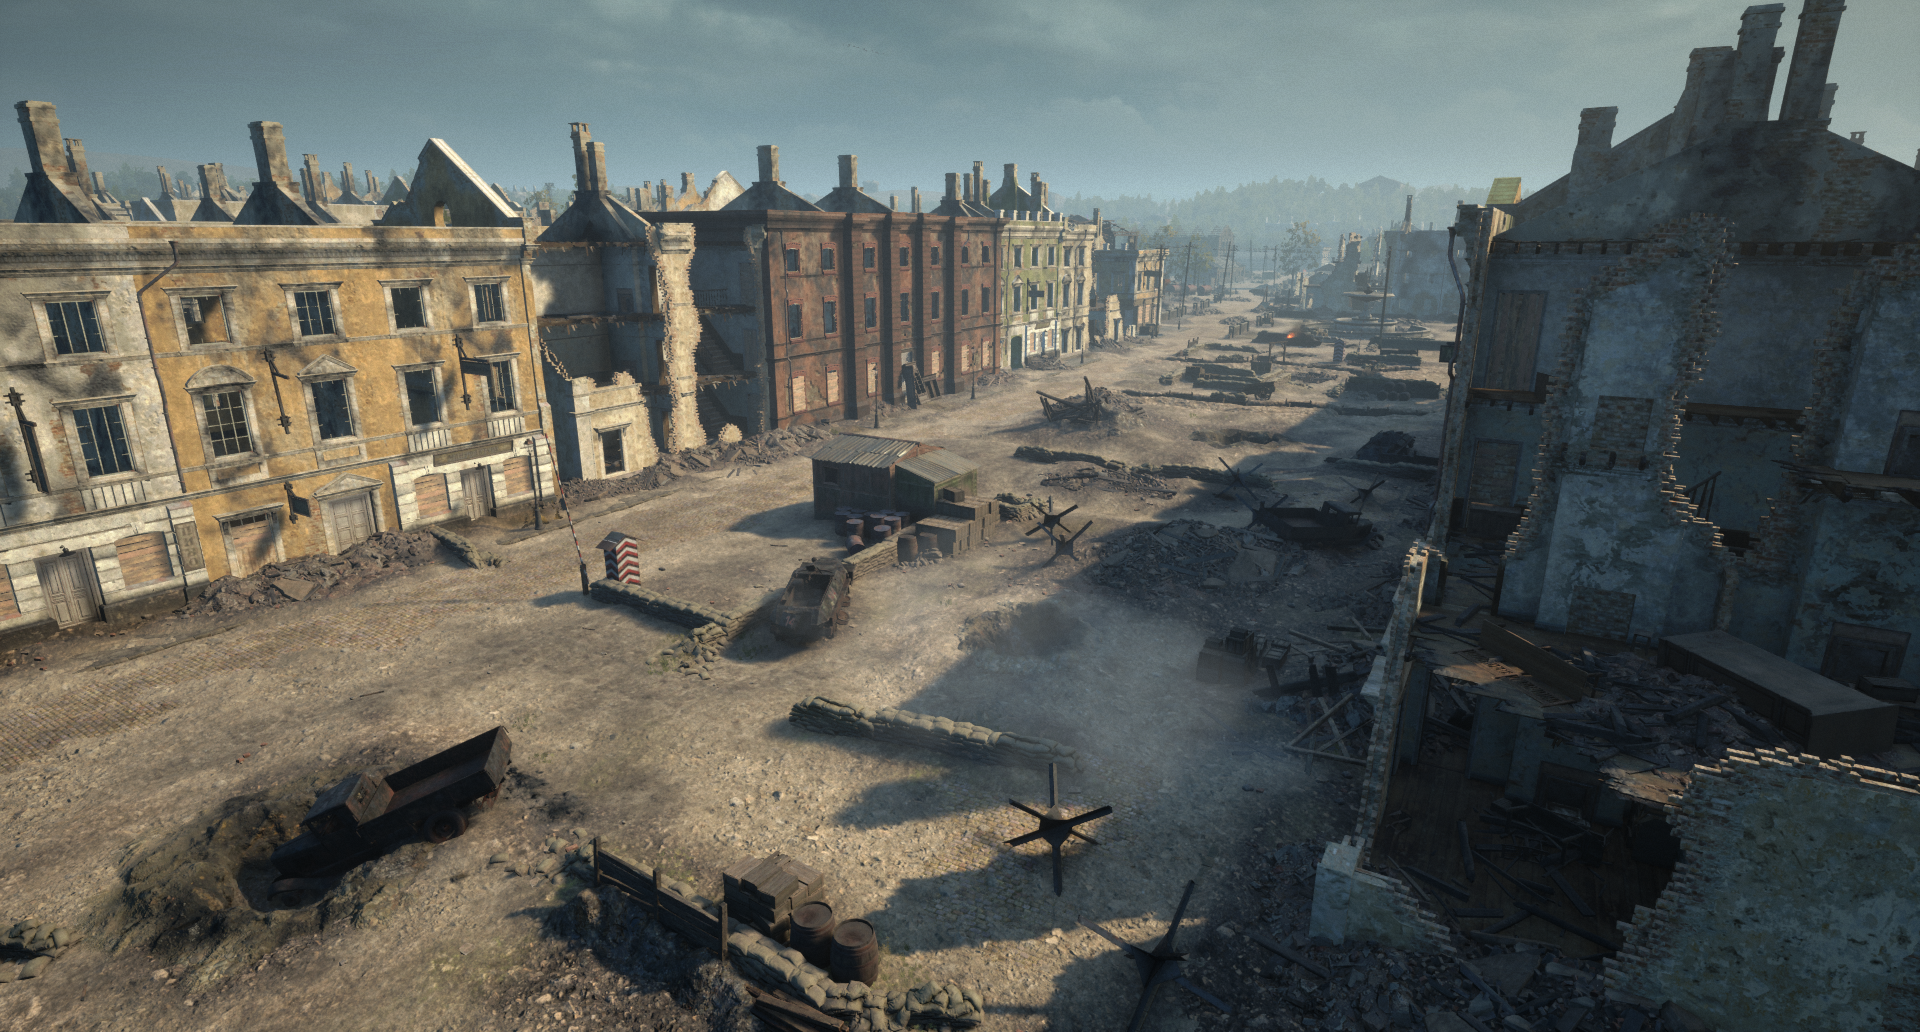
At the very centre of Smolensk is Zhelyabova Square, a network of tight roads with three-storey buildings on either side. The majority of these buildings have been destroyed either entirely or partially over the past years, leaving their interiors accessible. Players will need to make use of these and watch for crossfire from opposite sides of the street. The areas behind the buildings provide players with a number of alternate attacking options.
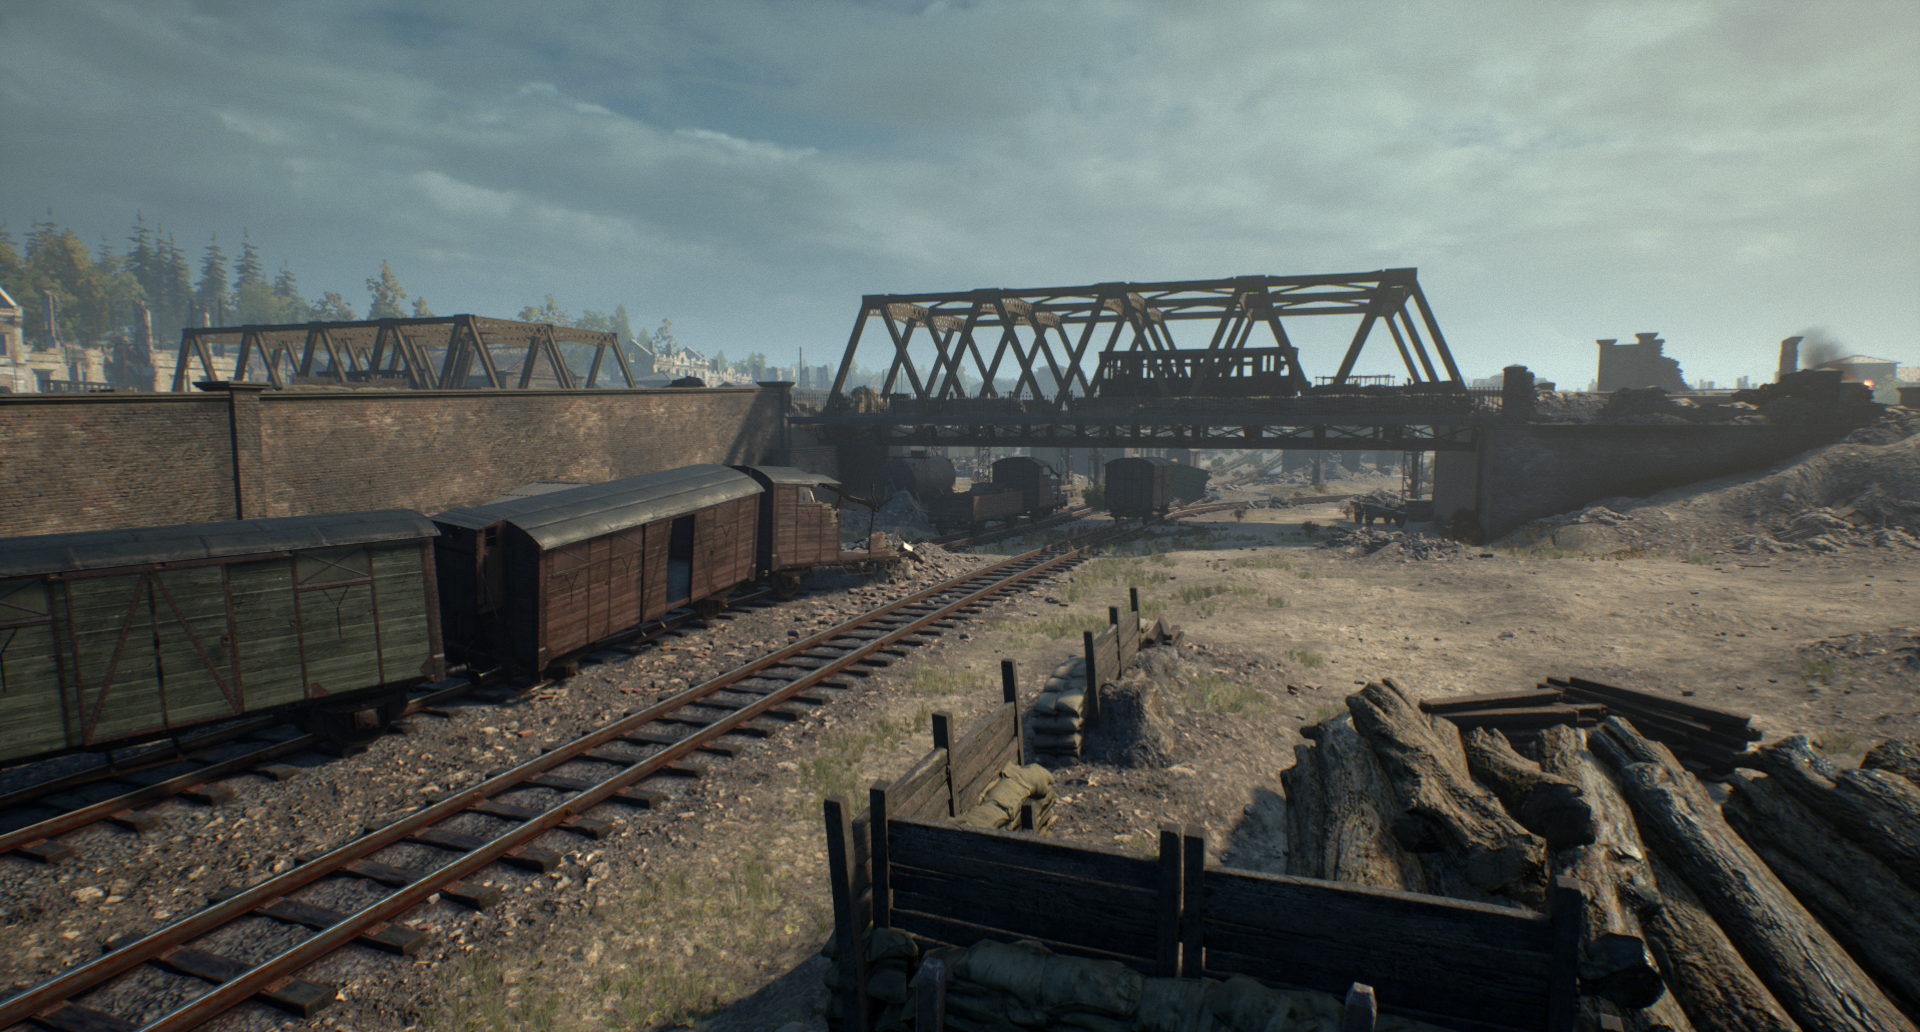
With the main bridge across the Dnieper destroyed, the German Forces built a temporary bridge for transporting supplies and men across the river. Players will have to make use of the scattered cover around the river to protect themselves from incoming fire. As with all bridges in Smolensk, vehicles can cross them easily.

This district in the North of Smolensk housed warehouses which are now in ruins. A network of trenches has been dug between the buildings, providing cover and protection when moving around the Capture Point.
Just east of the centre of Smolensk, the road opens up into this wide street lined by residential buildings. This Capture Point maintains intense urban combat, but crossing the open street carries additional risk. Ample cover is available, including destroyed tram cars. Vehicles can still navigate the area, though they are more exposed to infantry positioned in the surrounding buildings.
Another key landmark on this map, the Citadel signifies the historic town of Smolensk. Its medieval walls running parallel to the Dnieper are fully climbable. Staircases and scaffolding provide multiple access points to the top of these structures. This Capture Point also features the destroyed bridge. Players must find alternative ways to cross the river, but the underside of the bridge offers cover, creating three layers of vertical combat.
Close to the Soviet Headquarters lies an area once used for storing supplies transported by rail. Players will have to weave in and out of rail cars, making their way along the train tracks. This Capture Point also features a heavily destroyed Officers’ building, offering access to multiple levels of the ruined structure.
Now in one of Smolensk’s more residential areas, this Capture Point reflects how the city’s people once lived. Now heavily destroyed and littered with trenches and defences, this once communal area is now a shell of its former self. Players can use the multi-storeyed buildings to gain a vertical advantage over their opponents.
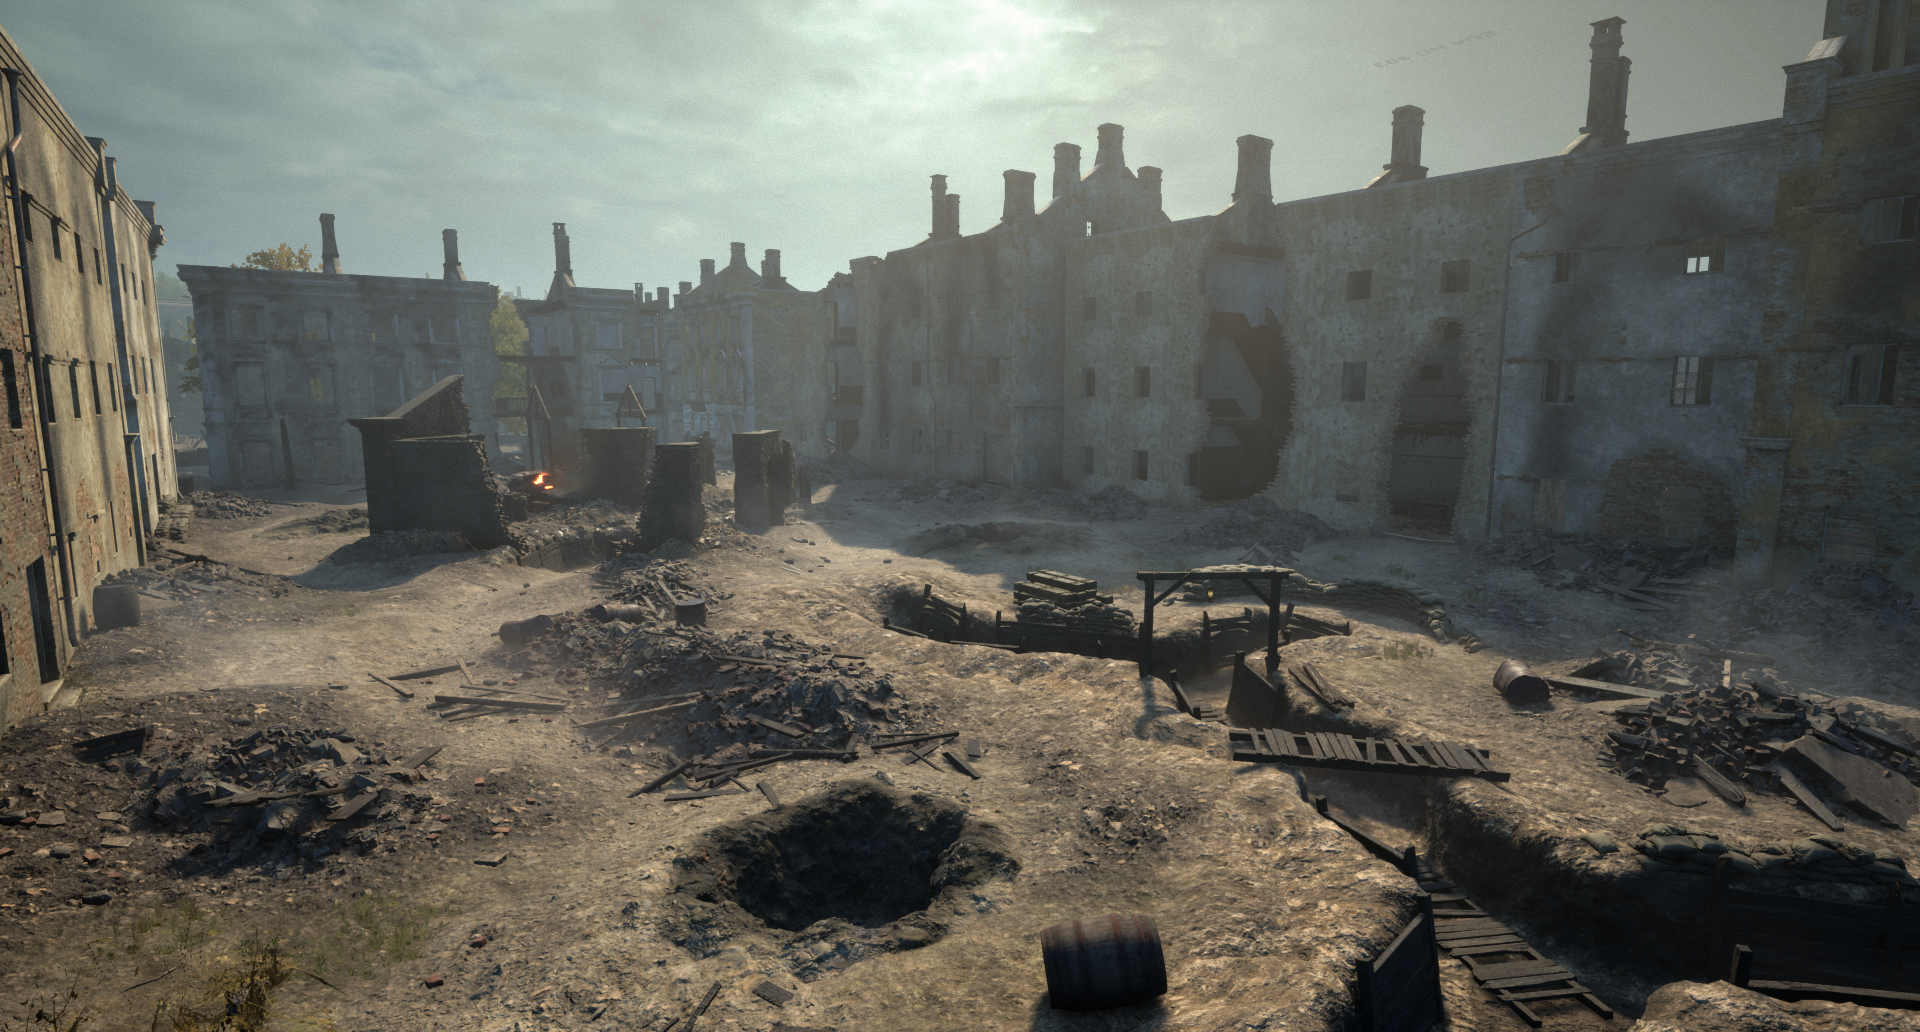
In the south-east of the map lies the remnants of a residential area, heavily bombarded over years of occupation. Now in total ruins, players can use the rubbled buildings to their advantage, providing cover from across the river. This Capture Point highlights the extent of Smolensk’s destruction during the war.
The Smolensk map has received a major visual atmosphere upgrade, with a focus on delivering a high-quality visual experience while maintaining strict performance budgets, particularly on console platforms. The initial step was the optimisation of fire VFX for the night map.
Large-scale fire technology previously used in Stalingrad could not be directly applied to Smolensk due to the frequency of fires required. A more streamlined system was developed, allowing additional fires to be added to specific buildings without compromising performance.
The core fire effect has been reworked and now primarily utilises a two-card rendering technique, first used in the large-scale fire in Stalingrad, but optimised for Smolensk. This allows the fire to convey realistic movement, flicker, and heat distortion without relying on a large volume of individual, computationally expensive particles. The result is a substantial reduction in overdraw and particle count, enabling fires to appear on multiple buildings simultaneously.
This optimisation also allowed the addition of complementary particle effects, such as embers and ash, enhancing the atmosphere without affecting performance. Ambient fog volumes were updated to create a heat-glow effect across the burnt-out streets, coupled with a low-cost lighting approach to maintain efficiency. Distance-based culling further ensured that these effects did not impact performance.
Distant fire effects were also implemented, allowing players to see the city ablaze from the surrounding hills, adding to the scale and immersion of the battlefield.
In addition to the extensive work on the night map, the day map received an atmospheric pass, featuring new fog volumes to create more localised fog and haze around the bombed-out buildings.
.png)
If you are interested in seeing how the map was created, one of our incredible War Correspondents, DasAltberg, has put together a fantastic video about Smolensk. The video compares authentic locations from Smolensk in WW2 with their counterparts in the Hell Let Loose map and offers great insight into the work that went into bringing this battlefield to life.
If you want to learn more about the real historical sites found across Smolensk, DasAltberg also recommends checking out this community curated website that features a huge collection of footage and reference material gathered over many years.
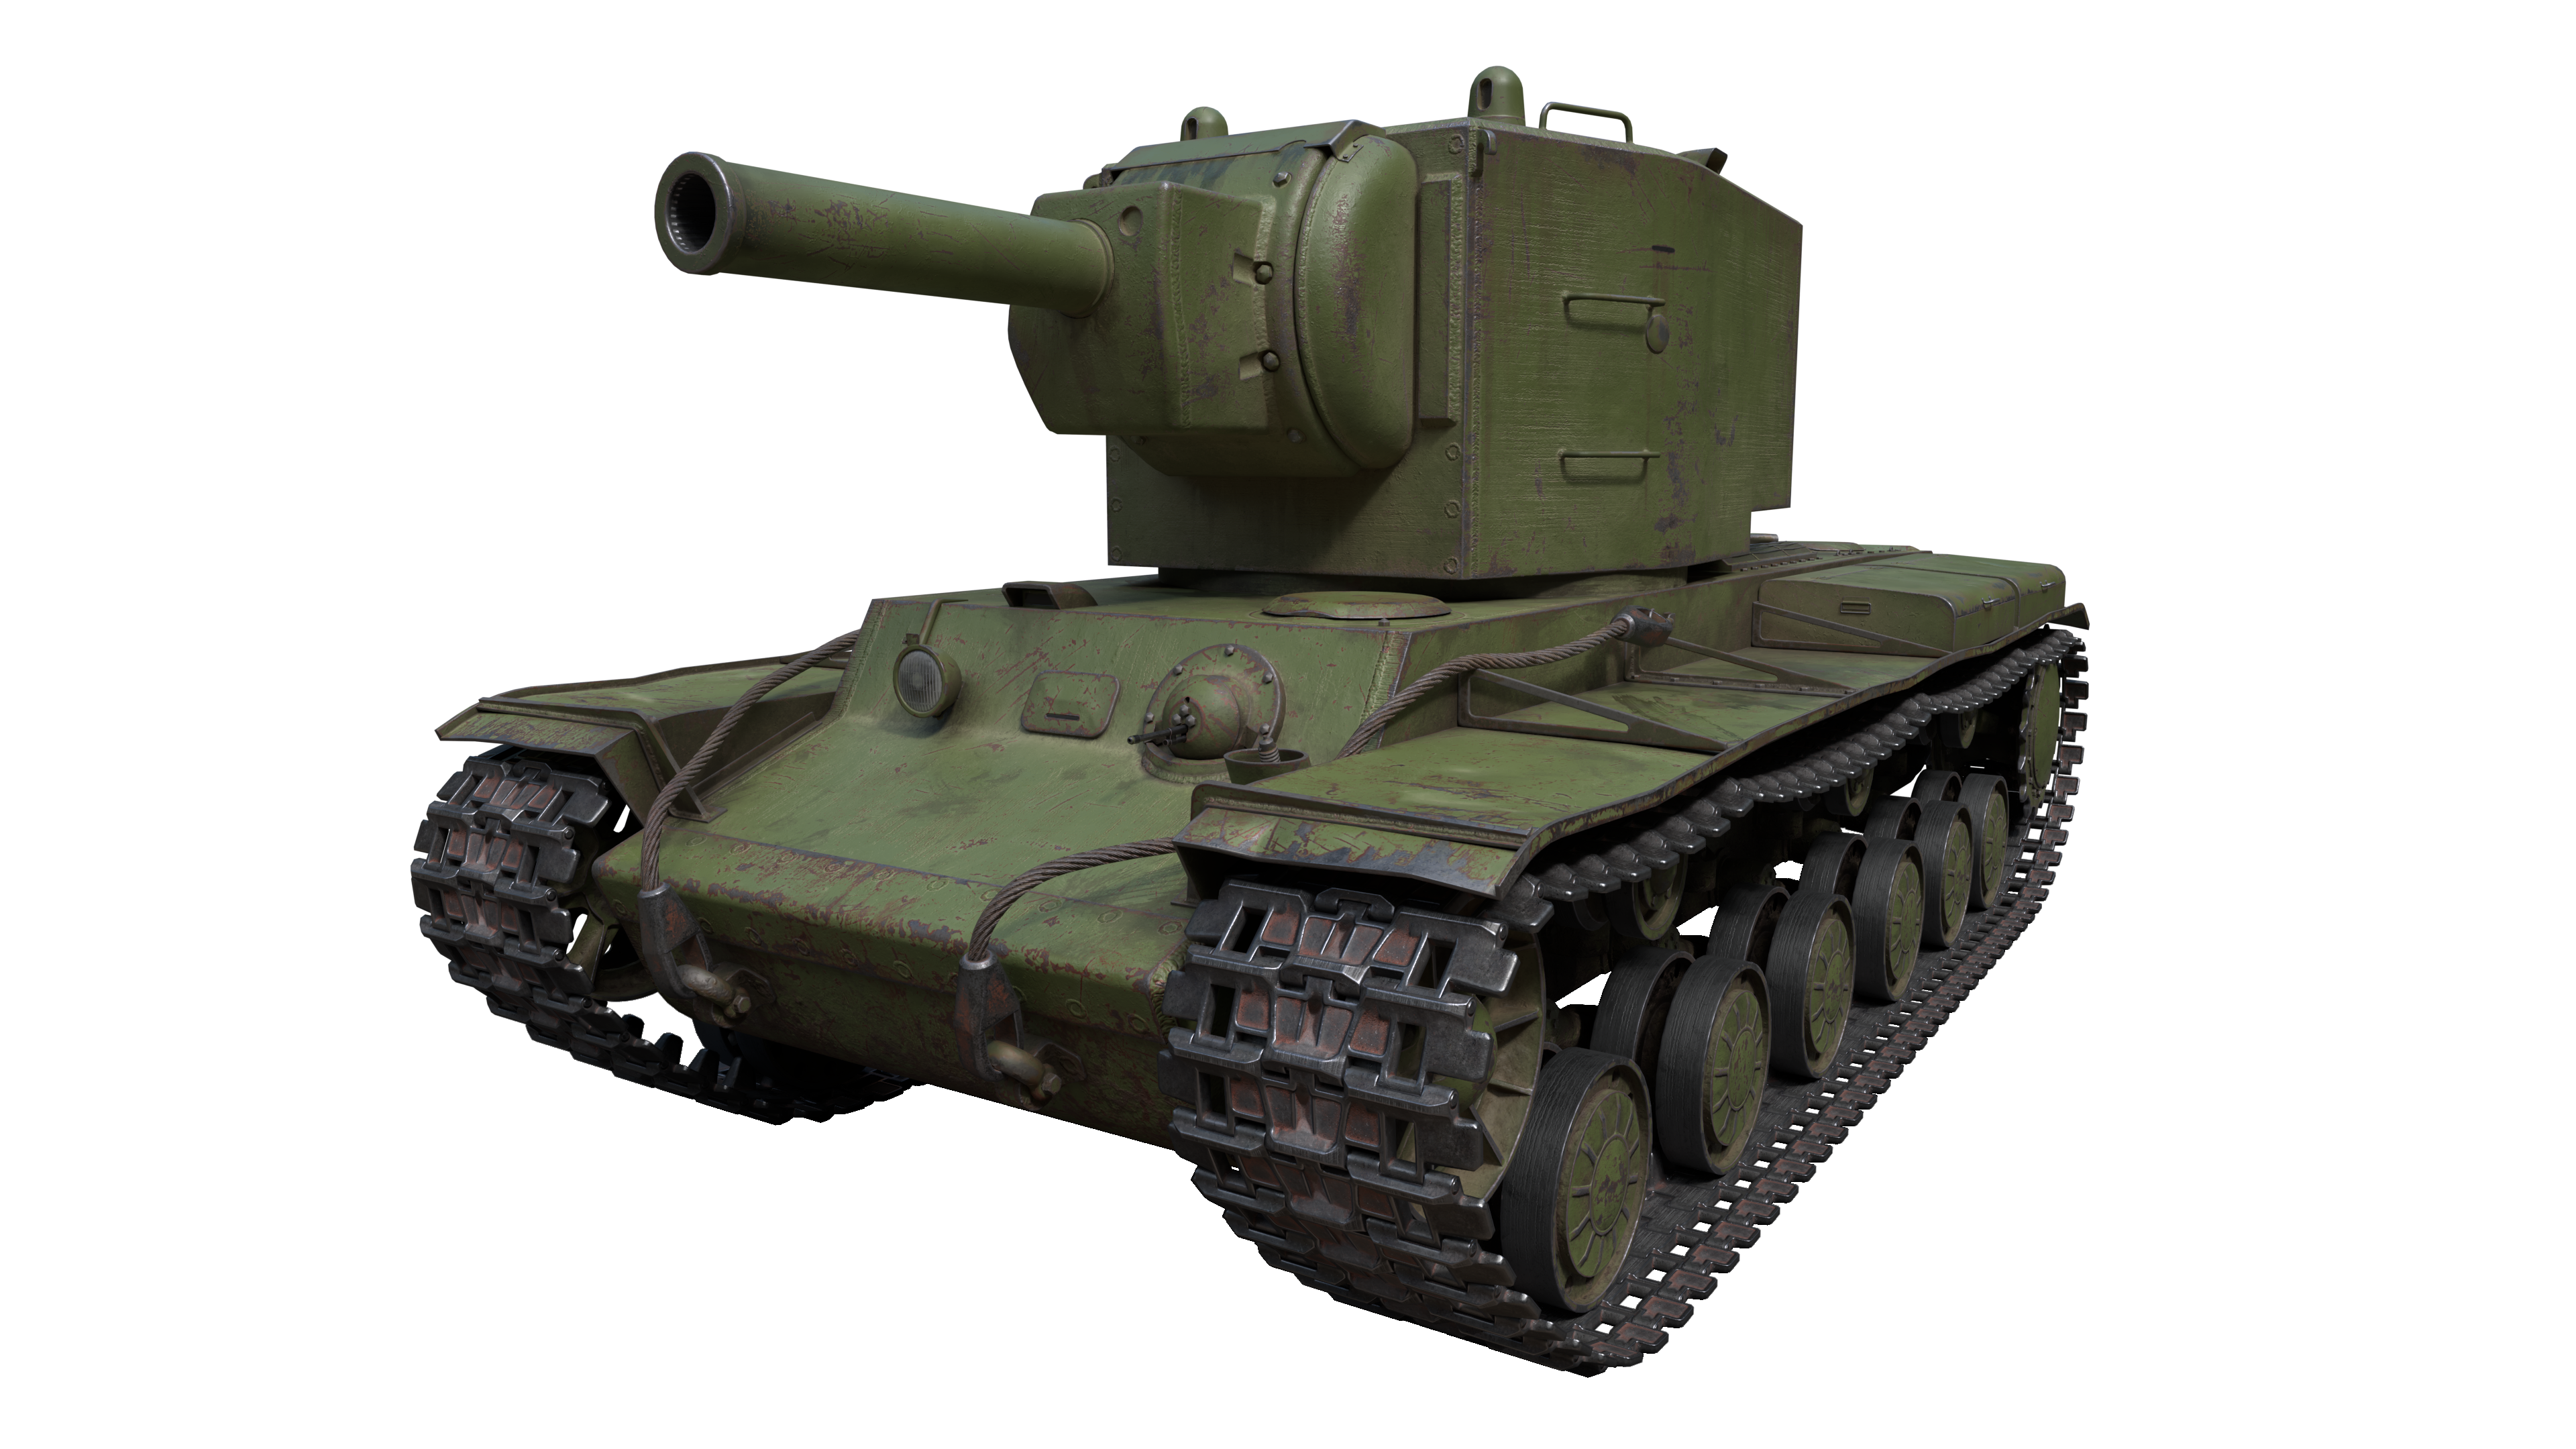
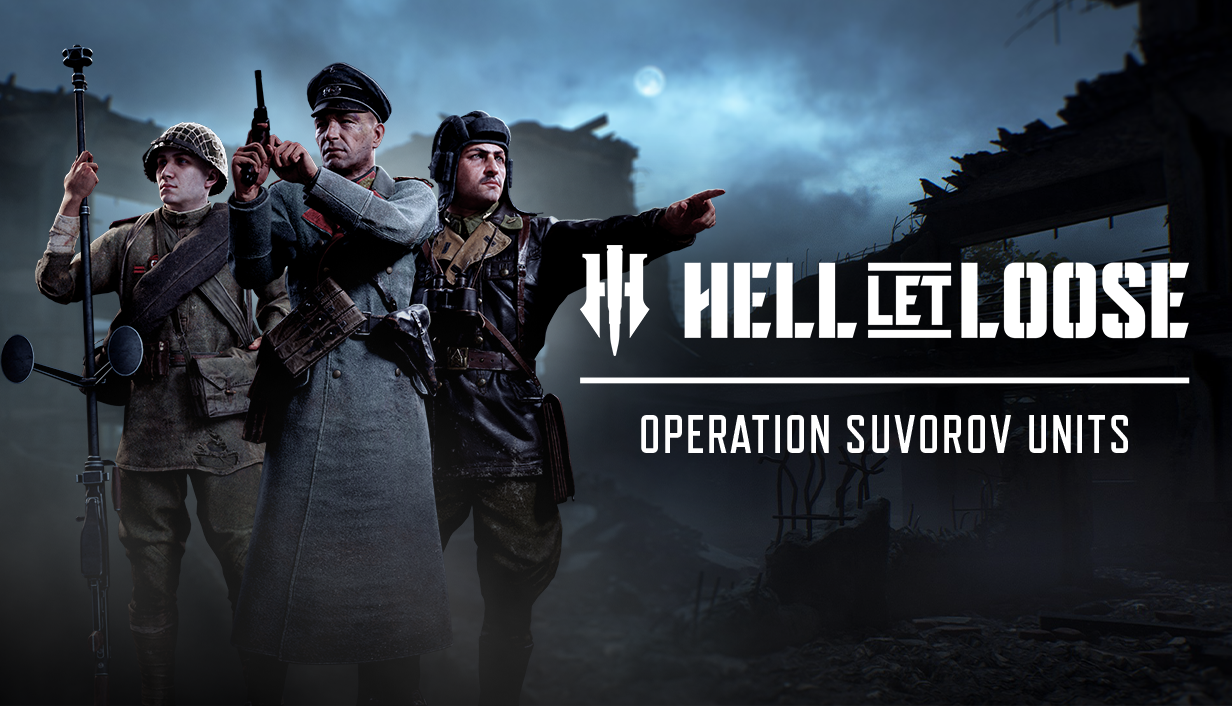
For Update 19, a new vehicle type has been added to Hell Let Loose, that is initially being called ‘Self Propelled Artillery’. They are now available across all factions.
The initial release of SPAs is the start of a series of updates that will give each unit unique characteristics and statistics based on their real historic counterparts.
As with our Armor changes in Update 18, the introduction of SPAs in Update 19 marks the beginning of an iterative process. Our goal is to establish a clear initial vision for how Self Propelled Artillery should function in Hell Let Loose, and the version you see today is shaped directly by the feedback many of you shared on the Experimental Branch. Rest assured we will continue to refine both SPAs and the wider artillery loop as we move into 2026. Please keep sharing your thoughts with us, since your feedback plays a major role in guiding these changes.
.png)


Unlike other armor, these can only be used by the newly created Artillery Squad (more on that down below) and cost munitions instead of fuel to spawn in.
They have the duel capabilities of indirectly bombarding positions from range and assaulting enemy positions with direct fire.

Since these howitzer based guns have far more drop off compared to regular tank shells, aiming is measured by combining the barrel elevation (yellow number) and the terrain elevation (red number).
While not suited to direct engagements with enemy armor due to their long reload time, shot drop-off and slow turret speed, they have several unique weapon traits:
These are the initial release values for these vehicle types. Once they are released and more feedback has been gathered on their balance and performance, that information will be used to give each unit more individual traits that mirror their real life equivalents as well as potential adjustments to their firing arcs.
From playtesting, it was determined that having too many vehicles capable of destroying fortifications risked making gameplay unfun for engineers. As such, the ability to destroy middle tier fortifications (hedgehogs, level 2 constructs, barbed wire etc.) has been removed from the heavy tank.
Not all units that have been created for this role were historically used in the exact same function as represented in game, for example, the Churchill A.V.R.E had a real life effective firing range of around 100m. In real life, many SPA vehicles were open topped and had the crew exposed. It was decided to not include these particular vehicles for several technical and design reasons, including:
Because of this it was decided to go with several howitzer-based units that could feasibly be used in this role albeit at a lesser range than regular artillery, while also be used in direct confrontations and assaulting enemy fortifications.
While some details about each SPA unit are different (movement, armor, turret radius, ect.), many of their core elements like damage and firing range are currently the same. Due to adding six vehicles of a new type into the game simultaneously, they have been kept mechanically similar for balance reasons.
Rest assured, that post Update 19, once feedback has been collected about their current level of balance and usage, each unit will receive more unique elements that better represent their real life counterparts. Using the previously mentioned A.V.R.E as an example, one potential option that is being considered, is greatly reducing its firing range while having its explosion radius increased to compensate.
A new unit type has been added to the game, along with three new roles. Two Artillery Units can be made per team. They are unavailable on the Skirmish game mode or for the attacking side in Offense. An artillery unit is now the only unit capable of operating the static artillery guns or piloting an SPA
The new roles are
The squad leader. Your role is to act as the bridge between the command chat and your unit. While capable of riding in an SPA alongside your squad, The Observer is most effective on the front lines, informing, guiding shots and marking enemy positions with a flare gun for your team to fire upon.
The only member of the unit with a blowtorch, it is the role of the Engineer to maintain the health of the SPA and static gun. The Artillery Engineer also carries a wrench, similar to the regular engineer, capable of building several constructs, and mines to safeguard the SPA or static artillery gun. Together with the Artillery Support, the Engineer drives, aims and fires the artillery guns.
This role carries a supply box, similar to the regular support class. Essential for assembling a static artillery gun at the start of the match and rebuilding it should it be destroyed. The Artillery Support works closely with the Artillery engineer to build various constructs. Together with the Artillery Engineer, the Support drives, aims and fires the artillery guns.
Static Artillery guns have long since been a point of controversy within the community, partially due to their sometimes oppressive nature and partially because the previous method of countering them often required a recon team to spawn camp the artillery users over and over again, leading to an unfun experience for both the recon and the people on the gun.
As such they have had several mechanical and balance changes.
Right now a team can have, at max, two SPAs active, or one SPA and one static gun.
Another change is that previously the static gun drained munitions from the team’s collective pool at a rate of 3 per HE shell fired. This created potential issues as players could drain the team’s munition resource without any input from the commander. Now, when the gun is built it comes with a fixed ammunition amount, similar to tanks. The commander has an ability to refill the static gun of all it’s ammunition (HE and smokes) at the cost of munitions. The exchange rate of munitions spent per shell fired is being kept at similar levels to before.
This marks the initial release of changes to static artillery, with further tactical flexibility for artillery gun positioning under consideration for future updates.
Update 18 came with some major changes to Armor, and with Update 19 we are continuing to work on the Armor class. The following will be released in as part of this Update:
All remaining vehicles have been updated to better align with the performance standards of existing tanks. Changes include:
The M1918A2 BAR and the FG42 now feature deployable bipods, giving players new tactical options when engaging from fixed positions. These weapons also provide improved stability for accurate sustained fire, while reducing the player’s mobility.
.png)
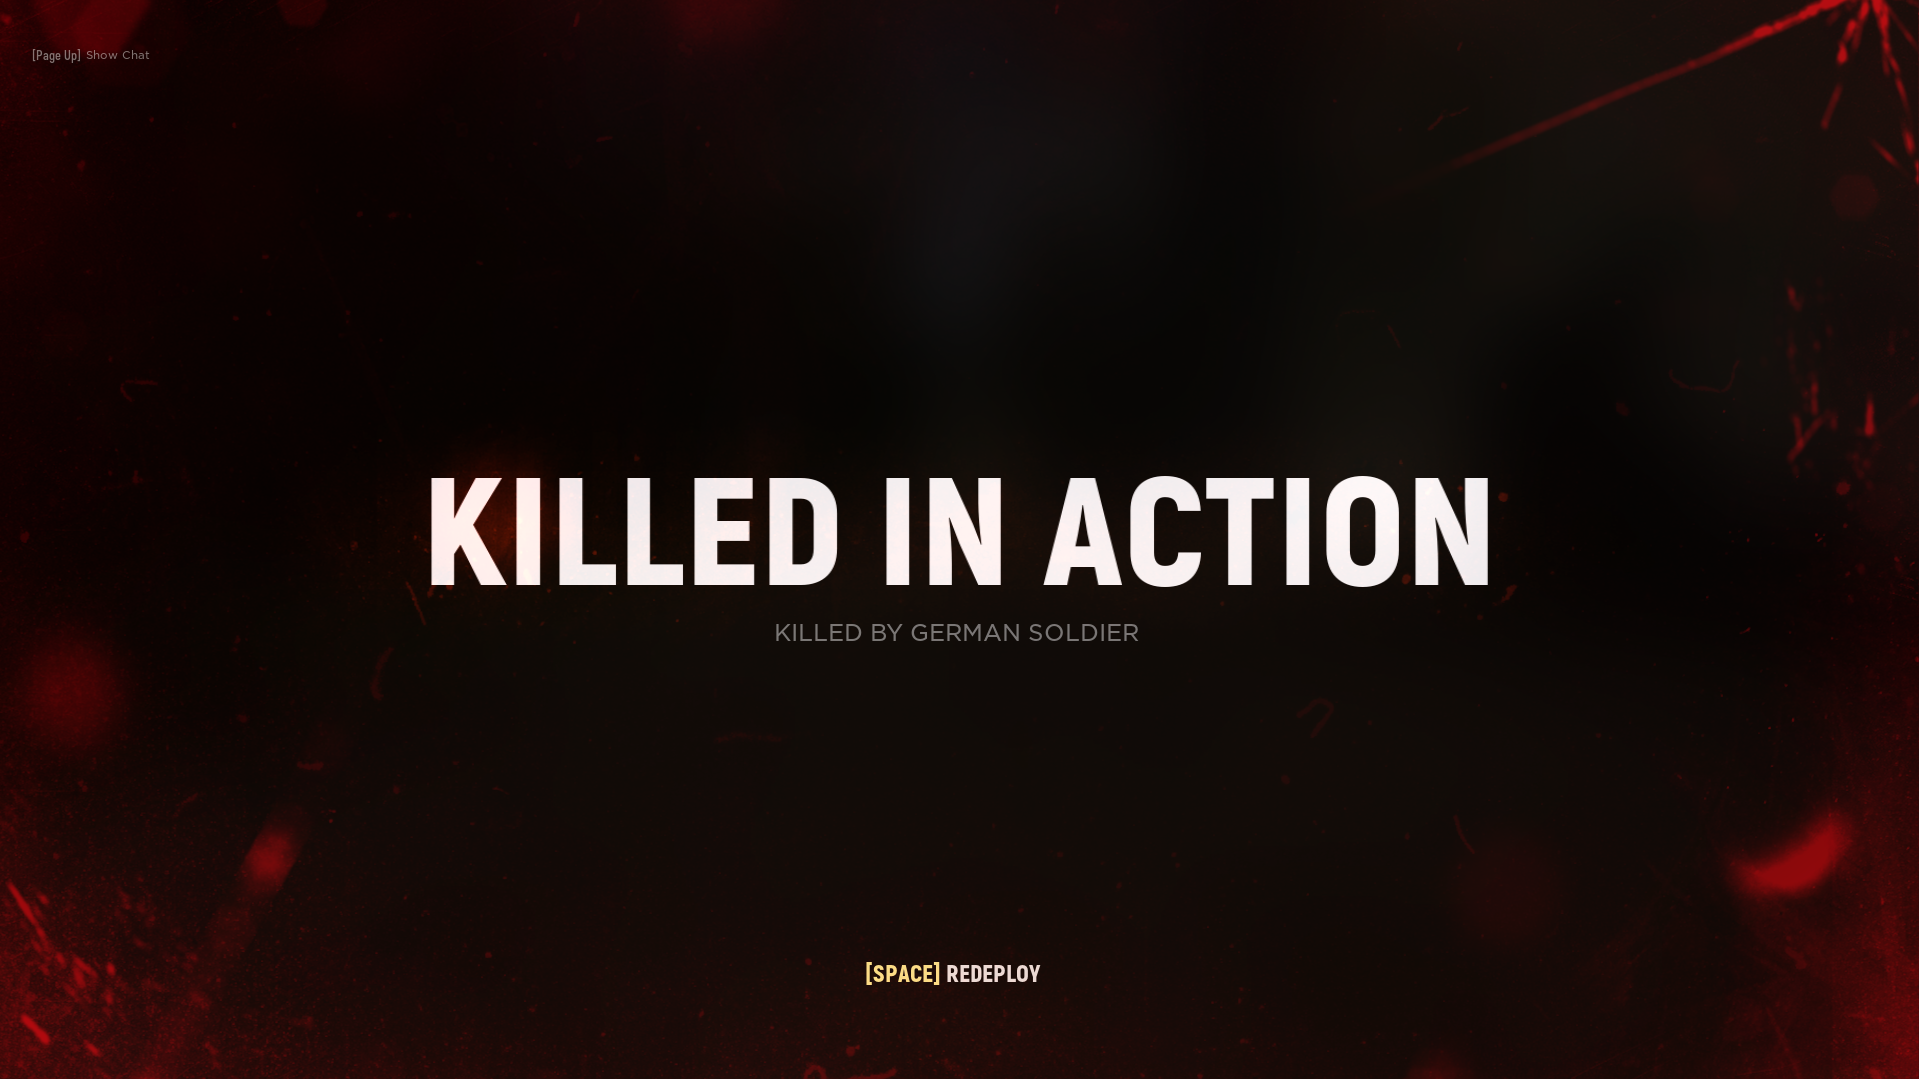
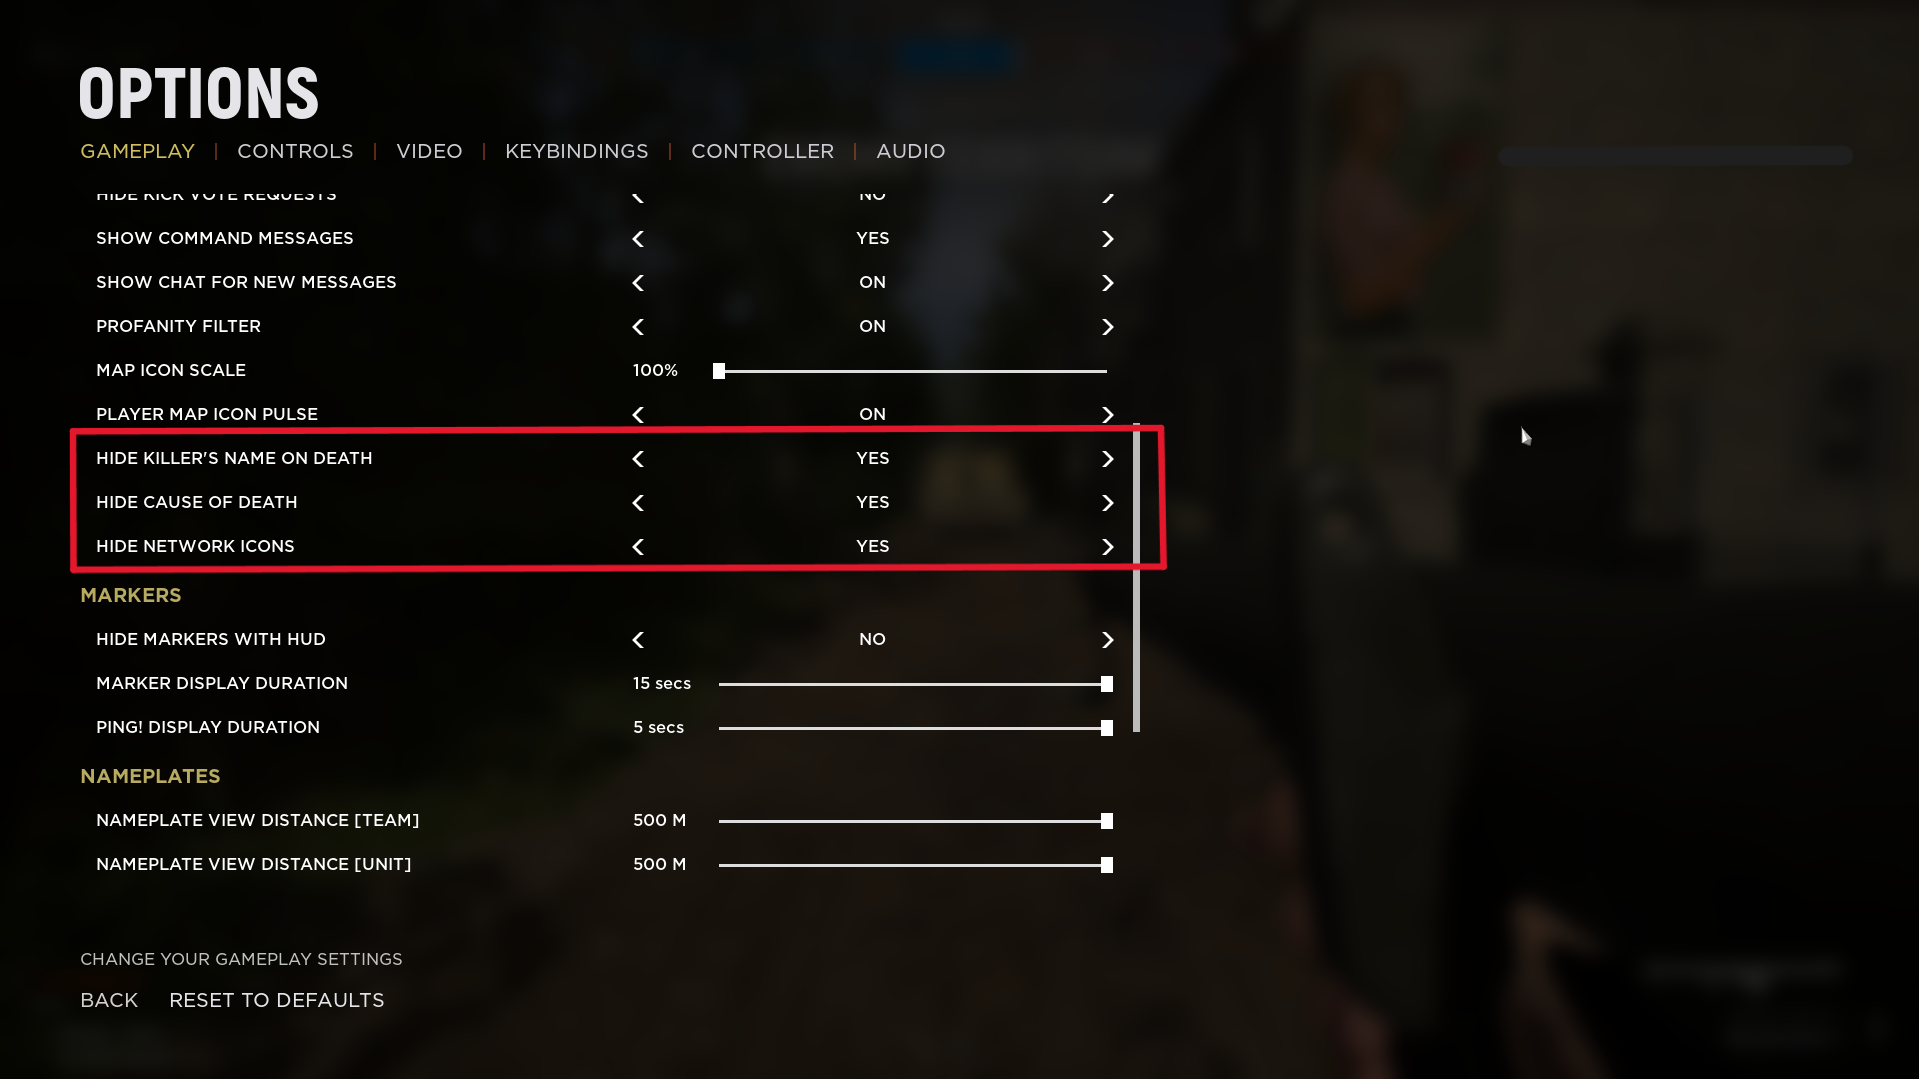
Following feedback from Update 18, adjustments have been made to the UI, focusing in particular on the Killed in Action screen and the network icons.
In Update 19, you will now find new options in your settings menu that let you toggle specific information on or off.
This means you can choose to hide the name of the player who killed you, the weapon they used, and whether network icons appear on your screen. These options give you more control over your experience and let you tailor the UI to your own preferences.
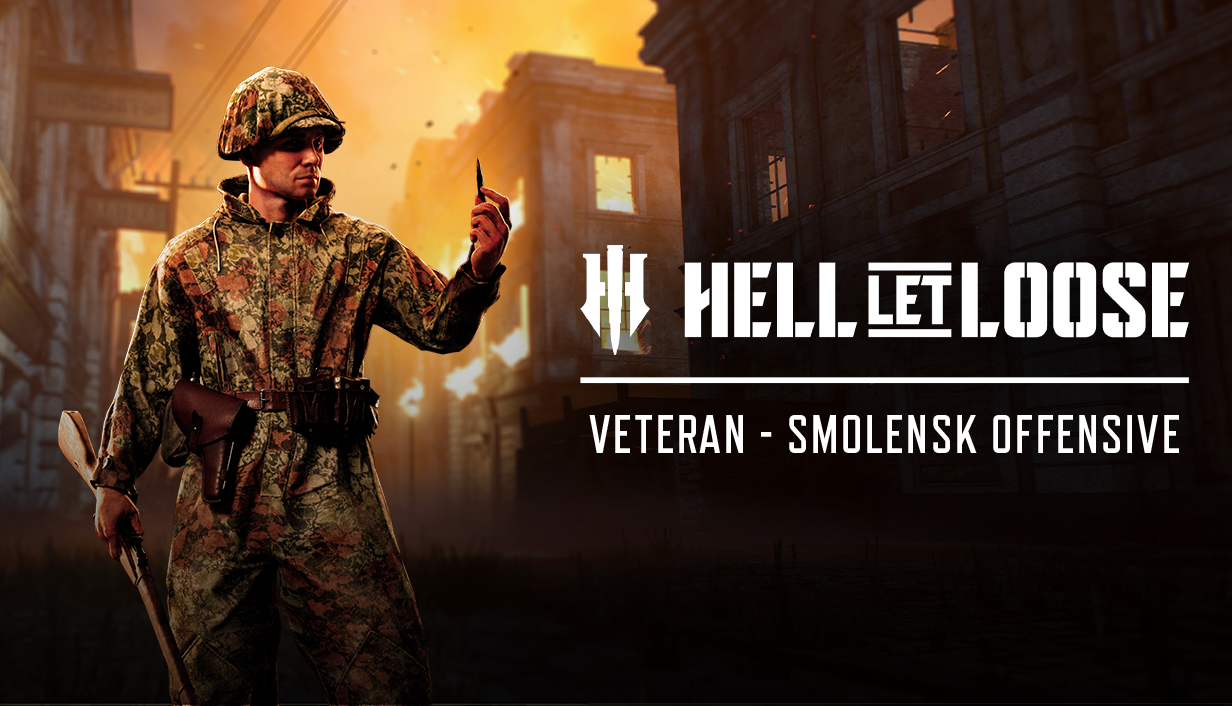
With this update also comes the release of new uniforms for the Soviet and German forces. They have been inspired by clothing worn across the Eastern Front and have been developed with care and attention to detail, to tell the story behind them.
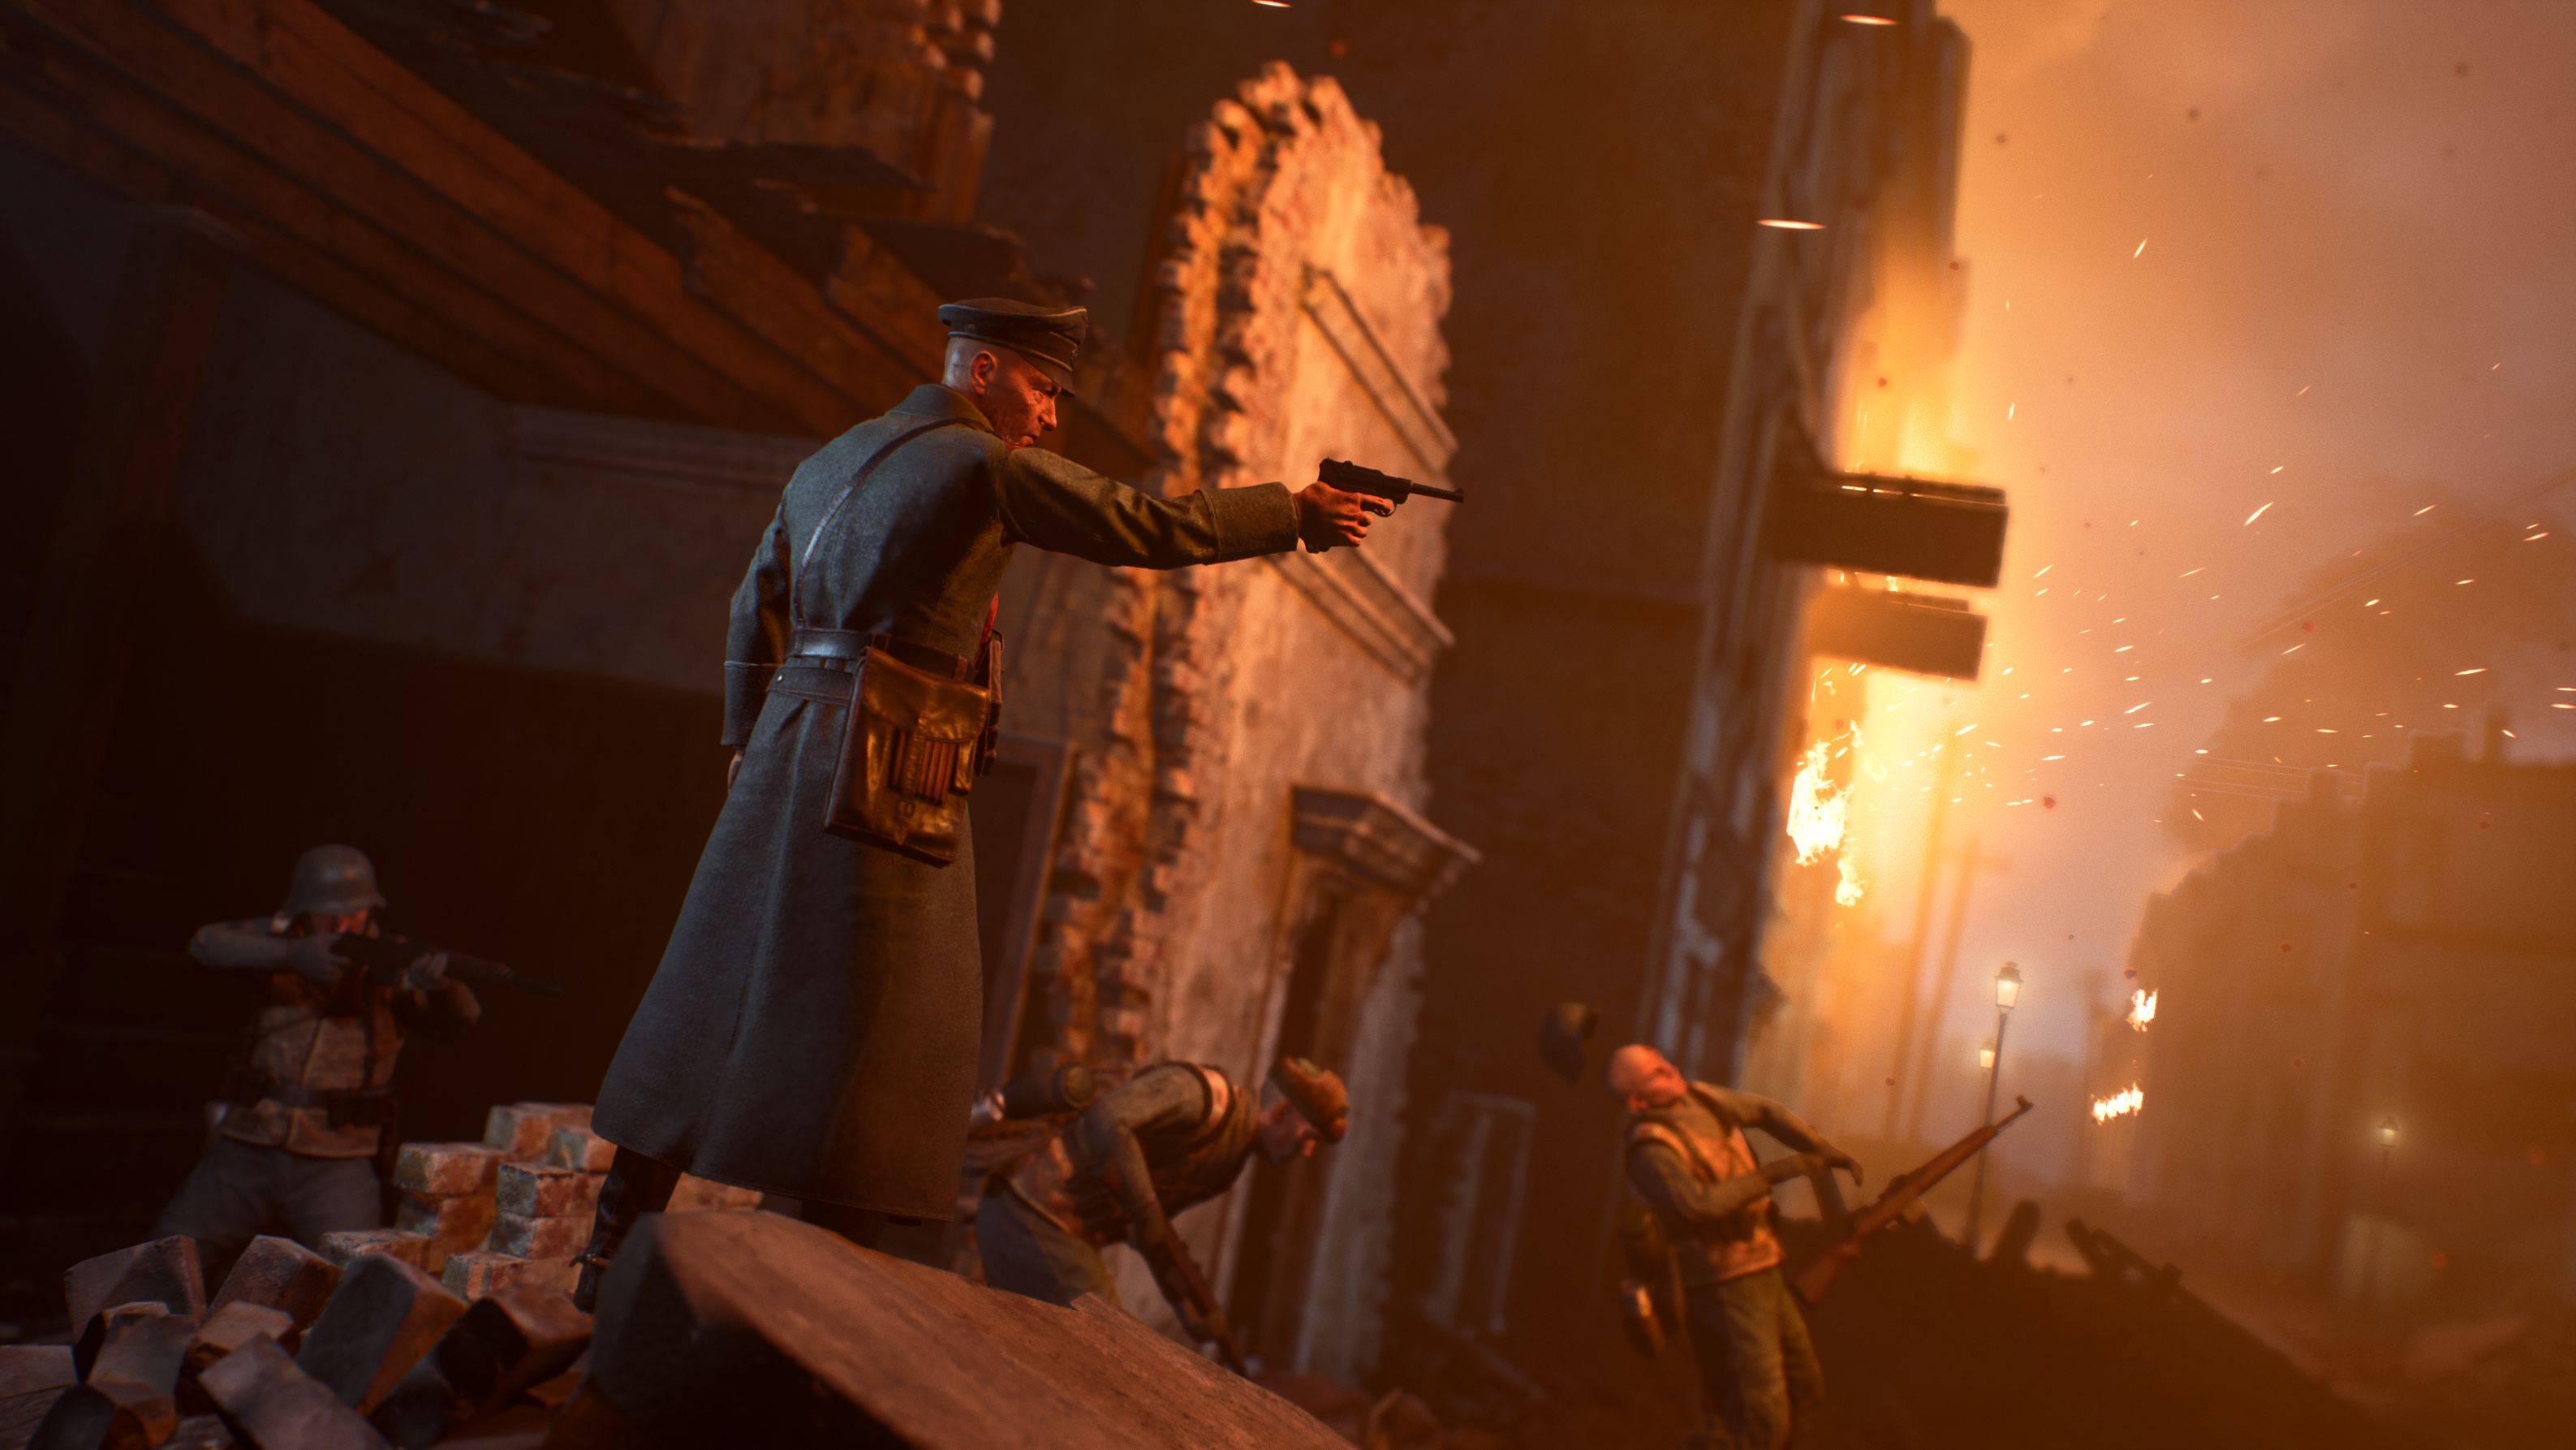
For the Germans, there is a new great coat with striking red lapels. The uniform features embroidered insignia, and the Iron Cross. For the rank and file, the Pelzjacke provides warmth. A winter fur-lined vest sits over an M44 tunic and winterhosen. Tank crews receive a uniform in the Sumpftarnmuster camouflage pattern, which might help them remain hidden from gunfire whilst checking tanks for satchels. There is also the addition of the Pelzmütze, a fur lined cap.
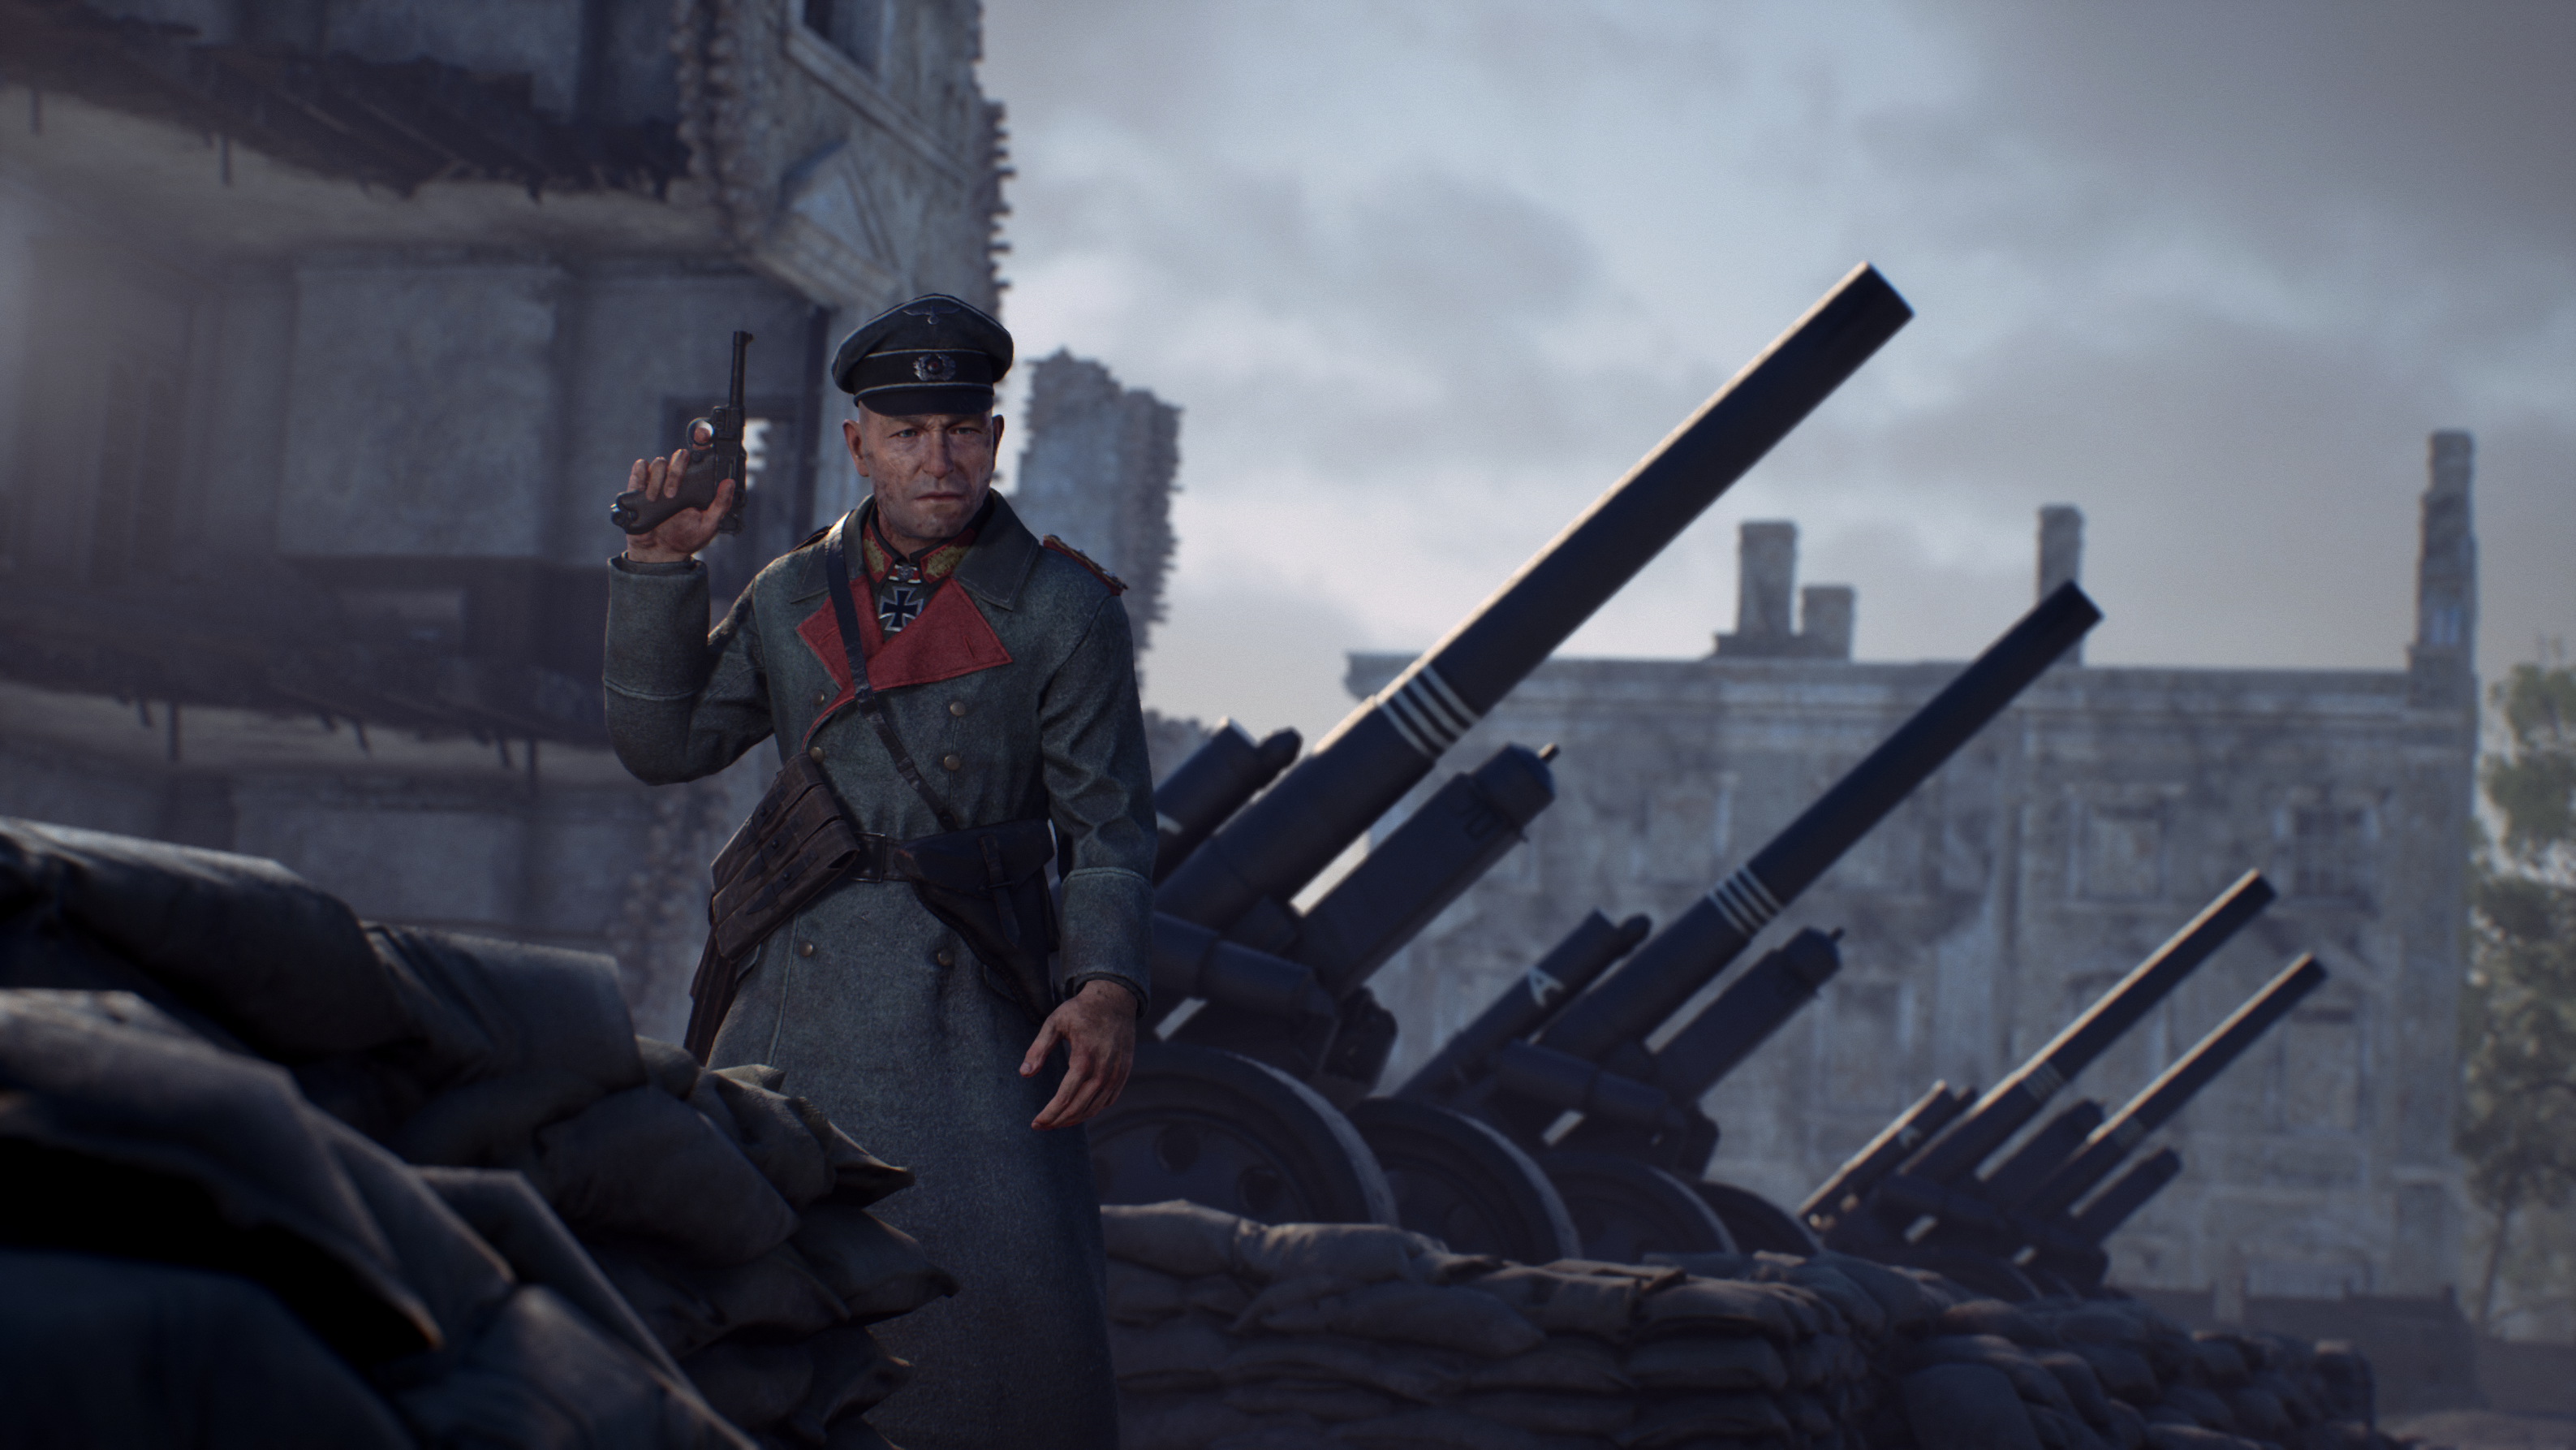
The Soviet Commander arrives with a brand new tunic and breeches. This uniform, along with many of the Soviet outfits in this update, has been created using original patterns found during research to ensure a high level of accuracy. The interpretation of the M43 Gimnasterka reflects a battle-hardened veteran. Featuring wound ribbons, a field dressing and a Guards badge, it marks the wearer as an elite soldier.
For the tank crew, the Tanker’s jacket offers detailed leatherwork, buttons and insignia. The pack also includes a netted SSh-40 helmet.
The standalone DLC introduces a leaf-pattern camouflage suit with amoeba overprints, offering exceptional camouflage.
There are also a couple of updates to some of the older heads in the game, part of an ongoing process to bring legacy assets in line with more recent ones.
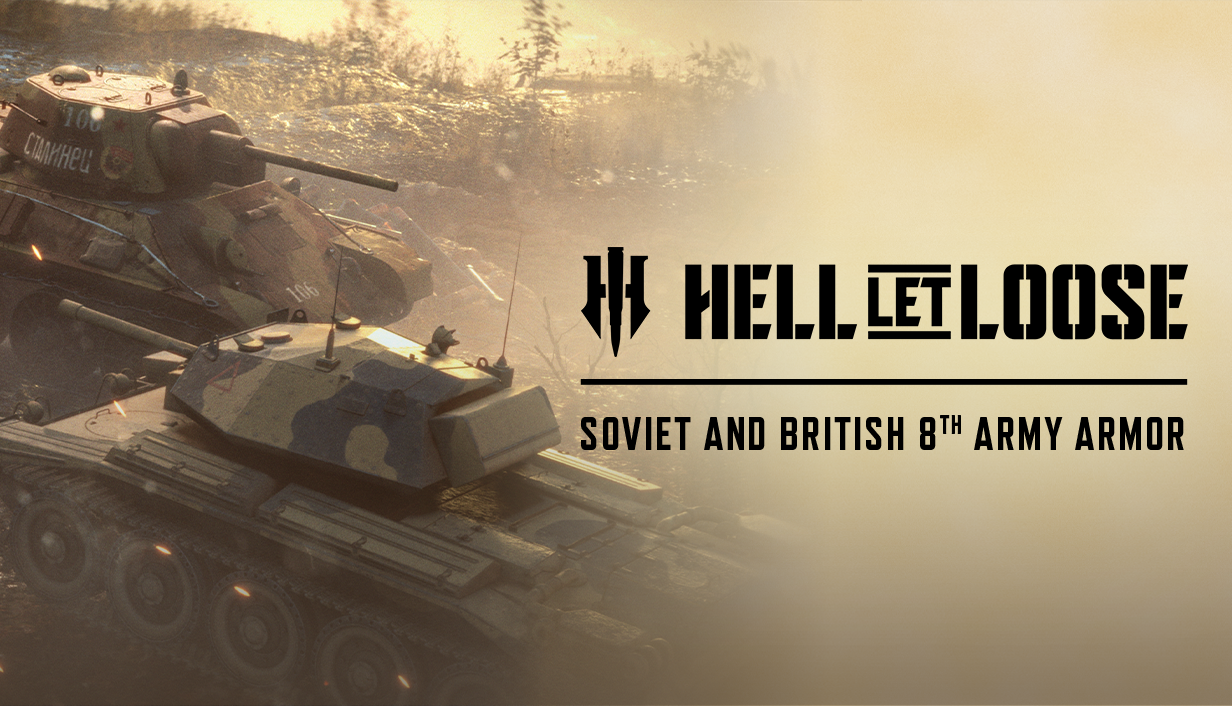
As mentioned in the introduction, we have also added some free DLC to your inventory as part of Update 19. These include three new helmets as part of the ‘Fallschirmjäger Airborne Veterans’ set, plus one of our brand new armor cosmetics for the tankers out there. This Soviet and British 8th Army Armor Pack features the ‘1st Armoured Division’ Crusader Mk. III and ‘30th Guard’s Tank Brigade’ T-34.
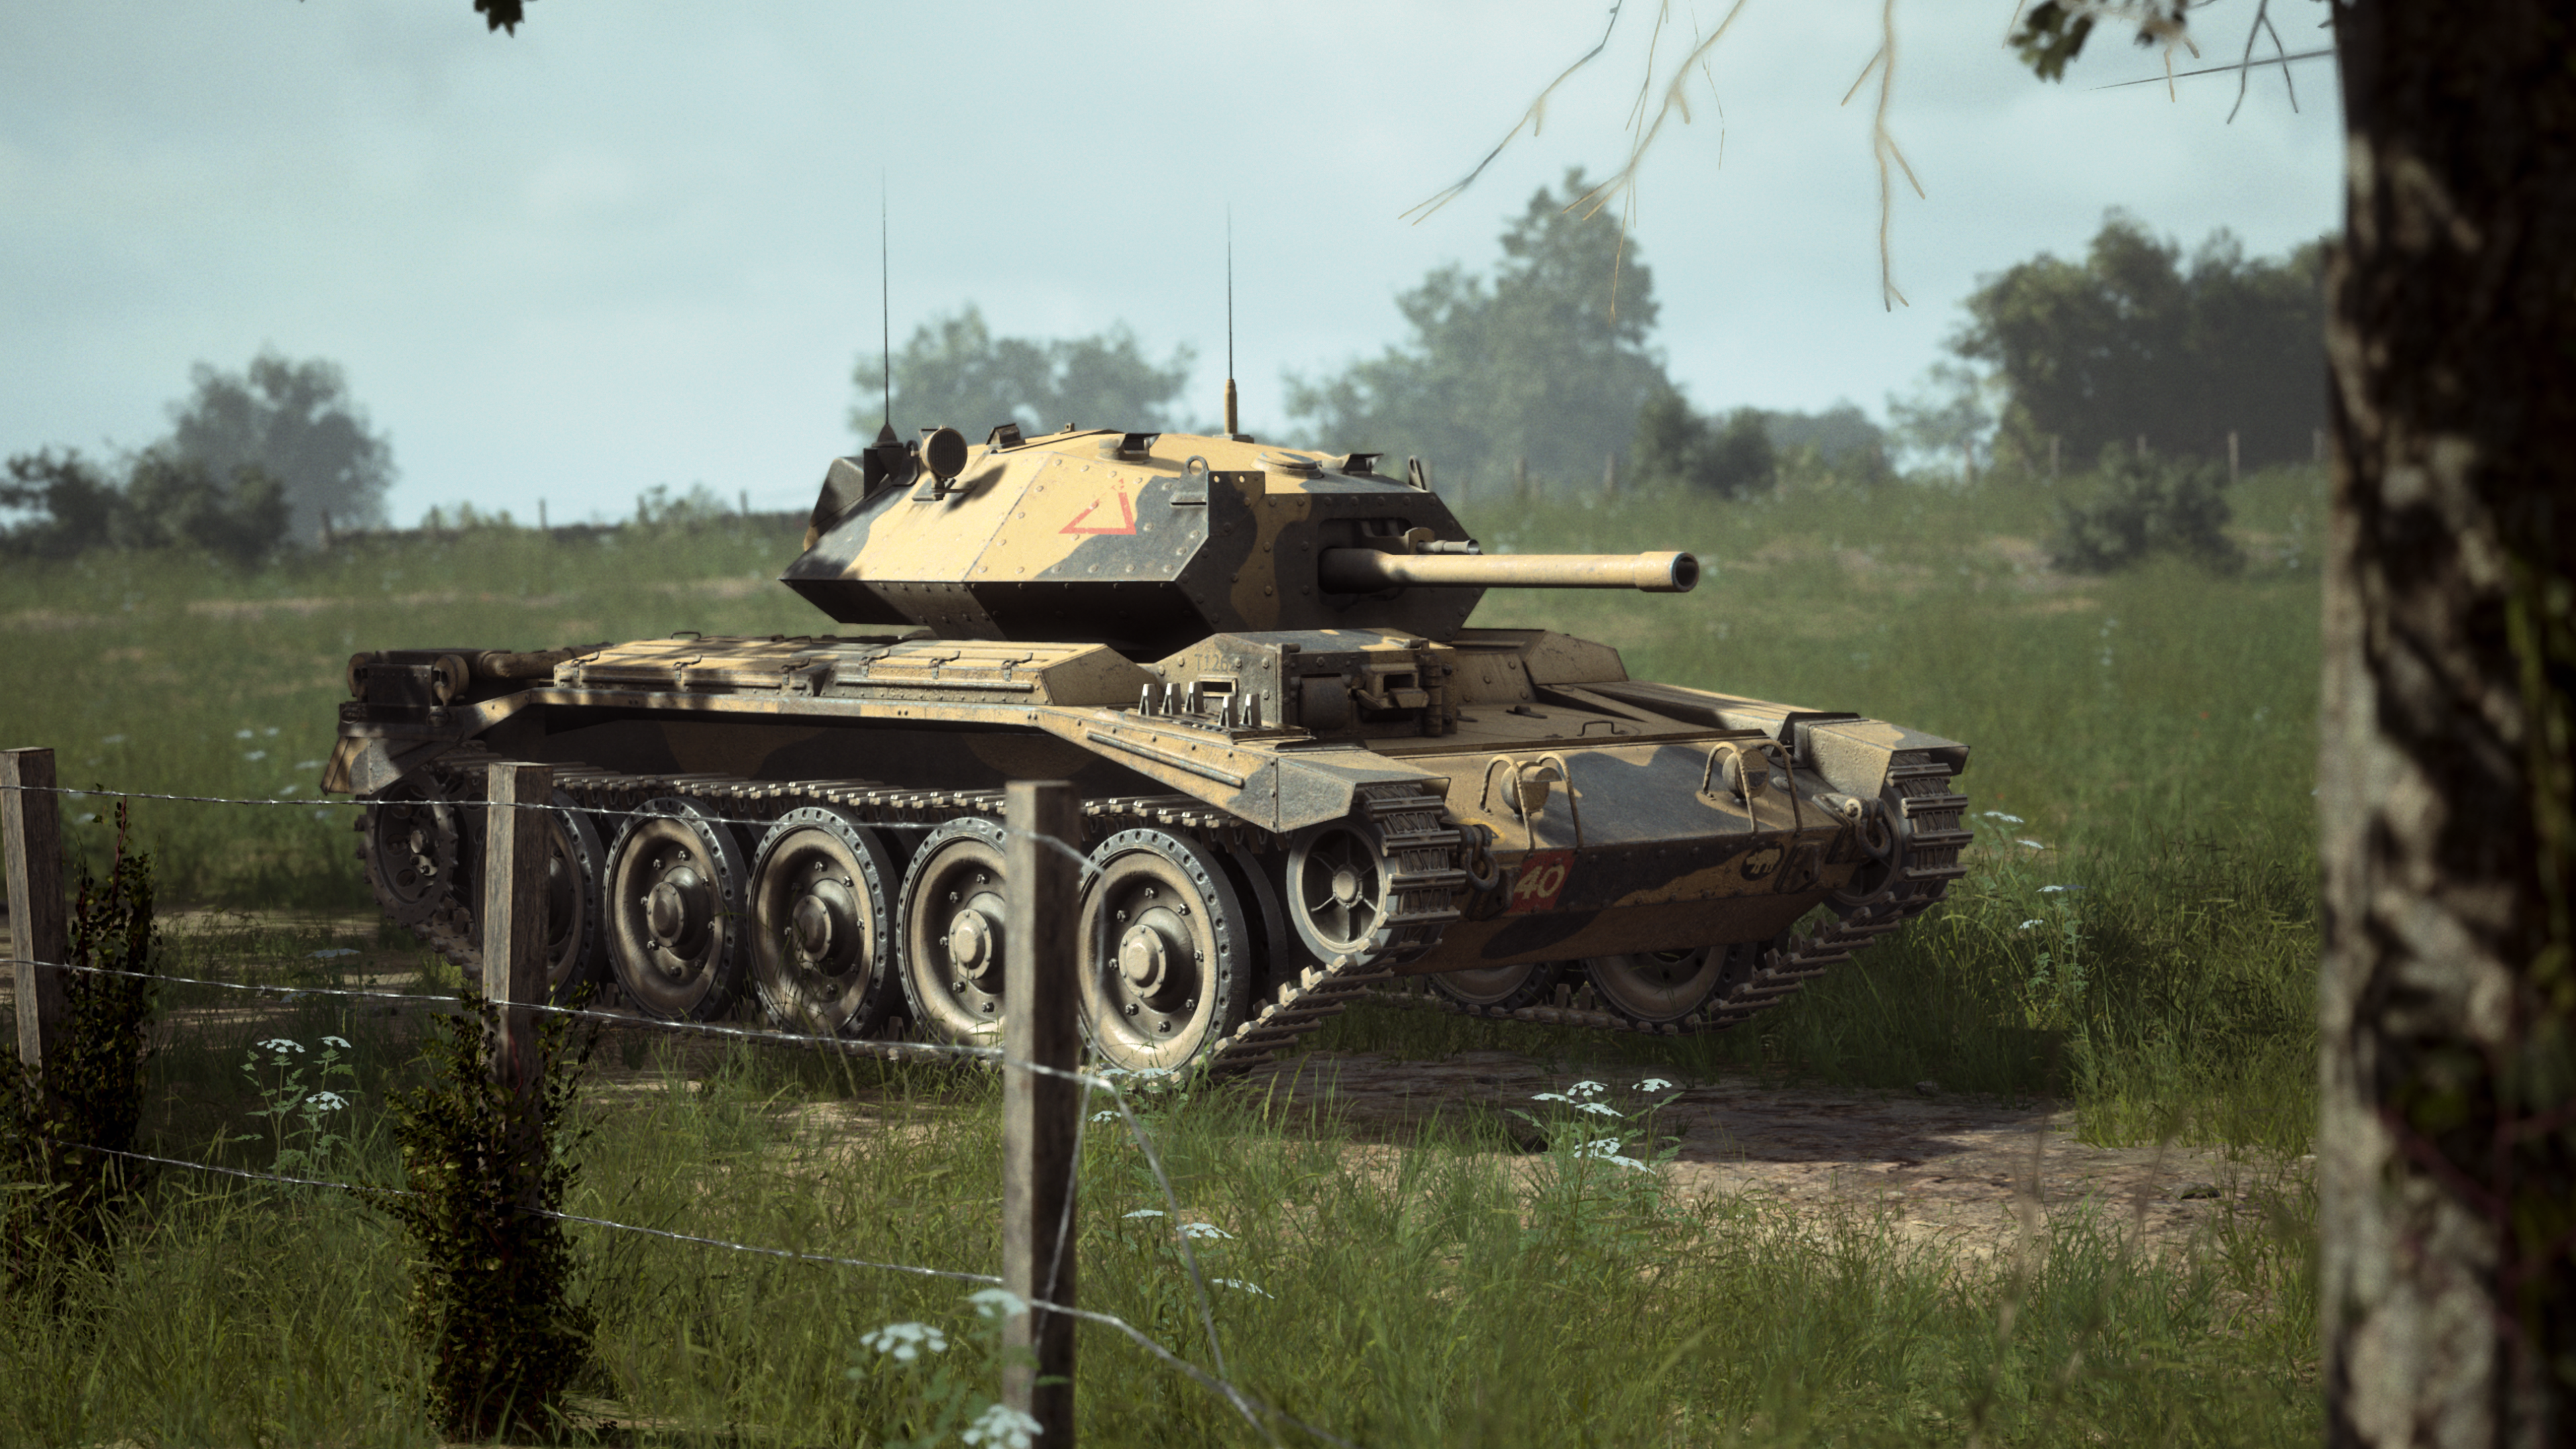 ‘1st Armoured Division’ Crusader Mk. III – Soviet and British 8th Army Armor Pack
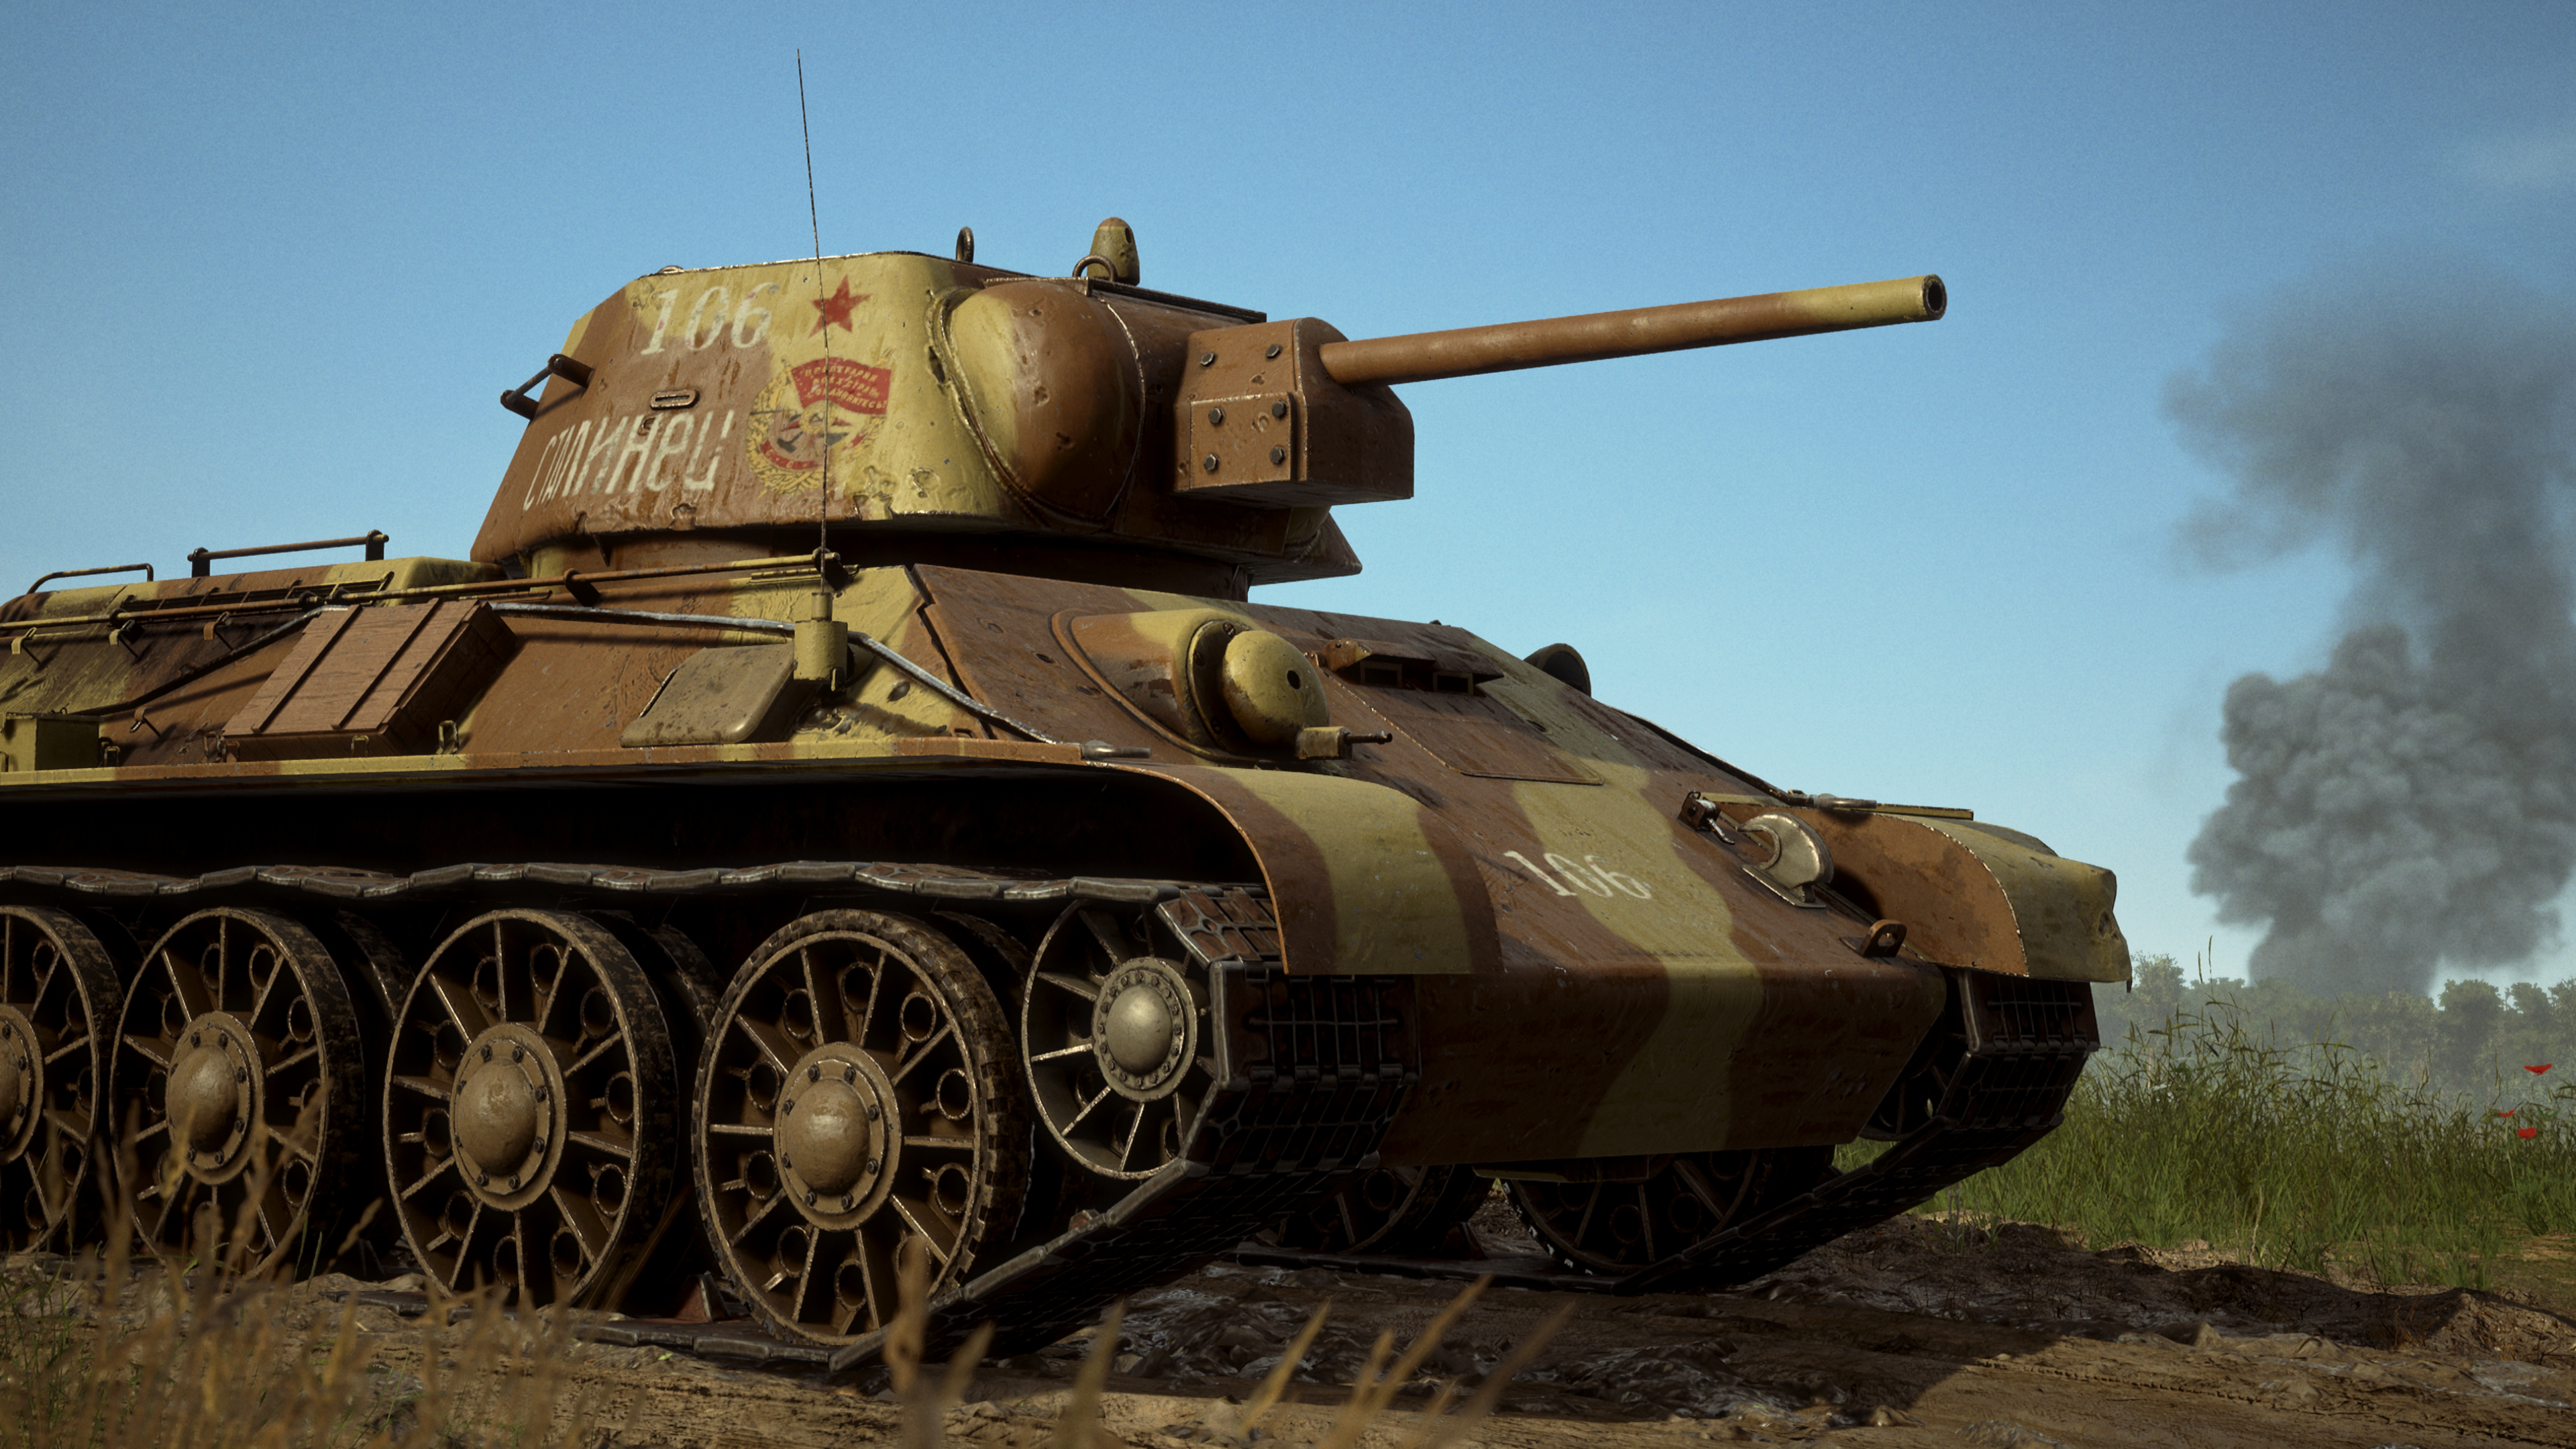 ‘30th Guard’s Tank Brigade’ T-34 – Soviet and British 8th Army Armor Pack
 Free Armor Pack – Soviet and British 8th Army Armor Pack
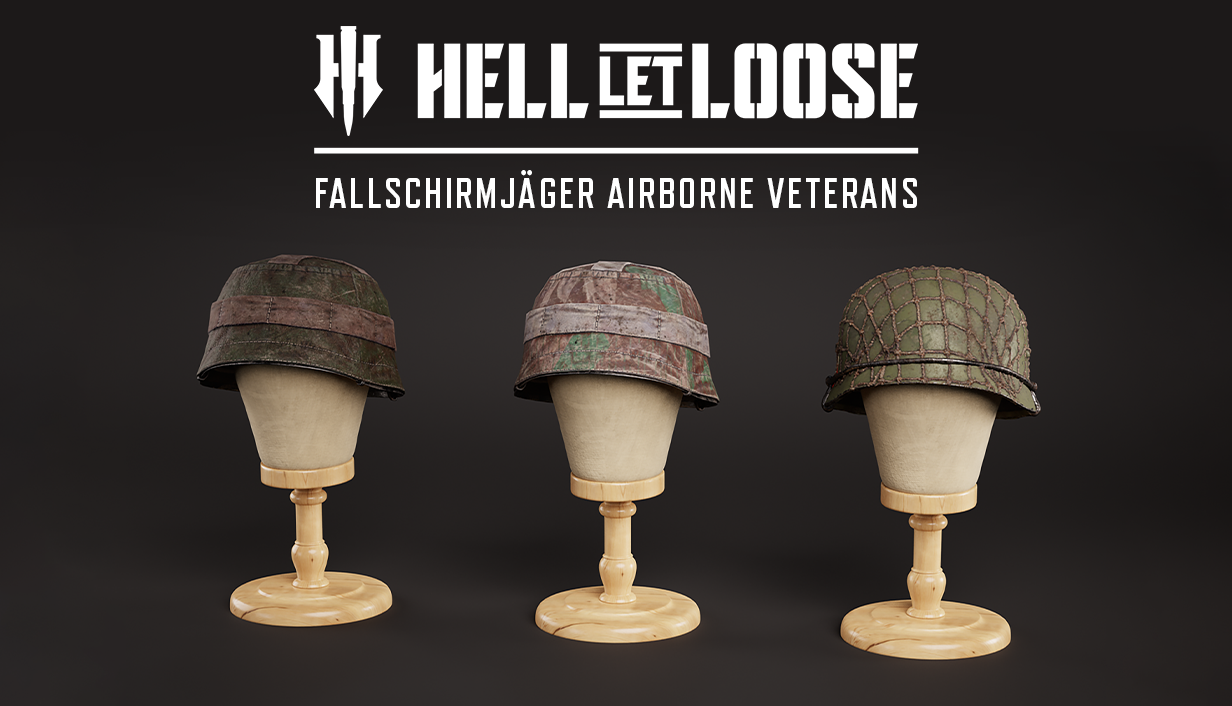 Free DLC Helmets – Fallschirmjäger Airborne Veterans
A huge thank you to everyone who entered the recent Episode #5 of Best of the Community. We were joined by our newest War Correspondent IronHeart Gaming and witnessed some clips that were so good they broke the stream! Be sure to check out the episode for yourselves over on our YouTube.
If you would like to be featured in Episode #6, be sure to submit your videos, artwork, or clips via our Hell Let Loose Discord.
As always, our War Correspondents have been on the front-lines creating some incredible content. Check out some of their latest releases below: